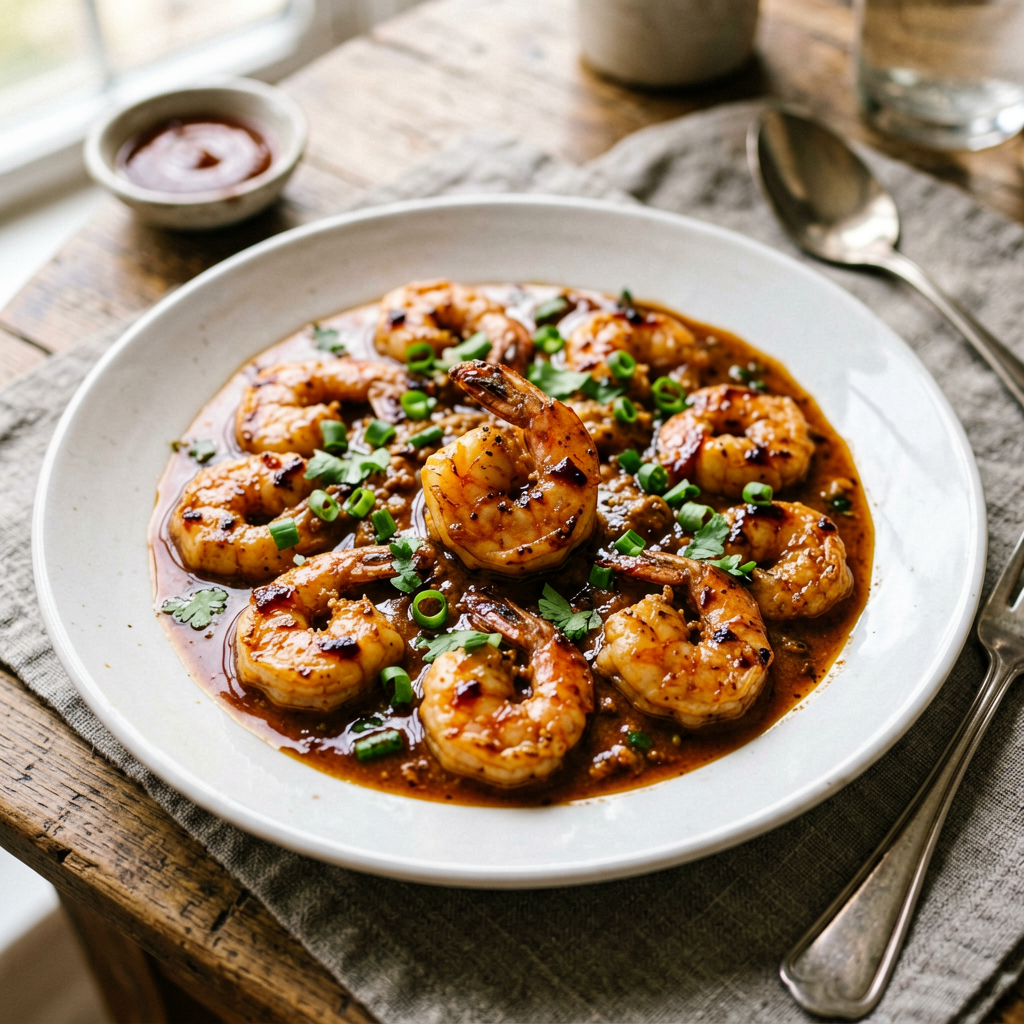
High-Protein Shrimp Curry with Teriyaki Glaze
High-Protein Shrimp Curry with Teriyaki Glaze: A Fast, Flavorful Fusion
This recipe delivers a powerful punch of flavor and protein in under 30 minutes. The genius lies in the fusion: a fragrant, coconut-based curry base provides deep, savory warmth, while a sticky, umami-rich teriyaki glaze is added at the end to create a glossy, sweet-savory finish that coats every piece of plump shrimp. This isn’t a traditional dish; it’s a modern, efficient technique designed for the home cook who wants restaurant-quality results. It’s an intermediate-level recipe due to its quick cooking time and multi-component sauce, but I’ve broken down every step to ensure success. The high protein comes from the shrimp (a lean powerhouse) and can be easily boosted with tofu or a side of edamame.
What You’ll Need
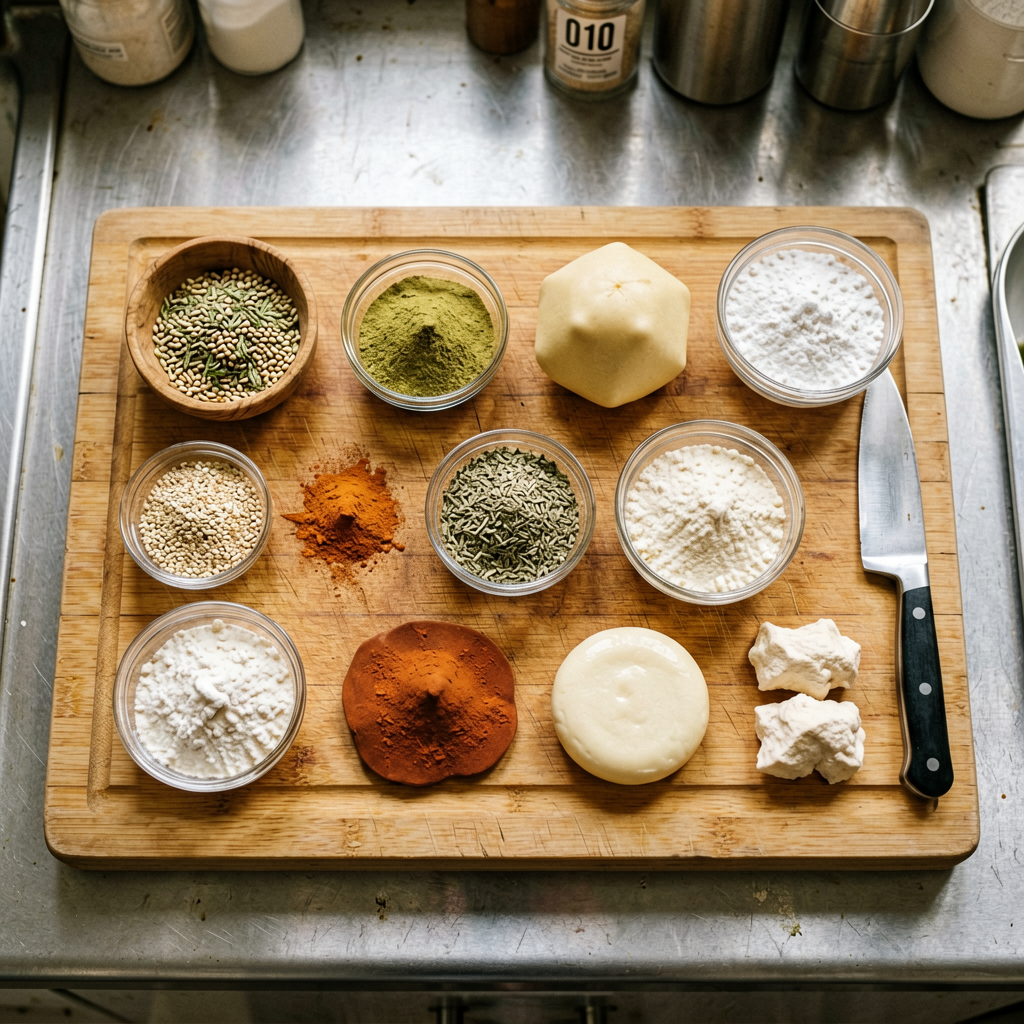
Ingredients
- For the Shrimp:
- Shrimp, peeled and deveined: 1.5 pounds (680g). Use large shrimp, 21-25 count per pound. For best texture, choose fresh, never-frozen if possible, or high-quality individually quick frozen (IQF) shrimp.
- For the Curry Base:
- Coconut milk: 1 can (13.5 ounces / 400ml), full-fat for richness.
- Yellow curry paste: 3 tablespoons. Brands like Mae Ploy or Maesri offer authentic flavor.
- Fish sauce: 1 tablespoon. Provides the essential salty, funky depth.
- Brown sugar or palm sugar: 1 tablespoon.
- Fresh lime juice: 2 tablespoons (from about 1 lime).
- Bamboo shoots: 1 can (8 ounces / 227g), drained and rinsed. Or substitute fresh bean sprouts.
- Bell pepper: 1 large, any color, sliced into thin strips.
- For the Teriyaki Glaze:
- Soy sauce or tamari: 1/4 cup (60ml).
- Mirin (sweet rice wine): 1/4 cup (60ml). If unavailable, substitute with 2 tablespoons rice vinegar + 2 tablespoons sugar.
- Sake (optional): 2 tablespoons. Adds depth; can be replaced with water.
- Brown sugar: 2 tablespoons.
- Garlic: 2 cloves, minced.
- Fresh ginger: 1 teaspoon, grated.
- Cornstarch slurry: 1 tablespoon cornstarch mixed with 2 tablespoons cold water.
- For Garnish & Serving:
- Fresh cilantro, roughly chopped.
- Toasted sesame seeds.
- Sliced scallions (green parts only).
- Cooked jasmine rice or quinoa for serving.
Equipment Needed
- Large skillet or wok: A 12-inch (30cm) heavy-bottomed skillet, preferably non-stick or well-seasoned carbon steel, is ideal. I recommend a high-quality non-stick skillet for easy glaze cleanup.
- Small saucepan.
- Instant-read thermometer. While not strictly necessary for shrimp, it’s invaluable for checking the curry temperature.
- Sharp knife and cutting board.
- Mis en place bowls.
Prep Work (Mise en Place is Non-Negotiable)
This dish cooks in minutes. Have everything prepped, measured, and organized before you turn on the heat.
- Shrimp: If using frozen, thaw completely under cold running water. Pat **very dry** with paper towels. This is crucial for getting a good sear. Lightly season with a pinch of salt and pepper.
- Vegetables: Slice the bell pepper into 1/4-inch strips. Drain and rinse the bamboo shoots. Keep them separate.
- Aromatics: Mince the garlic and grate the ginger for the teriyaki glaze. Set aside in a small bowl.
- Sauce Components: In a small bowl, whisk together the curry paste with about 1/3 of the coconut milk until smooth. This prevents lumps. In a separate small saucepan (not on heat), combine the soy sauce, mirin, sake, brown sugar, garlic, and ginger for the glaze.
- Timing Note: The curry base can be assembled up to 4 hours ahead. The teriyaki glaze (minus the cornstarch slurry) can be mixed up to a day in advance. The final cooking and glazing must be done right before serving.
Cooking Instructions
Step 1: Cook the Teriyaki Glaze (5 minutes)
- Place the small saucepan with the glaze ingredients over medium heat (approximately 325°F / 165°C). Stir until the sugar dissolves. Bring to a gentle simmer.
- Simmer for **2-3 minutes** to cook off the raw alcohol taste from the mirin and sake. The liquid will reduce slightly.
- Give your cornstarch slurry a stir and pour it into the simmering glaze, whisking constantly. Cook for **1 more minute** until the glaze thickens enough to coat the back of a spoon. It should look glossy and syrupy.
- Visual Cue: Dip a spoon in; the glaze should cling and not immediately drip off. Remove from heat and set aside. It will thicken further as it cools.
Step 2: Build the Curry Base (10 minutes)
- Heat your 12-inch skillet over medium-high heat. Add 1 tablespoon of a neutral oil (like canola or avocado).
- Add the remaining coconut milk and the curry paste mixture to the hot pan. It should sizzle immediately. Stir constantly for 2 minutes to “fry” the paste, which blooms its spices and deepens the flavor.
- Visual Cue: The mixture will darken slightly and become very fragrant. You’ll see small droplets of oil separating on the surface.
- Pour in the rest of the coconut milk, the fish sauce, and the brown sugar. Stir to combine. Bring to a simmer (do not boil violently), then reduce heat to medium-low. Let it simmer gently for 5 minutes to marry the flavors.
- Add the sliced bell pepper and bamboo shoots. Simmer for 3-4 minutes until the peppers are tender-crisp (they should have a slight bite). Stir in the lime juice.
Step 3: Sear the Shrimp & Combine (4-5 minutes)
This is the critical, fast-moving step.
- Push the curry and vegetables to the sides of the skillet, creating a clear space in the center. If the pan is dry, add another teaspoon of oil.
- Increase heat to high. Once the oil is shimmering (about 400°F / 200°C), add the dry shrimp in a single layer. Let them sear undisturbed for 60-90 seconds.
- Visual Cue: The shrimp will turn pink on the bottom and curl into a “C” shape. Flip each shrimp and sear the other side for another 60-90 seconds. The total cook time should be 3-4 minutes max. Overcooked shrimp are rubbery and tough.
- Once the shrimp are almost opaque, pour the teriyaki glaze over everything in the pan. Stir gently but thoroughly to coat every shrimp and vegetable in the glossy sauce. Cook for 30-60 seconds until the sauce is bubbly and clings to the shrimp.
- Chef’s Tip: In my experience, the residual heat will finish cooking the shrimp perfectly. If your shrimp are very large, you can remove the pan from the heat immediately after adding the glaze to prevent overcooking.
- Remove from heat immediately.

Pro Tips
- The Curry Paste Secret: Don’t skip “frying” the curry paste in step 2. Toasting the paste in fat (coconut milk oil) is what transforms it from a raw, one-note flavor into a complex, aromatic base.
- Shrimp Doneness: Perfect shrimp are opaque, pink, and firm but still slightly springy when pressed. They will have just begun to curl into a “C”. If they form a tight “O”, they are overcooked. An instant-read thermometer should read 120°F (49°C) at the thickest part.
- Glaze Consistency: If your glaze gets too thick upon standing, whisk in a teaspoon of water or lime juice before adding it to the pan. It should be pourable but not watery.
- Protein Boost: For extra protein, add a can of drained, rinsed chickpeas along with the bamboo shoots, or serve over high-protein quinoa instead of rice.
Serving Suggestions
This recipe serves 4 people generously. Serve immediately over fluffy jasmine rice to soak up the incredible sauce. For a lower-carb option, cauliflower rice works well. A simple side of steamed or sautéed green vegetables like broccoli or bok choy adds color and nutrition. Garnish generously with cilantro, scallions, and sesame seeds for a fresh, vibrant finish.
FAQ
Q: Can I use frozen shrimp?
A: Absolutely. Use IQF (Individually Quick Frozen) shrimp for the best quality. Thaw them completely under cold running water, then pat extremely dry with paper towels before cooking. Wet shrimp will steam instead of sear, resulting in a poor texture.
Q: How do I know when the curry is “done”?
A> The curry base is done when it has simmered for 5 minutes after adding the coconut milk and seasonings, the flavors are melded, and the vegetables have reached your desired tenderness. The real “