Busy Weeknights Asian Shrimp Pasta
Busy Weeknights Asian Shrimp Pasta
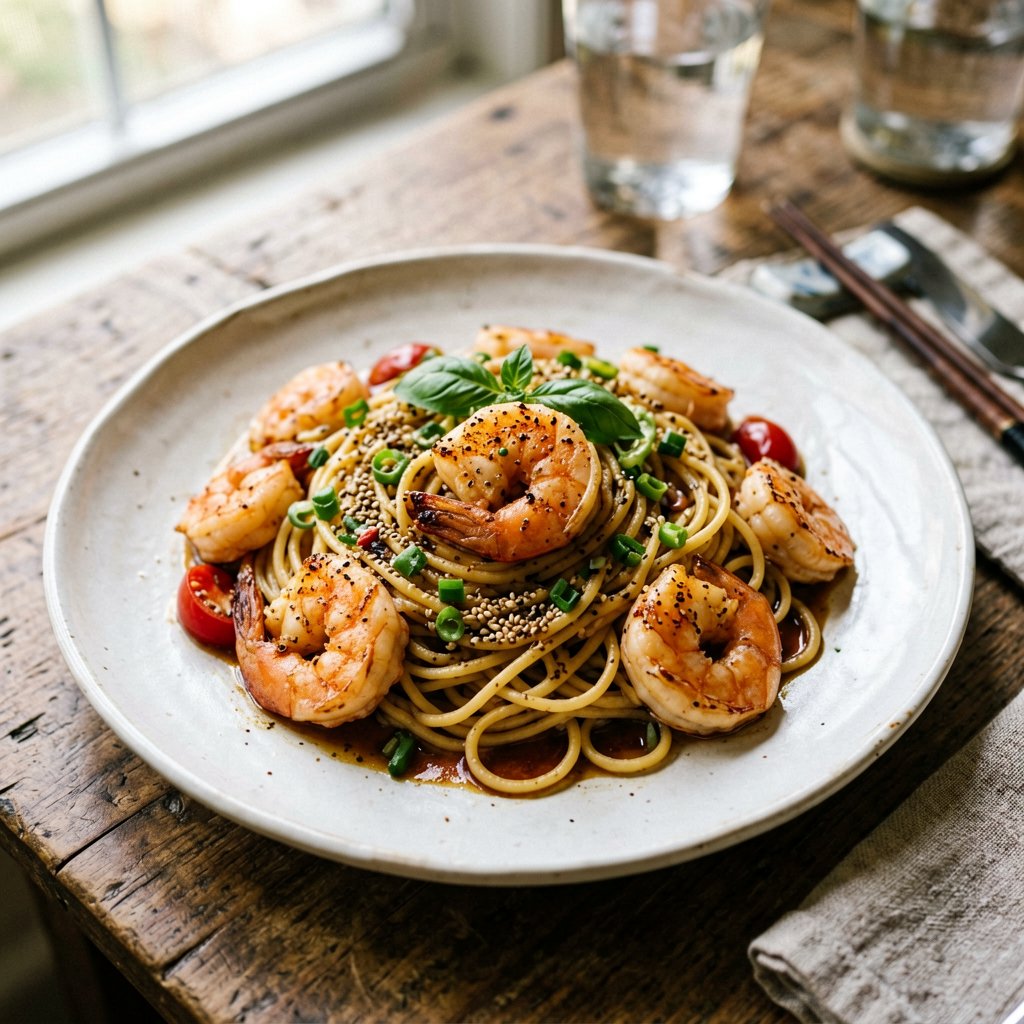
This dish is engineered for speed, flavor, and minimal cleanup. It delivers the savory, umami-rich profile of Asian cuisine in the familiar, comforting form of pasta. The technique focuses on high-heat, sequential cooking in a single pan, making it ideal for weeknights when time and energy are limited. This is a straightforward recipe for any skill level, relying on precise timing and smart ingredient prep rather than complex techniques. The result is a vibrant, restaurant-quality meal ready in under 30 minutes.
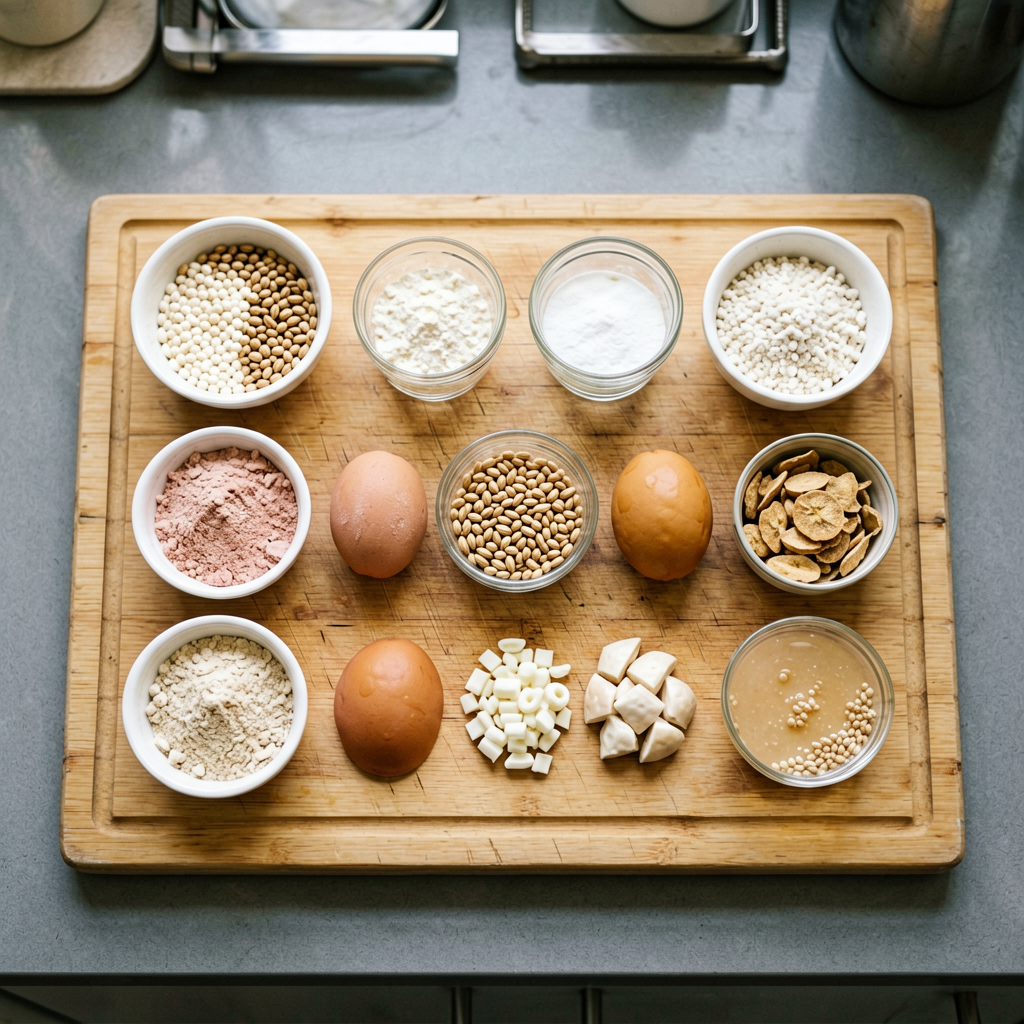
What You’ll Need
For the Pasta & Shrimp:
- Spaghetti or Linguine: 8 ounces (225g). I prefer spaghetti for its ability to cling to the sauce.
- Large Shrimp: 1 pound (450g), peeled and deveined, tails optional. Pat them completely dry with paper towels.
- Neutral Oil: 2 tablespoons, divided. Canola, grapeseed, or avocado oil work well.
- Garlic: 3 cloves, finely minced.
- Fresh Ginger: 1 tablespoon, finely grated. Use a microplane for best results.
- Scallions: 4, thinly sliced. Separate white and green parts.
- Red Bell Pepper: 1 medium, julienned into thin strips.
For the Sauce:
- Low-Sodium Soy Sauce: 3 tablespoons.
- Rice Vinegar: 1 tablespoon.
- Toasted Sesame Oil: 1 teaspoon.
- Honey or Maple Syrup: 1 tablespoon.
- Cornstarch: 1 teaspoon, dissolved in 1 tablespoon of cold water (this is your slurry).
- Crushed Red Pepper Flakes: ½ teaspoon, or to taste.
Equipment Needed:
- Large (12-inch / 30cm) Skillet or Wok: A high-sided skillet is essential for containing splatter during high-heat cooking. [Check Price on Amazon]
- Large Pot: For boiling pasta.
- Tongs or a Spider Strainer.
- Small Bowl & Whisk: For mixing the sauce.
Prep Work (Mise en Place is Critical)
For a fast weeknight meal, complete all prep before you turn on the stove.
- Shrimp: Ensure they are thoroughly dry. Excess moisture will steam the shrimp instead of searing them, preventing a good color and texture.
- Vegetables & Aromatics: Julienne the bell pepper, mince the garlic, grate the ginger, and slice the scallions. Keep the scallion whites and greens separate.
- Sauce: In a small bowl, whisk together the soy sauce, rice vinegar, sesame oil, honey, and red pepper flakes. In a separate tiny dish, make the cornstarch slurry.
- Pasta Water: Bring a large pot of salted water to a rolling boil. Start this now; it takes the longest.
Cooking Instructions
The key is sequential cooking. Each component gets the proper heat and time, then they are combined.
- Cook Pasta to Al Dente: Add pasta to boiling water. Cook according to package directions, but set a timer for 1 minute less than the package suggests. It will finish cooking in the sauce. Before draining, reserve 1 cup (240ml) of the starchy pasta water.
- Sear the Shrimp (High Heat): While pasta cooks, heat 1 tablespoon of oil in your large skillet over high heat until it just begins to smoke. Add shrimp in a single layer. Do not crowd the pan—cook in two batches if necessary. Sear for 60-90 seconds per side until pink, opaque, and they have a slight golden char. Immediately transfer to a plate. Visual Cue: Shrimp will curl into a “C” shape when done.
- Sauté Aromatics and Vegetables: Reduce heat to medium-high. Add the remaining 1 tablespoon of oil. Add scallion whites, bell pepper, garlic, and ginger. Sauté for 2-3 minutes, stirring constantly, until peppers are crisp-tender and garlic is fragrant. Do not let the garlic burn.
- Build the Sauce: Pour the prepared soy sauce mixture into the skillet. Bring to a simmer, then reduce heat to medium-low. Let it bubble gently for 30 seconds. Give your cornstarch slurry a quick re-stir, then pour it into the simmering sauce. Stir constantly for 30-60 seconds until the sauce thickens noticeably and becomes glossy.
- Combine Everything: Add the drained pasta, seared shrimp (and any juices from the plate), and ½ cup (120ml) of the reserved pasta water to the skillet. Toss vigorously with tongs over medium heat for 1-2 minutes. The starchy water will emulsify with the sauce, coating the pasta beautifully. Add more pasta water, a few tablespoons at a time, if the sauce is too thick.
- Final Touch: Remove from heat. Stir in the scallion greens and the final drizzle of toasted sesame oil (1 teaspoon). Taste and adjust seasoning with more soy sauce or a pinch of sugar if needed.

Pro Tips
- The Pasta Water is Key: I cannot overstate this. The starch in the reserved water is what binds the sauce to the pasta, creating a creamy, cohesive dish without any cream. Never skip this step.
- Don’t Overcook the Shrimp: In my experience, shrimp go from perfectly cooked to rubbery in a matter of 30 seconds. Remove them from the pan as soon as they turn opaque and pink. They will warm through again when combined with the hot pasta.
- Versatile Protein & Veg: This sauce works beautifully with thinly sliced chicken breast (sear for 3-4 minutes per side), firm tofu (pressed and cubed), or a mix of vegetables like broccoli, snap peas, and mushrooms. Just adjust cooking times accordingly.
Serving Suggestions
This is a complete, balanced meal in one bowl. The portion size is generous; it serves 2-3 people comfortably. For a more substantial meal or to stretch servings, serve over additional rice or with a side of steamed edamame. A simple garnish of extra scallion greens, a sprinkle of toasted sesame seeds, or a few drops of chili oil can elevate the presentation and flavor.
Frequently Asked Questions
Can I use frozen shrimp?
Absolutely. Thaw shrimp overnight in the refrigerator or under cold running water for 15-20 minutes. The most critical step is to pat them completely dry with paper towels before searing, as frozen shrimp release a lot of moisture.
How do I know when the pasta is done?
Al dente pasta should be tender but still have a firm bite in the center. Taste it a minute before the package time is up. Remember, it will cook for another minute or two in the sauce, so err on the side of slightly underdone when draining.
Can I prep this ahead of time?
You can complete all chopping, mincing, and sauce mixing up to 24 hours in advance. Store everything in separate airtight containers in the refrigerator. The actual cooking—from turning on the heat to plating—should only take about 10-12 minutes with all your prep done.
*As an Amazon Associate I earn from qualifying purchases.*