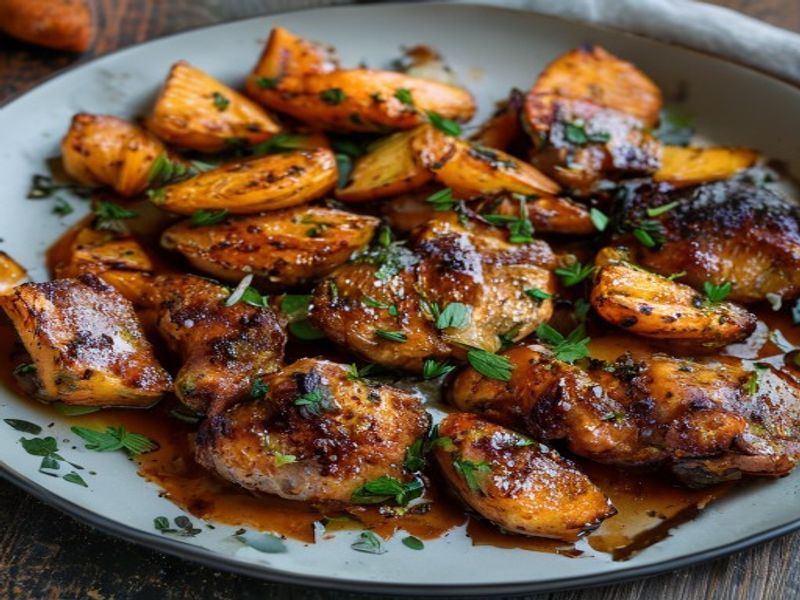
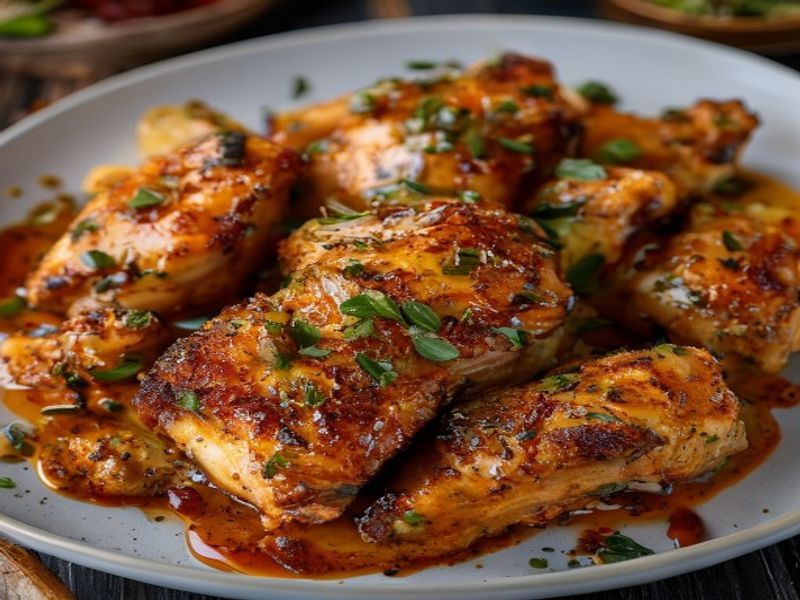
20-Minute Crispy Air-Fryer Chicken Thighs with Spicy Gochujang Honey
This recipe delivers restaurant-quality texture and bold flavor in a fraction of the time. By leveraging the rapid convection heat of a modern air fryer, you achieve deeply crisped skin and tender, juicy meat without deep-frying. The gochujang honey glaze caramelizes quickly during the final minutes, creating a glossy, spicy-sweet crust that clings perfectly to the rendered fat. Designed for home cooks seeking reliable results, this 20-minute weeknight dinner requires minimal active prep and delivers consistent outcomes every time. Whether you need a quick chicken dinner for busy schedules or a family-friendly dinner that satisfies both kids and adults, the technique here prioritizes moisture retention and surface dehydration. Boneless, skin-on thighs are ideal for even cooking and maximum crispness, while the balanced glaze ensures every bite carries heat, sweetness, and umami.
What You’ll Need
Ingredients
- Chicken thighs: 1.5 pounds boneless, skin-on (about 4 thighs, 6 oz each). Skin-on is non-negotiable for proper crisping and fat rendering.
- Gochujang (Korean chili paste): 3 tablespoons. Use a fermented, soybean-based brand for authentic depth, not a substitute sauce.
- Honey: 2.5 tablespoons. Mild clover or wildflower works best; avoid strong-flavored honeys that overpower the chili.
- Rice vinegar: 1 tablespoon. Provides necessary acidity to balance sweetness and cut through fat.
- Garlic: 3 cloves, finely minced or pressed. Fresh garlic outperforms powder for glaze texture.
- Neutral oil: 1 tablespoon. Avocado or grapeseed oil has a high smoke point suitable for high-heat air frying.
- Soy sauce: 1.5 teaspoons. Low-sodium preferred to control salinity.
- Sesame oil: 1 teaspoon. Toasted, added at the end for aroma.
- Kosher salt: 1 teaspoon.
- Freshly ground black pepper: 1/2 teaspoon.
- Sesame seeds: 1 tablespoon, toasted, for garnish.
- Green onions: 2 stalks, thinly sliced, for garnish.
Equipment
- Air fryer: Minimum 4-quart basket capacity to avoid overcrowding. [Check Price on Amazon]
- Instant-read thermometer: Digital probe type for precise internal temperature verification.
- Silicone basting brush: Heat-resistant, for even glaze application.
- Small mixing bowl & whisk: For emulsifying the gochujang honey glaze.
Prep Work
Proper preparation dictates final texture. Remove chicken from packaging 15 minutes before cooking to take the chill off. Cold meat drops the air fryer temperature too rapidly, causing steaming instead of crisping. Pat each thigh completely dry with paper towels. Moisture is the enemy of browning; surface water must be eliminated. If any residual skin moisture remains, lightly score the fat layer with 3 shallow cuts per thigh, being careful not to cut into the meat. This accelerates fat rendering and prevents curling.
Season both sides evenly with 1 teaspoon kosher salt and 1/2 teaspoon black pepper. Set the seasoned thighs on a wire rack at room temperature for 10 minutes while you prepare the glaze. In a small bowl, combine 3 tablespoons gochujang, 2.5 tablespoons honey, 1 tablespoon rice vinegar, 1.5 teaspoons soy sauce, and 3 minced garlic cloves. Whisk vigorously until smooth. The mixture should coat the back of a spoon with a thick, glossy consistency. Reserve 1 teaspoon toasted sesame oil for finishing. You can mix the glaze up to 24 hours in advance and refrigerate, but bring it to room temperature before use to ensure even brushing.
Cooking Instructions
- Preheat the air fryer to 400°F / 200°C for 3 minutes. A fully preheated basket ensures immediate surface dehydration. Skipping this step traps steam and produces rubbery skin.
- Arrange chicken in a single layer, skin-side up. Leave at least 1/2 inch between pieces for proper air circulation. Overcrowding drops the cooking temperature and creates soggy patches.
- Drizzle 1 tablespoon neutral oil over the skin and brush lightly to coat. Oil acts as a heat conductor and promotes Maillard browning. Cook for 12 minutes undisturbed. You will hear a steady sizzle as moisture evaporates and fat renders. The skin should transition from pale to deep golden brown with visible bubbling.
- Flip thighs carefully using tongs. Cook for 4 additional minutes skin-side down. At this stage, check for a crisp, glass-like crackle when tapped with tongs. Internal temperature should reach 155°F / 68°C.
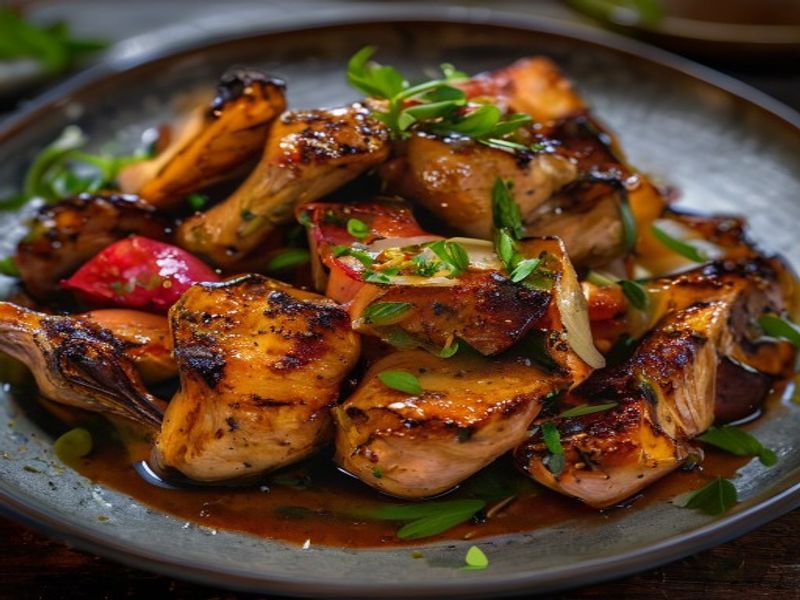
- Flip skin-side up again. Brush generously with the gochujang honey glaze. Return to the air fryer for exactly 3 minutes. Watch closely through the window. The sugars in honey and gochujang caramelize rapidly; burning occurs in under 60 seconds if left unattended. Look for a glossy, blistered surface that darkens slightly at the edges.
- Remove and immediately drizzle with reserved 1 teaspoon toasted sesame oil. Transfer to a clean plate and rest for 4 minutes. Resting allows muscle fibers to relax and reabsorb juices. Cutting immediately releases moisture and yields dry meat.
- Verify doneness. Insert the instant-read thermometer into the thickest part of each thigh. Target temperature is 165°F / 74°C. If any piece reads lower, return to the air fryer at 375°F / 190°C for 1-minute increments.
Pro Tips
In my experience, the single most common failure in air-fryer chicken is inadequate drying. I find that leaving salted thighs uncovered on a rack in the refrigerator for 30 minutes before cooking creates a pellicle that guarantees shattering crispness. If your air fryer runs hot or lacks precise temperature control, reduce the final glazing time to 2 minutes and monitor color visually rather than relying strictly on the timer. For substitutions, you can replace gochujang with a 2:1 ratio of tomato paste and Sriracha plus 1/2 teaspoon sugar, though the fermented depth will differ slightly. To make this entirely make-ahead, cook the thighs fully, cool completely on a wire rack, and store in airtight containers in the refrigerator for up to 3 days. Reheat at 375°F / 190°C for 6 minutes to restore texture without drying out the interior.
Serving Suggestions
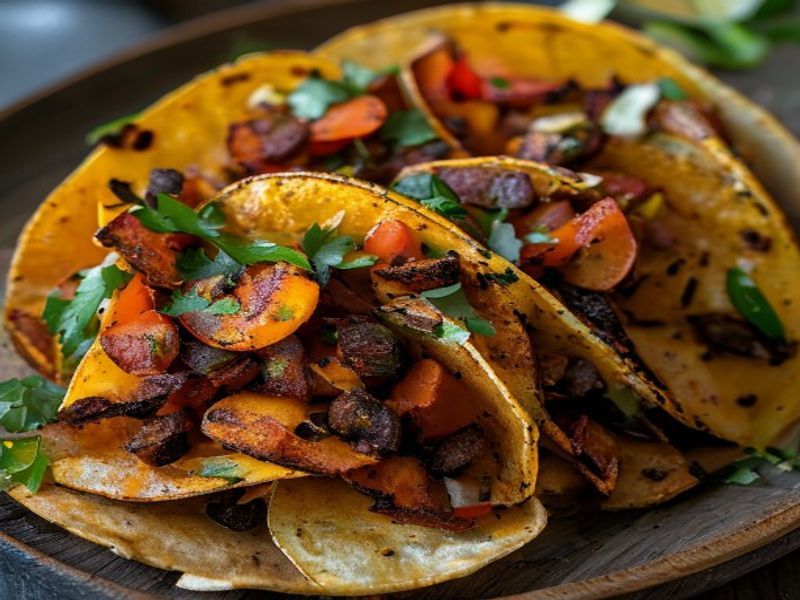
Plate 2 thighs per serving as a main course, or 1 thigh alongside substantial sides. This korean-inspired chicken pairs exceptionally well with quick-cooking jasmine rice, which absorbs the extra glaze, and a cold cucumber-sesame salad to balance the heat. For a complete 20-minute weeknight dinner, steam edamame in the microwave while the chicken cooks, and toss with flaky sea salt. The spicy sweet chicken also works sliced into warm tortillas with shredded cabbage and a squeeze of lime for a fusion-style wrap. Portion guidance remains consistent: plan 6 to 8 ounces of cooked chicken per adult, adjusting side dish quantities based on appetite.
FAQ
Can I use frozen chicken thighs?
Yes, but you must adjust the technique. Thawing in the refrigerator overnight is strongly preferred. If cooking from frozen, increase the initial cook time to 18 minutes at 375°F / 190°C, then flip, glaze, and finish at 400°F / 200°C for 4 minutes. Note that frozen meat will steam initially, delaying crisping until surface moisture fully evaporates.
How do I know when it’s done?
Visual cues alone are unreliable. Always verify with an instant-read thermometer. The internal temperature must reach 165°F / 74°C in the thickest portion. If you lack a thermometer, the juices should run completely clear when pierced, and the meat should separate easily with gentle fork pressure, but temperature verification remains the only foolproof method.
Can I prep this ahead for meal prep?
Absolutely. Cook the thighs fully, cool to room temperature within 2 hours, and store in shallow airtight containers for up to 4 days. Reheat directly in the air fryer at 375°F / 190°C for 5 to 6 minutes to restore the crispy skin. Avoid microwave reheating, which reintroduces moisture and softens the crust.
What if my air fryer basket is too small?
Cook in two batches rather than stacking or overcrowding. Batch cooking preserves air circulation and maintains consistent browning. Keep finished pieces warm on a wire rack in a 200°F / 95°C oven while the second batch cooks.
*As an Amazon Associate I earn from qualifying purchases.