作者: Alex Chen

  • Crispy Sweet Potato Fries Guide

    A Little Story About My First Batch

    There is a particular kind of magic that happens when the air turns crisp and my kitchen windows start to fog. I remember one of those evenings a few years ago, wrapped in a thick cable-knit sweater, desperately craving something golden, salty, and deeply comforting. I tossed sweet potato wedges onto a baking sheet, expecting crisp edges and soft centers, only to pull out a tray of limp, steamed vegetables. I sat there with a fork, sighing into my sweater while the rain tapped steadily against the glass. That quiet little kitchen failure actually sparked a gentle obsession. Over the next several months, I tested every method I could think of. I soaked them in ice water, tossed them in different starches, adjusted the oven rack, and learned to listen for the exact moment they stopped sizzling and started caramelizing. What I found was a simple, reliable rhythm that turns those naturally moist roots into perfectly crisp, caramelized fries. Now, whenever the leaves start to turn or the weekend slows down, I make a batch. They fill the house with a warm, earthy aroma that feels like a long hug. This guide shares everything I learned along the way, so you can skip the guesswork and head straight to the crispy, golden goodness we all want.

    A rustic, cozy lifestyle shot of the finished dish on a wooden table, natural morning light, steam rising, realistic food photography

    Why You’ll Love This

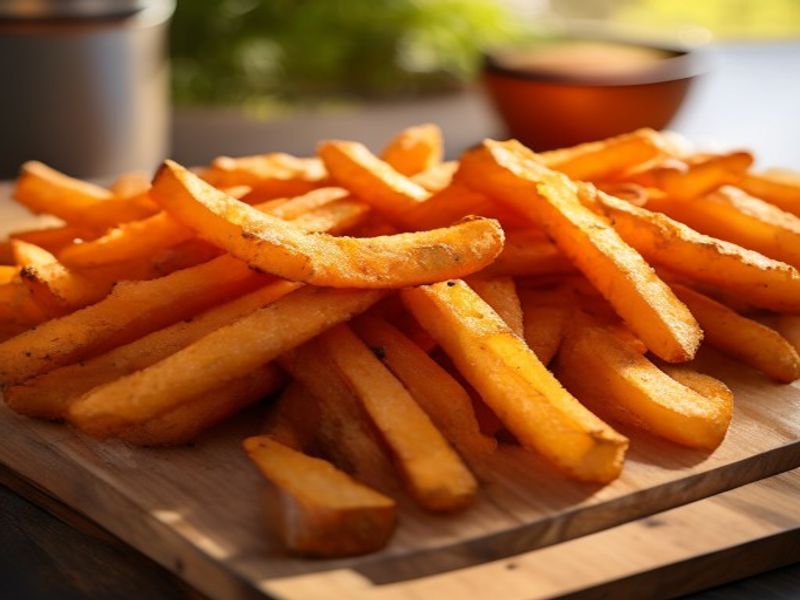
    • They deliver that deeply satisfying crunch without needing a heavy batter or a pot of hot oil.
    • The natural sweetness balances beautifully with a pinch of flaky sea salt and a whisper of smoked paprika.
    • You only need a handful of pantry staples and about ten minutes of hands-on prep time.
    • They hold their shape wonderfully, making them a reliable side dish for weeknight dinners or lazy weekend afternoons.
    • The method works beautifully in a standard oven, giving you consistent results without any special equipment.
    • They reheat nicely in a toaster oven or skillet, keeping your kitchen routine flexible.

    Ingredients Breakdown

    Close up shot of fresh ingredients for Crispy Sweet Potato Fries Guide on a cutting board, bright natural lighting, shallow depth of field, high detail

    Getting the right foundation makes all the difference with sweet potatoes. Because they hold so much natural moisture, choosing carefully prevents that dreaded soggy middle. Start by looking for medium-sized tubers that feel firm, smooth, and heavy for their size. Avoid any with soft spots, wrinkled skin, or tiny sprouts, as these signs mean they have started to lose their moisture and will steam instead of crisp in the oven. I usually reach for the darker-skinned varieties, often labeled as Beauregard or Jewel, because they have a denser flesh that holds its shape beautifully when roasted. If you can, buy them unwashed and store them in a cool, dark pantry rather than the refrigerator, which can turn the starches gritty and change their flavor.

    For the coating, a simple blend of arrowroot powder or fine cornstarch does wonders. The powder draws out surface moisture and creates a delicate, glassy shell that shatters when you bite into it. I keep a box of flaky sea salt and a small tin of smoked paprika within arm’s reach on the counter. A light drizzle of avocado oil or refined coconut oil works best because both have higher smoke points and won’t weigh down the fries. Freshly cracked black pepper and a whisper of garlic powder round out the flavor without overpowering that lovely, earthy sweetness. When you gather everything before you start chopping, the whole process flows smoothly and keeps your hands clean.

    Step-by-Step Instructions

    Action shot of cooking Crispy Sweet Potato Fries Guide, sizzling pan or fresh plating, appetizing, realistic, 4k food photography

    1. Preheat your oven to 425°F and place a heavy rimmed baking sheet on the middle rack. Let it heat fully so the metal is properly hot when the fries make contact. A cold pan will cause the potatoes to release their juices too quickly.
    2. Peel the sweet potatoes if you prefer a smoother texture, or leave the skins on for extra earthiness. Slice them into even, quarter-inch matchsticks. Try to keep the width consistent so they bake at the same pace. You will hear a quiet, crisp snap as your knife moves through the dense flesh.
    3. Submerge the cut fries in a large bowl of very cold water for at least thirty minutes. Watch the water turn slightly cloudy as excess starch escapes. This step is the real secret to that satisfying crunch.
    4. Drain the water and spread the potatoes across a clean kitchen towel. Gently roll them and press down until every single piece is completely dry. Any lingering moisture will steam the coating, so take your time here.
    5. Transfer the dry fries to a large mixing bowl. Sprinkle two tablespoons of your chosen starch over the top and toss with your hands until each piece wears a light, matte coating. The texture should feel dry to the touch, not clumpy.
    6. Add two tablespoons of oil, a generous pinch of flaky salt, and half a teaspoon of smoked paprika. Fold everything together until the fries glisten evenly and the spices cling to the starch layer.
    7. Carefully arrange the fries in a single layer on your preheated baking sheet. Leave a little space between them so hot air can circulate freely. Crowding the pan will trap steam and ruin the crispness.
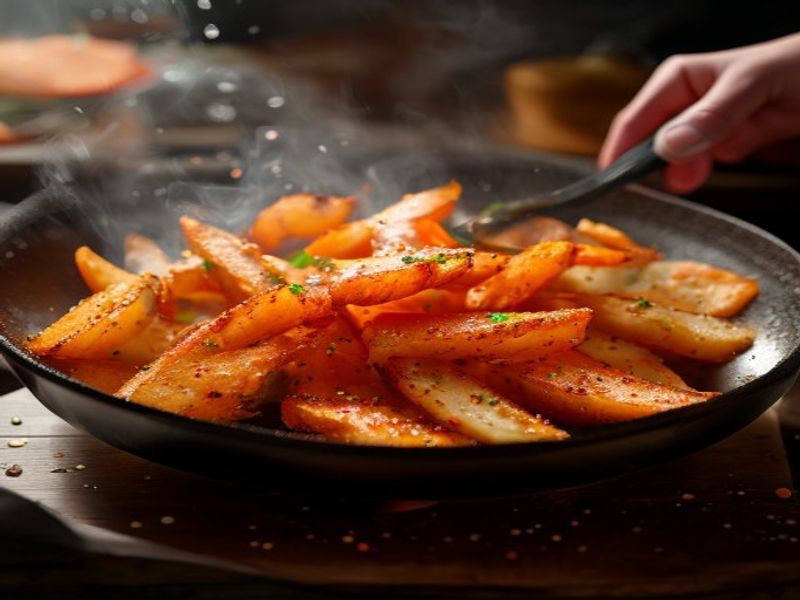
    8. Roast for twenty minutes, then carefully flip each piece using a thin spatula. Continue baking for another fifteen to eighteen minutes until the edges turn deep caramel brown and the centers yield to gentle pressure.
    9. Pull the tray from the oven and let the fries rest for two minutes on the hot metal. This brief pause allows the crust to firm up. Transfer to a serving bowl, finish with an extra sprinkle of salt, and enjoy the warm, crackling crunch.

    Pro-Tips / Troubleshooting

    Why Are My Fries Still Soggy?

    The most common culprit is moisture hiding on the surface or in the oven air. Make sure your towel-drying step is thorough. If your kitchen tends to be humid, prop the oven door open slightly with a wooden spoon during the last five minutes of baking. This lets steam escape and forces the exterior to dry out and crisp. Also, avoid using parchment paper if your oven runs cool; placing them directly on the hot metal helps conduct heat faster.

    How Do I Prevent Burning?

    Sweet potatoes contain more natural sugars than regular potatoes, which means they caramelize quickly. If your oven runs hot or you notice the edges darkening too fast, lower the temperature to 400°F and extend the baking time by a few minutes. Keep an eye on them through the oven light during the final stretch, and rotate the pan halfway through to ensure even browning.

    Can I Prep These Ahead of Time?

    Absolutely. You can slice, soak, and thoroughly dry the potatoes up to a day in advance. Store them in an airtight container lined with a paper towel in the refrigerator. When you are ready to bake, simply toss them with the starch and oil right before they hit the hot pan. This saves precious time on busy evenings without sacrificing texture.

    Serving Suggestions

    These fries shine alongside almost anything, but I especially love pairing them with cozy, comforting mains. A thick slice of roasted chicken with rosemary and lemon makes a beautiful plate. For a vegetarian option, a warm bowl of black bean soup or a simple chickpea and avocado salad brings out their earthy sweetness. If you are serving them as a standalone snack, set out a small ramekin of chipotle aioli or a bright lemon-tahini drizzle for dipping. They also make a wonderful topping for loaded nachos or a hearty grain bowl. Keep a sprinkle of fresh parsley or finely chopped chives nearby for a pop of color and a touch of freshness that cuts through the richness.

    FAQ Section

    Do I really need to soak the potatoes?

    While you can skip it, soaking is what transforms limp fries into crispy ones. The cold water pulls excess surface starch out of the potato, which prevents the pieces from sticking together and allows the exterior to dry faster in the oven. I always keep a bowl of ice water by my sink for this exact reason.

    Why did my starch clump up?

    Clumping usually happens when the potatoes are too wet when you add the coating. Always dry them completely before tossing with arrowroot or cornstarch. If you notice small lumps forming, just add a light drizzle of oil first to help the powder distribute evenly.

    Can I use an air fryer instead of an oven?

    Yes, the air fryer is fantastic for this recipe. Cook them at 380°F for about twelve minutes, shaking the basket halfway through. The rapid air circulation gives an even crispier result in less time, though you will need to work in smaller batches to avoid steaming.

    If you find yourself craving these on weeknights and want to speed up the process even more, I highly recommend investing in a quality countertop model. It handles batches beautifully and keeps the kitchen from heating up. You can check out the Best Air Fryer I Recommend for reliable, even cooking every single time.

    *As an Amazon Associate I earn from qualifying purchases.

  • 5 Avocado Toast Variations

    Morning Light & The Perfect Slice

    I still remember the exact morning I first truly understood why a simple piece of toast could feel like a hug. It was a damp, gray Tuesday in late October, the kind where the rain taps gently against the kitchen window and the whole house smells like damp earth and old books. I was tired, my schedule felt impossibly full, and I had exactly ten minutes before I needed to leave for the studio. I pulled a slightly crusty slice of sourdough from the bread box, mashed a perfectly ripe avocado with a fork, and sprinkled it with flaky sea salt. When I finally took that first bite, the crunch of the toasted bread gave way to that impossibly smooth, buttery fruit, and the sharp salt woke up my whole palate. In that quiet kitchen, with steam curling from my mug and the rain humming outside, I realized something simple: good food does not have to be complicated. It just has to be honest. Over the last decade of sharing recipes in this space, I have learned that the best mornings are built on small, repeatable rituals. That is why I put together these five avocado toast variations. They are not about chasing trends or stacking on unnecessary extras. They are about honoring the quiet beauty of breakfast, finding comfort in familiar flavors, and giving you a few gentle ways to switch up your routine when the week gets a little heavy. We can all use a little more softness in our mornings, can we not?

    A rustic, cozy lifestyle shot of the finished dish on a wooden table, natural morning light, steam rising, realistic food photography

    Why You Will Love These Variations

    • Effortless and forgiving: You do not need fancy techniques or hours of prep. These come together in under fifteen minutes, which means you can actually sit down and eat them while they are warm.
    • Highly adaptable: Whether your pantry is full of fresh summer tomatoes or stocked with winter pantry staples like chili flakes and preserved lemons, there is a version here that will fit right into your kitchen.
    • Balanced and nourishing: Each combination brings together healthy fats, fiber, and bright flavors that keep you steady through the morning rush without that heavy, sluggish feeling.
    • Beautifully simple: These plates look like they came straight from your favorite neighborhood café, but they only require a good knife, a reliable toaster, and a few honest ingredients.

    Choosing Your Ingredients with Care

    The magic of avocado toast lives entirely in the quality of what you put on the bread. When you start with thoughtful ingredients, the recipe practically makes itself. I want to share exactly what I look for when I am standing in the grocery aisle or the farmers market.

    First, the bread. I always reach for a loaf with a thick, chewy crust and an open, airy crumb. Sourdough is my favorite because the slight tang cuts through the richness of the avocado beautifully. If you prefer something earthier, a dense rye or a seeded whole grain will hold up wonderfully. Avoid pre-sliced sandwich bread, as it tends to soften too quickly under the weight of toppings. Look for a loaf that feels slightly springy when you press it gently, and listen for that satisfying crunch when you break a piece.

    Next, the avocados. This is where a lot of frustration happens, so here is my trick. I look for Hass avocados that feel heavy for their size. Gently press the stem end with your thumb. If it yields just slightly, like a ripe peach, it is ready to mash today. If it feels rock hard, leave it on your counter for a day or two. If it feels mushy or leaves a dent, skip it and pick another. You want that pale green flesh that turns to velvet when you run a fork through it.

    For the toppings, freshness matters. When choosing cherry tomatoes, look for plump, unblemished ones that smell faintly sweet and earthy. Fresh herbs should look vibrant, not wilted or slimy. A good flaky sea salt and a reliable extra-virgin olive oil will tie everything together. The oil should pour smoothly and smell grassy, almost like fresh-cut herbs. When you build your plate with care, every bite feels intentional.

    Close up shot of fresh ingredients for 5 Avocado Toast Variations on a cutting board, bright natural lighting, shallow depth of field, high detail

    Step-by-Step Instructions

    These five variations follow a simple rhythm: toast, mash, layer, and finish. Take your time, listen to the bread crackle, and let the aromas fill your kitchen. Here is exactly how I build each plate.

    1. The Classic Salt & Lemon: Start by toasting two thick slices of your chosen bread until the edges are deeply golden and crisp. While they warm, halve a ripe avocado, remove the pit, and scoop the flesh into a bowl. Mash it with a fork until it stays slightly chunky, leaving little pockets of texture. Stir in a generous pinch of flaky salt, a squeeze of fresh lemon juice, and a crack of black pepper. Spread the mixture thickly over the warm toast, letting it melt slightly into the nooks of the bread. Finish with a light drizzle of olive oil and a final sprinkle of salt.
    2. Spicy Honey & Radish: Prepare your avocado mash the same way, but add half a teaspoon of smoked paprika and a pinch of cayenne for a gentle warmth. Toast your bread until deeply crisp. Spread the mash evenly. Thinly slice fresh radishes on a mandoline or with a very sharp knife until they look like delicate pink ribbons. Arrange them over the top in an overlapping pattern. Drizzle a teaspoon of raw honey over the radishes, letting it catch in the crevices, and finish with a dusting of toasted sesame seeds.
    3. Everything Bagel & Soft Egg: Toast two slices until sturdy and warm. Mash your avocado with a splash of apple cider vinegar and a pinch of garlic powder. Spread it generously. While the bread toasts, bring a small pot of water to a gentle simmer. Crack a fresh egg into a ramekin and slide it into the water. Let it poach for three minutes until the white is set but the yolk remains liquid and glossy. Lift it out, pat the bottom dry, and place it directly on the avocado. Sprinkle heavily with everything bagel seasoning and crack fresh pepper over the top.
    4. Roasted Tomato & Fresh Basil: Halve a handful of cherry tomatoes and toss them in a warm skillet with a touch of olive oil and sea salt. Cook them until the skins blister and the juices thicken into a sweet, syrupy glaze. Meanwhile, toast your bread and spread it with plain mashed avocado, keeping it bright and simple. Spoon the warm tomatoes and their pan juices directly over the top. Tear fresh basil leaves by hand, letting the fragrant oils release as they fall onto the plate. Add a whisper of balsamic reduction if you have it.
    5. Feta & Cucumber Crunch: Toast your bread until it has a sturdy, audible snap. Mash the avocado with a squeeze of lime juice and a pinch of cumin. Spread it thick. Using a vegetable peeler, create long, translucent ribbons from a cold English cucumber. Lay them gently across the toast so they curl naturally. Crumble a generous handful of cold, tangy feta cheese over the cucumber. Finish with a handful of chopped fresh dill and a final drizzle of good olive oil.

    Action shot of cooking 5 Avocado Toast Variations, sizzling pan or fresh plating, appetizing, realistic, 4k food photography

    Pro-Tips & Troubleshooting

    I have been making these variations for years, and I still run into the same little kitchen puzzles that most of you do. Here is how I handle them so your toast stays beautiful and delicious.

    Preventing soggy bread: The enemy of great toast is moisture. Always toast your bread a little longer than you think you need to. If you are adding juicy toppings like roasted tomatoes or a poached egg, let the bread cool for exactly sixty seconds before spreading the avocado. This tiny pause allows the crust to set and creates a barrier against sogginess.

    Keeping avocados green: Oxidation is natural, but a squeeze of citrus right after mashing will slow it down. Lemon or lime juice works perfectly. If you only need half an avocado, leave the pit in the unused half, press plastic wrap directly against the exposed flesh, and store it in the fridge. It will stay fresh for about a day.

    Seasoning balance: Avocado is naturally rich and mild, which means it acts like a canvas. If your toast tastes flat, do not reach for more avocado. Reach for salt and acid. A pinch of flaky salt and a bright squeeze of citrus will wake up the entire plate instantly.

    Serving Suggestions

    These toasts are wonderfully complete on their own, but I love building them into a slow weekend morning. I usually pair them with a simple side of sliced citrus or a small handful of roasted almonds for extra crunch. A pot of black tea or a lightly steeped green tea complements the earthy flavors perfectly. If you want to stretch this into a light lunch, add a small bowl of chilled cucumber soup or a handful of peppery arugula tossed in lemon vinaigrette. For those who love batch cooking, I often keep a few of these components prepped on busy weekdays. I will roast a batch of tomatoes on Sunday, hard boil a few eggs, and slice radishes ahead of time. When Tuesday morning arrives, everything is ready to assemble, which means I get to stay in my robe just a little longer.

    Frequently Asked Questions

    Can I make the avocado mash ahead of time? I do not recommend mashing it more than an hour in advance, as it will darken and lose that fresh, creamy texture. It is much better to mash it fresh while the bread is toasting.

    What if I cannot find sourdough bread? Any high-quality, sturdy bread will work. A good whole wheat, a dense rye, or even a gluten-free artisan loaf will hold the toppings beautifully. Just make sure it has enough structure to stay crisp.

    How do I keep the eggs from overcooking? Timing is everything with poached or soft-boiled eggs. Keep your water at a gentle simmer, never a rolling boil. Three minutes is usually perfect for a runny yolk. If you prefer a firmer white, let it sit in the hot water for an extra thirty seconds.

    Are these suitable for meal prep? The bread and toppings are best assembled fresh, but you can prep everything separately. Store your sliced radishes, roasted tomatoes, and crumbled cheese in airtight containers in the fridge. When you are ready to eat, simply toast the bread and assemble in minutes.

    If you find yourself making these on busy mornings and wanting to warm up some leftover roasted vegetables or quickly reheat a slice of crusty bread without turning on the full oven, I highly recommend keeping a reliable countertop appliance nearby. It makes a noticeable difference in keeping weeknight and weekend cooking stress-free. You can check out the Best Air Fryer I Recommend for a model that fits perfectly on most kitchen counters and handles everything from quick crisping to gentle reheating.

    *As an Amazon Associate I earn from qualifying purchases.

  • Detox Kale Green Smoothie

    A Quiet Morning in the Kitchen

    There’s a specific kind of stillness that settles over my kitchen right around seven in the morning, just before the rest of the house wakes up. A few winters back, I found myself leaning against the counter, wrapped in an oversized knit cardigan, feeling completely drained. My body felt heavy, my skin looked tired, and I knew the rich, heavy meals from the previous weeks had finally caught up with me. I didn’t want a complicated breakfast, but I desperately needed something that felt like a fresh, gentle reset. That’s when I started experimenting with a simple green blend. I grabbed a handful of kale, half a frozen banana, and a splash of almond milk, hoping it would just be drinkable. Instead, it became this vibrant, surprisingly creamy sip that instantly woke up my palate. Over the years, I’ve tweaked the ratios, added a touch of fresh ginger for warmth, and learned exactly how to balance the earthy greens with natural sweetness. This Detox Kale Green Smoothie isn’t a magic cure-all, but it is my reliable, comforting way of starting the day with a little extra lightness. I’ve poured so much of that quiet morning ritual into this recipe, and I truly hope it brings the same steady comfort to your routine.

    A rustic, cozy lifestyle shot of the finished dish on a wooden table, natural morning light, steam rising, realistic food photography

    Why You’ll Love This Detox Kale Green Smoothie

    • It actually tastes like dessert: I promise you won’t taste a single bitter leaf. The natural sugars from ripe bananas and crisp apples completely balance the earthy greens, leaving behind a bright, sweet finish.
    • Ready in five minutes flat: No chopping, no complicated prep. Just toss everything into your blender and let the blades do the heavy lifting while you tie your hair up.
    • Deeply nourishing without the heaviness: Packed with fiber, vitamins, and plant-based omega-3s, it gives you steady energy that lasts well past lunchtime without the dreaded mid-afternoon slump.
    • Infinitely customizable: Whether you prefer a thicker, scoopable texture or a lighter, juice-like pour, you control the consistency with a simple splash of extra liquid.

    Choosing the Right Ingredients

    The secret to a smoothie that doesn’t taste like grass lies entirely in your ingredient selection. I’ve spent years testing different combinations at my kitchen counter, and these are my non-negotiables for getting that bright, balanced flavor every single time.

    Close up shot of fresh ingredients for Detox Kale Green Smoothie on a cutting board, bright natural lighting, shallow depth of field, high detail

    Kale

    Look for bunches with deep, dark green leaves that feel firm and slightly crisp to the touch. Avoid any yellowing or wilted edges, as those will introduce a bitter, metallic aftertaste that no amount of banana can fix. Lacinato kale, also known as dinosaur kale, has a much smoother texture than curly kale and blends down silkier. I always remove the thick central stems before measuring, as they can make the final texture slightly fibrous and stringy.

    Frozen Banana

    The banana does double duty here: it brings natural sweetness and creates that thick, creamy mouthfeel we all crave. Pick bananas that are heavily spotted or even mostly brown before freezing. The darker the peel, the higher the natural sugar content, which means you won’t need to add any extra honey or maple syrup. I slice them into thick coins and store them in a reusable silicone bag so they freeze evenly and blend quickly.

    Green Apple

    Granny Smith is my absolute go-to because its tartness cuts right through the richness of the kale and banana. When shopping, choose apples that feel dense and heavy for their size, with a tight, unblemished skin. Give them a gentle squeeze; they should offer a little resistance. If you prefer something milder, a Honeycrisp works beautifully, though you might want to add a tiny squeeze of lemon to brighten the flavor and keep it lively.

    Fresh Ginger & Lemon

    For the ginger, look for plump roots with smooth, papery skin that yields slightly to pressure. Wrinkled or soft ginger has lost its spicy punch and won’t give you that clean, warming finish. I peel it quickly with the edge of a teaspoon rather than a knife. As for the lemon, roll it firmly on the counter with your palm before juicing. This simple trick breaks up the inner membranes and gives you twice the juice with half the effort, ensuring a bright citrus lift in every glass.

    Chia Seeds & Unsweetened Almond Milk

    High-quality chia seeds should be uniform in size, ranging from matte black to speckled gray. They act as your natural thickener and a gentle source of fiber that settles comfortably in your stomach. I stick to unsweetened, plain almond milk to keep the flavor clean and uncluttered. If you check the ingredients list on the carton, it should only contain water, almonds, and maybe a pinch of sea salt. Anything else will muddy the bright, fresh profile we’re aiming for.

    Step-by-Step Instructions

    1. Prep the greens: Strip the kale leaves from their tough, woody stems. Give the leaves a quick rinse under cool water and pat them completely dry with a clean kitchen towel. Damp leaves can make the smoothie runny, so I like to wrap them for a minute if I’ve just washed them.
    2. Layer the blender: Always pour your liquid base in first. Add one cup of unsweetened almond milk to the bottom of your pitcher. This creates a natural vortex that pulls everything down toward the blades, preventing that annoying air pocket that leaves stubborn chunks floating at the top.
    3. Add the produce: Drop in your chopped green apple, frozen banana slices, and the prepped kale leaves. Sprinkle one tablespoon of chia seeds over the fruit. Peel and grate about half an inch of fresh ginger directly into the mix. Squeeze in the juice of half a lemon, letting the bright citrus drip down into the blender.
    4. Blend until glassy: Secure the lid tightly and start your machine on the lowest setting. Let it run for about ten seconds to break up the larger pieces. Gradually increase the speed to high and blend for another forty-five seconds. You’ll hear the sound shift from a heavy, rhythmic chop to a smooth, steady whir. The color will turn into a vibrant, glossy emerald, and the sides of the pitcher should look completely smooth with no visible leaf fragments.
    5. Taste and adjust: Pour a small spoonful out and give it a careful taste. If it leans too earthy, add a touch more apple or a teaspoon of raw honey. If you prefer it thinner, splash in two tablespoons of cold water or extra milk and pulse for five seconds. Serve immediately in a chilled glass, or pour it over a few ice cubes if you like it extra frosty.

    Action shot of cooking Detox Kale Green Smoothie, sizzling pan or fresh plating, appetizing, realistic, 4k food photography

    Pro-Tips & Troubleshooting

    Too thick or too thin? Texture is entirely up to you. If your blend turns out like a frozen dessert, simply add cold liquid one tablespoon at a time, blending briefly between additions. If it’s too watery, toss in a handful of extra ice cubes or a quarter of an avocado for a luxuriously thick finish that coats the glass beautifully.

    Still tasting grassy? This almost always means the fruit-to-green ratio is off, or the kale wasn’t fresh enough. Double-check that your banana is properly frozen and spotted, and make sure you’re using a high-speed blender. Low-powered machines sometimes leave tiny leaf fragments that release bitterness as you drink. A quick pulse of an extra apple slice usually fixes it instantly.

    Prep it ahead of time: I keep a few pre-portioned freezer bags on the top shelf of my freezer. Each bag contains the exact amount of kale, apple chunks, and banana slices. When the morning rush hits, I just dump the bag into the blender, add my liquid and ginger, and I’m out the door in under three minutes with a perfectly chilled breakfast in hand.

    Washing the blender: The easiest way to clean up is to fill the pitcher halfway with warm water and a single drop of mild dish soap. Run it on high for ten seconds, rinse thoroughly, and let it air dry. The chia seeds can stick to the rubber gasket, so a quick swipe with a soft sponge is all it takes to keep everything spotless.

    How to Serve & Enjoy

    I love drinking this straight from a tall, chilled glass while sitting by the kitchen window, watching the morning light change. If I’m feeling particularly indulgent, I’ll pour it into a wide ceramic bowl and treat it like a smoothie bowl. I top it with a sprinkle of toasted coconut flakes, a few fresh blackberries for a tart pop, and a light drizzle of almond butter. It pairs beautifully with a warm slice of sourdough toast topped with ricotta and honey, or a simple handful of roasted almonds if you want to keep things light and steady. For the kids, I sometimes hide it in colorful reusable pouches and freeze them overnight. They thaw by lunchtime into a perfectly chilled, nutrient-dense sip that they actually ask for without hesitation.

    Frequently Asked Questions

    Can I use spinach instead of kale?

    Absolutely. Spinach has a much milder flavor and blends down even easier. Use the same amount, but keep in mind the final drink will taste slightly sweeter and less earthy. It’s a fantastic swap for beginners who are still getting used to green smoothies or who prefer a lighter, more delicate flavor profile.

    How long does it keep in the refrigerator?

    You can store leftovers in a tightly sealed glass jar for up to twenty-four hours. The color might darken slightly due to natural oxidation, which is completely harmless. Just give it a vigorous shake before drinking. I don’t recommend freezing the blended mixture, as the separation can become difficult to reverse once thawed.

    Is this smoothie suitable for weight loss?

    This recipe is naturally high in fiber and water content, which helps you feel full and satisfied without spiking your blood sugar. It works wonderfully as a balanced breakfast replacement or a mid-afternoon pick-me-up. Just remember that sustainable wellness comes from consistent, gentle habits rather than extreme restrictions or skipping meals entirely.

    Do I really need to remove the kale stems?

    I highly recommend it. The stems contain tough, woody fibers that even high-speed blenders struggle to break down completely. If you skip this step, you might end up with tiny, gritty specks in your drink that settle at the bottom. Removing them takes less than a minute and guarantees a silky-smooth result that glides down easily.

    What if I don’t have fresh ginger?

    You can substitute a quarter teaspoon of ground ginger, though the flavor profile will shift slightly toward something warmer and earthier. Fresh ginger brings a bright, zesty heat that really lifts the whole drink, but the dried version will still work in a pinch. Just make sure it’s recently opened for maximum potency, and start with less so you can adjust to your taste.

    As my kitchen routine has evolved over the last decade, I’ve learned that having the right tools makes all the difference. I recently upgraded my counter setup and found myself relying more heavily on versatile appliances for quick meal prep. If you’re looking to streamline your mornings even further, I always point my readers toward the Best Air Fryer I Recommend. It’s become my absolute favorite for roasting quick breakfast potatoes and crisping up nuts for smoothie toppings without heating up the whole kitchen.

    *As an Amazon Associate I earn from qualifying purchases.

  • Kung Pao Chicken with Costco Rotisserie Chicken (Leftover Hack)

    Kung Pao Chicken with Costco Rotisserie Chicken (Leftover Hack)

    There is a particular kind of magic that happens when the week gets heavy, the rain starts tapping against the kitchen window, and the thought of ordering takeout just feels too slow and too expensive. We have all been there. You open the refrigerator door, hoping for inspiration, and your eyes land on that glorious, golden-brown Costco rotisserie chicken sitting quietly on the middle shelf. It is practically a national treasure at this point, isn’t it? But instead of pulling it apart for another quick sandwich or tossing it into a bland casserole, I want to invite you into my kitchen for something truly special. Today, we are transforming those humble leftovers into a vibrant, restaurant-quality Kung Pao Chicken using only ingredients you can easily grab from Kroger, Costco, or your local American grocery store. No specialty market trips, no complicated prep, just pure, cozy weeknight comfort with a beautiful Chinese-inspired twist.

    Overhead shot of delicious Kung Pao Chicken with Costco Rotisserie Chicken (Leftover Hack) on a wooden table, natural light, steam rising

    When I first developed this recipe, I was determined to prove that authentic-tasting Chinese food does not require an hour of chopping or a pantry full of obscure imports. We live in a beautiful era where grocery stores have democratized global flavors. With a few clever swaps and a deep appreciation for the humble rotisserie bird, we can create something that tastes like it came straight from a bustling Sichuan kitchen, yet fits perfectly into our busy American lives. Grab your favorite skillet, let’s warm up the stove, and dive into this delicious leftover hack together.

    Why This Works

    You might be wondering why a pre-cooked chicken works so beautifully in a stir-fry that traditionally calls for raw, marinated meat. The secret lies in timing and texture. Traditional Kung Pao chicken requires slicing, marinating in cornstarch and soy sauce, and then flash-frying until perfectly tender. It is wonderful, but it adds twenty extra minutes to your prep. By starting with Costco rotisserie chicken, we bypass that entirely. The meat is already incredibly moist, deeply seasoned from the roasting process, and perfectly tender. When we toss it into the hot wok or skillet, we are not cooking the chicken; we are simply warming it through and allowing it to soak up that glossy, sweet-and-spicy sauce.

    Furthermore, the rotisserie bird brings a subtle, savory depth that raw chicken simply cannot replicate on its own. The natural poultry juices and the gentle herb seasoning blend seamlessly with the toasted dried chilies, Sichuan peppercorns, and roasted peanuts. We are essentially shortcutting the flavor development process without sacrificing authenticity. Pair that with the accessibility of everyday American grocery items like low-sodium soy sauce, rice vinegar from the baking aisle, and bell peppers from the produce section, and you have a recipe that is as practical as it is delicious. It is a beautiful marriage of convenience and culinary tradition, and it consistently earns rave reviews at our dinner table.

    Ingredients

    One of the things I love most about this recipe is how approachable the ingredient list is. You likely have most of these staples in your pantry right now, and the rest can be picked up during a standard weekend grocery run. I have carefully curated this list to reflect what you will actually find at stores like Kroger, Safeway, or Costco, keeping the shopping trip simple and stress-free.

    For the Sauce:

    • 1/3 cup low-sodium soy sauce (I prefer the Kroger brand for its balanced saltiness)
    • 2 tablespoons Chinese black vinegar or substitute with unseasoned rice vinegar
    • 2 tablespoons honey or brown sugar for that signature caramelized sweetness
    • 1 tablespoon cornstarch, mixed with 1 tablespoon cold water (this creates our silky glaze)
    • 1 teaspoon toasted sesame oil for an aromatic finish
    • 1/2 cup warm chicken broth or water to thin the mixture slightly

    For the Stir-Fry:

    • 2 cups shredded or cubed Costco rotisserie chicken (discard skin if you prefer a leaner dish)
    • 2 tablespoons neutral cooking oil (avocado or vegetable oil works perfectly)
    • 1 medium red bell pepper, diced into bite-sized pieces
    • 1/2 medium yellow onion, thinly sliced
    • 1/3 cup roasted peanuts (the Kirkland Signature unsalted roasted peanuts are fantastic)
    • 6-8 dried whole red chilies (found in the international or spice aisle)
    • 1 teaspoon Sichuan peppercorns, lightly crushed
    • 3 cloves fresh garlic, finely minced
    • 1 tablespoon fresh ginger, grated or finely minced
    • 2 green onions, sliced on a diagonal for garnish

    Fresh ingredients for Kung Pao Chicken with Costco Rotisserie Chicken (Leftover Hack) (beef, broccoli, spices) arranged on a cutting board

    I always recommend prepping your ingredients before you even turn on the stove. Stir-frying moves incredibly fast, and having everything measured, chopped, and within arm’s reach is the golden rule of a smooth cooking experience. We want to enjoy the process, not stress over a missing measuring spoon while the garlic is burning!

    Steps

    Now for the fun part. We are going to bring this dish together in just three straightforward phases. I will walk you through each moment so you feel completely confident in the kitchen. Remember, the heat should be medium-high, but never so high that it scorches the aromatics. We want a steady, lively sizzle.

    1. Whisk the sauce: In a small bowl or glass measuring cup, combine the soy sauce, vinegar, honey, warm broth, and sesame oil. Stir until the honey completely dissolves. Add the cornstarch slurry last and give it one final, vigorous whisk. Set this aside near the stove.
    2. Toast the aromatics and peanuts: Place your wok or large heavy-bottomed skillet over medium heat. Add the neutral oil and let it shimmer. Toss in the dried red chilies and crushed Sichuan peppercorns. Let them sizzle gently for about thirty seconds until fragrant. Add the peanuts and toast them for another minute until they deepen in color and release their oils. Remove everything from the pan with a slotted spoon and set aside on a small plate.
    3. Sear the vegetables: In the same pan, increase the heat slightly. Add the diced bell pepper and sliced onion. Stir-fry for two to three minutes until they begin to soften but still retain a pleasant crunch. Push them to one side of the pan.
    4. Infuse the base: Add a tiny splash of oil to the cleared side of the pan if it looks dry. Drop in the minced garlic and ginger. Let them sizzle for just fifteen seconds until you can smell that incredible aroma. Do not let them brown.
    5. Combine and coat: Add the shredded rotisserie chicken to the pan. Toss everything together, mixing the vegetables, chicken, and aromatics thoroughly. Pour the prepared sauce over the top. Stir continuously for about two minutes. You will watch as the sauce bubbles, thickens, and clings beautifully to every piece of chicken and pepper.
    6. Finish and serve: Return the toasted peanuts, chilies, and Sichuan peppercorns to the pan. Give it one final toss to redistribute everything. Turn off the heat immediately to preserve the crunch of the nuts. Plate over steamed jasmine rice or cauliflower rice, and garnish generously with fresh green onions.

    Close up action shot of stir-frying Kung Pao Chicken with Costco Rotisserie Chicken (Leftover Hack) in a wok with flames

    The moment that sauce hits the hot pan, your kitchen will fill with the most comforting, mouth-watering aroma. It is the kind of smell that makes neighbors peek out their windows and wonder what you are making. Serve it immediately while it is hot, glossy, and perfectly coated.

    Tips

    Cooking is as much about intuition as it is about following a recipe, and over the years, I have gathered a few little tricks that elevate this dish from good to absolutely unforgettable. I hope you find them as useful as I do.

    • Control the moisture: Because rotisserie chicken is already cooked, it can sometimes release a bit of extra liquid. If your sauce seems too thin after tossing, simply let it bubble for an extra thirty seconds, or add a half-teaspoon of cornstarch dissolved in cold water.
    • Adjust the heat: The dried chilies are where the spice lives, but they do not need to be eaten. You can leave them whole for visual appeal and gentle warmth, or carefully snip them open with kitchen shears before adding them to the pan for a bolder kick. We usually serve this at a medium spice level so the whole family can enjoy it.
    • Use the right pan: A carbon steel wok is traditional, but a heavy stainless steel skillet or cast iron pan works beautifully. The key is heat retention. Thin non-stick pans tend to cool down too quickly when you add ingredients, which leads to steaming instead of frying.
    • Don’t overcrowd: If you are cooking for a larger crowd, double the sauce but cook the chicken in two batches. Overcrowding drops the pan temperature and ruins that beautiful, glossy finish we are aiming for.

    FAQ

    Can I use fresh chicken breast or thighs instead?

    Absolutely. If you prefer to start with raw meat, slice 1 pound of boneless, skinless chicken into uniform strips. Toss it with 1 tablespoon of soy sauce, 1 tablespoon of cornstarch, and a pinch of white pepper. Let it marinate for fifteen minutes before stir-frying. You will need to cook the raw chicken thoroughly in step three before adding the vegetables, which adds about four to five minutes to the total time.

    Is this recipe gluten-free?

    It can easily be made gluten-free by swapping the regular soy sauce for a certified gluten-free tamari or coconut aminos. Double-check that your cornstarch and vinegar are also certified if you are cooking for someone with celiac disease or a severe sensitivity.

    How spicy is it really?

    This recipe is designed to be approachable. The heat comes primarily from the Sichuan peppercorns, which provide a tingling, citrusy numbness rather than outright burn, and the dried chilies, which infuse the oil with a gentle warmth. If you are sensitive to spice, reduce the dried chilies to four and omit the peppercorns. You can always add chili crisp or red pepper flakes at the table for extra kick.

    Can I meal prep this for the week?

    I highly recommend it. The flavors actually improve after resting in the refrigerator for a few hours. Store it in airtight glass containers for up to four days. When reheating, I suggest adding a splash of water or broth and microwaving at fifty percent power, or gently warming it in a skillet over low heat to prevent the peanuts from turning soggy.

    Where can I find Sichuan peppercorns?

    Most major grocery chains now carry them in the international foods aisle or the spice section. If your local Kroger or Walmart does not stock them, they are widely available online. If you truly cannot find them, a light pinch of black pepper combined with a tiny dash of lemon zest will give you a similar bright, earthy note, though it will not be identical.

    We hope this cozy, clever leftover hack becomes a staple in your weekly cooking routine. There is something deeply satisfying about turning a simple grocery store purchase into a restaurant-worthy meal, and I truly believe this dish proves that delicious food does not have to be complicated. Thank you for spending this time in the kitchen with me. I cannot wait to hear how your version turns out!

    🛒 Recommended Products

    *As an Amazon Associate I earn from qualifying purchases.

    *As an Amazon Associate I earn from qualifying purchases.

  • Creamy Tuscan Garlic Shrimp

    A Quiet Evening and a Skillet Full of Comfort

    I still remember the exact evening this recipe became a permanent fixture in our kitchen. The rain was tapping against the windowpanes, the kind of steady, quiet drizzle that makes you crave something warm and deeply comforting. I had just come home from a long week, my grocery haul was modest, and I wanted a meal that felt like a hug without keeping me at the stove for hours. I pulled together what I had: a handful of raw shrimp, a jar of sun-dried tomatoes tucked in the back of the pantry, a generous bulb of garlic, and a carton of heavy cream. I tossed it all into one skillet, let the aromas fill the kitchen, and watched my husband wander in, drawn entirely by the scent of toasted garlic and butter. That first bite was rich, tangy, and impossibly cozy. We scraped the last drops of sauce with crusty bread, and I knew immediately I had to write it down. It is funny how the simplest combinations often bring the most comfort. Over the years, I have refined this recipe until it hits every single note perfectly—bright, savory, and luxuriously creamy. It is the kind of dish that reminds us to slow down, share a table, and actually taste what we are eating.

    A rustic, cozy lifestyle shot of the finished dish on a wooden table, natural morning light, steam rising, realistic food photography

    Why You’ll Love This

    • Ready in under twenty-five minutes from start to finish
    • One skillet means minimal cleanup and maximum flavor development
    • The sauce is rich but beautifully balanced, never heavy or overwhelming
    • Easily adaptable for busy weeknight dinners or quiet date nights at home
    • Relies on pantry staples you likely already have tucked away

    Ingredients Breakdown

    I have learned over the years that a beautiful dish starts long before the pan gets hot. It is all about choosing ingredients that bring their own character to the table.

    Close up shot of fresh ingredients for Creamy Tuscan Garlic Shrimp on a cutting board, bright natural lighting, shallow depth of field, high detail

    Shrimp: Look for large or jumbo shrimp, ideally peeled and deveined to save precious time. If buying frozen, thaw them slowly in the refrigerator overnight. I always pat them completely dry with paper towels before cooking so they sear instead of steam.

    Garlic: Fresh cloves are non-negotiable here. Pre-minced garlic in jars tends to have a metallic aftertaste and burns too quickly. I use a simple microplane to grate it into a soft paste, which distributes evenly throughout the sauce and releases its oils faster.

    Sun-Dried Tomatoes: Always reach for the oil-packed variety. They are softer, sweeter, and carry that concentrated, almost jammy flavor that gives this dish its signature Tuscan character. Reserve a tablespoon of the oil to start the pan.

    Heavy Cream vs. Half-and-Half: For a truly luxurious texture, stick with full-fat heavy cream. It holds its shape and resists curdling when it meets the acidic tomatoes. If you need something lighter, half-and-half works, but you will need to stir gently and keep the heat low.

    Parmesan Cheese: Buy a wedge and grate it yourself. Pre-shredded bags are coated in anti-caking agents that prevent them from melting smoothly into your sauce.

    Fresh Spinach: A large handful of baby spinach wilts beautifully in seconds, adding a pop of color and earthiness that cuts through the richness.

    Step-by-Step Instructions

    1. Start by heating your largest skillet over medium-high heat. Add a tablespoon of the reserved sun-dried tomato oil alongside a pat of butter. Wait until the butter foams and the edges just begin to turn golden.
    2. Season your dried shrimp generously with salt and black pepper. Lay them carefully into the hot pan in a single layer. Let them sit undisturbed for about two minutes until they develop a delicate, pinkish-orange crust. Flip them once, cook for another minute, then remove them to a clean plate. They will finish cooking in the sauce later.
    3. Reduce the heat to medium. Toss in your freshly minced garlic and the chopped sun-dried tomatoes. Stir constantly for about thirty seconds until the kitchen fills with that unmistakable, savory aroma. Be gentle, as garlic can turn bitter the moment it darkens.
    4. Pour in the heavy cream slowly, allowing it to mingle with the garlic and oil. Add a pinch of red pepper flakes if you enjoy a quiet warmth in the background. Let the mixture simmer gently until it begins to coat the back of a spoon.
    5. Turn off the burner and fold in your freshly grated parmesan. The residual heat will melt it into a smooth, velvety blanket. Return the shrimp to the pan, nestling them into the sauce.
    6. Finally, add the fresh spinach. Watch as it softens and turns a vibrant emerald green within seconds. Give everything one last gentle stir, taste, and adjust the seasoning.

    Action shot of cooking Creamy Tuscan Garlic Shrimp, sizzling pan or fresh plating, appetizing, realistic, 4k food photography

    Pro-Tips / Troubleshooting

    Rubbery Shrimp: This almost always happens from overcooking. Shrimp cook incredibly fast. Pull them off the heat while they still have a slight translucency in the very center. The residual heat will finish them perfectly without toughening the texture.

    Broken Sauce: If your sauce looks separated or grainy, it is usually because the heat was too high when adding the dairy or cheese. Lower the temperature immediately and whisk vigorously. A splash of warm pasta water or chicken broth can also help bring it back together into a glossy finish.

    Too Thick or Thin: Cream sauces continue to thicken as they cool. If yours looks too heavy, stir in a few tablespoons of warm liquid. If it runs too thin, let it simmer uncovered for another minute or two to reduce.

    Garlic Overpowering: If you are sensitive to raw garlic, add it to the pan a few seconds after the tomatoes, or use a lighter hand. You can always add more, but you cannot take it out once it infuses the cream.

    Serving Suggestions

    I usually serve this straight from the skillet, right in the center of the table with a stack of warm bowls. A loaf of crusty sourdough or a simple baguette is essential for soaking up every last drop of that garlic cream. If you want to stretch it into a heartier meal, toss it over freshly cooked linguine, angel hair, or even a bed of mashed potatoes for something deeply comforting. For a lighter approach, serve it alongside roasted asparagus or a simple arugula salad dressed with lemon and olive oil. A glass of crisp Pinot Grigio or a lightly oaked Chardonnay pairs beautifully with the bright tomatoes and rich cream. We love setting out a small bowl of extra red pepper flakes so everyone can adjust the spice to their liking.

    FAQ Section

    Can I use chicken or tofu instead of shrimp?
    Absolutely. Sliced chicken breast or firm tofu works wonderfully. Just adjust the cooking time accordingly and ensure the protein is fully cooked through before adding it back to the skillet at the end.

    Is there a dairy-free alternative for the cream?
    Yes. Full-fat coconut milk will give you a rich, creamy texture, though it will add a subtle coconut note. Cashew cream is another excellent neutral option that blends seamlessly into the garlic and tomato base.

    How should I store leftovers?
    Keep them in an airtight container in the refrigerator for up to three days. The sauce may thicken when chilled, so simply add a splash of water or milk when reheating on the stovetop over low heat.

    Can I freeze this dish?
    I generally do not recommend freezing cream-based sauces, as they tend to separate when thawed. It is always best enjoyed fresh, but if you must, freeze the shrimp and sauce separately from the dairy, and add fresh cream when reheating.

    We have been making weeknight meals easier lately, and sometimes I prep the garlic bread or roast a quick side dish while the main comes together. If you are looking to streamline your evenings even further, I highly recommend keeping a Best Air Fryer I Recommend on the counter for quick, crispy vegetables or perfectly toasted crostini without heating up the whole kitchen. Thank you so much for spending a little time in my kitchen today. I hope this creamy Tuscan garlic shrimp brings as much comfort to your table as it has to ours. Let me know how it turns out when you give it a try.

    *As an Amazon Associate I earn from qualifying purchases.

  • 5 Mouth-Watering Ways to Cook Salmon in an Air Fryer (Healthy & Fast!)

    Are you tired of dry, boring salmon? 🐟 You are not alone! But what if I told you that your Air Fryer is the secret weapon to making restaurant-quality salmon in just 10 minutes?

    In this guide, we will share the 5 best air fryer salmon recipes that are not only delicious but also packed with Omega-3 goodness. Let’s get cooking!

    1. Crispy Honey Garlic Salmon 🍯

    Imagine a sweet, sticky glaze caramelizing on perfectly flaky salmon…

    Instructions: Brush with honey garlic sauce, set air fryer to 400°F (200°C) for 8 minutes.

    2. Lemon Herb Butter Salmon 🌿

    Fresh, zesty, and buttery—this is the perfect summer dinner.

    💡 Pro Chef’s Secret for Perfect Results

    To get that restaurant-crisp skin, you need precise temperature control. Most home cooks fail because their air fryer has hot spots. We highly recommend the Ninja Foodi DualZone for even cooking every time.

    👉 Check Price on Amazon: Ninja Foodi DualZone Air Fryer


    Enjoyed this recipe? Save this page and try it tonight! Your family will thank you. 😋

    🛒 Recommended Products

    *As an Amazon Associate I earn from qualifying purchases.