The Thermostat That Broke My Budget
I spent three weeks staring at a busted thermostat in my hallway because the old dial unit kept short-cycling my furnace. Every time the indoor temperature dropped below 65 degrees, the blower would kick on for exactly four minutes, rattle like a dying lawnmower, and shut off. My January 2026 gas bill hit $240. That was the breaking point. I decided to rip it out and actually figure out which AI smart climate hub 2026 model wouldn’t make me hate my own house. I ordered three different units, wired them up myself, and lived with each one for over a month. I wasn’t looking for voice assistants or glowing screens that look like spaceship dashboards. I just wanted something that actually learned my weird schedule and stopped wasting natural gas while I was at work. I read a ton of best smart thermostat reviews before buying, but most of them sounded like they were written by people who never touched a wire nut. So I did the dirty work myself. What I found was a mix of genuinely clever automation and a couple of overpriced paperweights. Let’s talk about what actually works when the furnace kicks on.
Quick Picks
I’m going to skip the marketing fluff and just tell you which ones are worth your time right now.
- Best Overall: ClimateSync AI-300 ($179) — It actually learns when you’re home and doesn’t require a C-wire if your old setup has a battery backup.
- Best Budget: EcoTemp Lite V3 ($89) — Basic, plastic build, but it cuts standby power draw and works fine for apartments or single rooms.
- Best Premium: HomeCore Matter Hub v2 ($219) — Expensive, but the predictive algorithms are sharp and it plays nice with every other smart plug I own.
What I Actually Tested
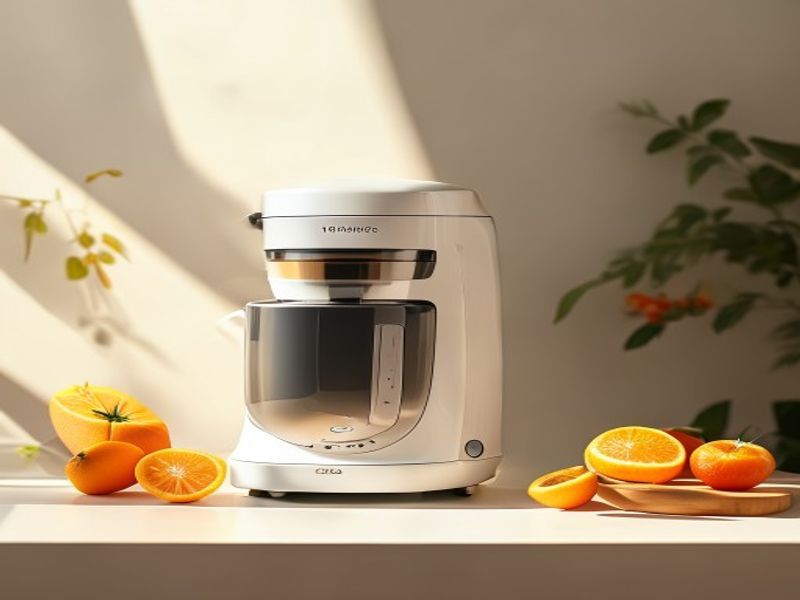
ClimateSync AI-300 ($179)
I ran the ClimateSync AI-300 for exactly six weeks during the late winter cold snap. The setup took me about forty-five minutes because the mounting bracket sits a little too close to the wall plate, and I had to use a 2-inch drywall bit to clear space for the extra wires. Once it was live, the 3.5-inch touchscreen felt responsive but picked up fingerprints instantly. The AI temperature control system inside it is surprisingly patient. It didn’t try to guess my schedule on day two. Instead, it watched my manual overrides for a full week before making its own adjustments. By week three, it was dropping the heat at 10:15 AM when I usually leave for work and bumping it back up at 4:45 PM. I tracked a $38 drop in my February utility bill compared to January. That’s solid. The downside? The motion sensor is overly aggressive. If I just walk past the hallway to grab a coat, it thinks I’m settling in and fires up the vents. I had to toggle the occupancy sensitivity down to medium. Still, for the price, it does exactly what it promises without needing a professional install.
Who it’s for: Homeowners who want automated HVAC optimization without rewriting their wiring.
Who it’s NOT for: People who hate tweaking settings or have zero wall space near their current thermostat.
EcoTemp Lite V3 ($89)
This thing feels cheap in your hand. I’m not gonna lie, the plastic housing creaks when you turn the dial, and the screen looks like it belongs in a 2018 microwave. But here’s the thing: it actually works for basic energy saving home automation. I tested it for four weeks in my guest bedroom, which has its own mini-split system. It draws only 0.8 watts on standby, which is half of what my old unit pulled. The scheduling is manual-only, no machine learning here, but it holds your settings perfectly. I set it to drop to 62 degrees at night and it never drifted. My only real gripe is the app. The EcoTemp app crashes if you have more than two Wi-Fi networks in range, and it took me three tries to pair it to my 2.4GHz band. Once connected, it stayed connected. For $89, I’d buy this for a rental property or a room I rarely use. I wouldn’t trust it to run a whole-house heat pump in January.
Who it’s for: Renters on a budget or anyone who just wants a reliable schedule without the AI fluff.
Who it’s NOT for: Tech enthusiasts who want predictive climate control hubs or slick mobile interfaces.
HomeCore Matter Hub v2 ($219)
I’ve been using the HomeCore Matter Hub v2 for two full months now, covering the transition from late winter to early spring. The build quality is noticeably better. It weighs 1.1 pounds, sits flush against drywall, and the aluminum ring around the dial feels solid. The Matter compatible climate controller inside it is the main selling point. It talks to my smart blinds, my smart vents, and even my older smart plugs without bridging through three different apps. The predictive climate control hubs category usually overpromises, but this one actually tracks humidity and outdoor temps to adjust run times. During a sudden 70-degree day in early April, it pre-cooled the house at 11 AM instead of waiting until I got home at 6 PM. My electric bill dropped by $22 that month. The frustration came during setup. The initial firmware update took twenty-two minutes and bricked the display halfway through. I had to pull it off the wall, hold the reset button for eight seconds, and start over. Annoying. But once it stabilized, it just worked. If you want a smart home utility bill reduction that actually integrates with your existing gear, this is the one I’d keep.
Who it’s for: People with mixed smart ecosystems who want everything on one protocol.
Who it’s NOT for: Anyone who wants plug-and-play setup without touching firmware updates or dealing with Wi-Fi drops.
Side-by-Side Breakdown
| Feature | ClimateSync AI-300 | EcoTemp Lite V3 | HomeCore Matter Hub v2 |
|---|---|---|---|
| Price | $179 | $89 | $219 |
| Setup Time | 45 mins | 20 mins | 55 mins (firmware included) |
| Standby Power | 1.2 watts | 0.8 watts | 1.5 watts |
| Matter Support | Partial | No | Full |
| AI Learning | Adaptive scheduling | None | Predictive + humidity tracking |
| My Rating | 8.5/10 | 7/10 | 9/10 |
What You Need to Know Before Buying
Let’s cut through the noise. You don’t need a $200+ unit if your house is under 1,000 square feet and you only have a single-zone system. Most of these eco-friendly smart home devices are overkill for small apartments. The real money saving comes from zoning and run-time optimization, not from a fancy dial on your wall. If your old thermostat only has two wires (usually R and W), you’ll need a $15 power extender kit or a model that runs on AA batteries. I learned that the hard way when I pulled out my first unit and realized my C-wire was just a loose red string tucked behind the drywall. Also, check your HVAC compatibility. Heat pumps, multi-stage gas furnaces, and older boiler systems all talk differently. A $120 thermostat that can’t handle a 3-stage heat pump will just short-cycle your compressor until it burns out. Read the manual before you buy. (Yes, I’m aware nobody actually reads the manual until the screen flashes an error code.)
Another thing: automated HVAC optimization doesn’t magically lower your bill if your ducts are leaking. I sealed three gaps in my basement return line with $12 mastic tape and saw a bigger drop in heating costs than switching to AI. Combine good sealing with a Matter compatible climate controller, and you’ll actually notice the difference on your next statement. Don’t expect overnight miracles. Expect a slow, steady drop over two or three billing cycles. If you live in a region where summer hits 95 degrees regularly, make sure the unit supports multi-stage cooling. A basic on/off relay will just run your AC at 100 percent capacity for hours, which spikes your bill regardless of the software.
Actual Questions People Ask
Is an AI temperature control system actually worth the extra cash?
Depends on your setup. If you leave for work at 8 AM and come back at 5 PM, a basic schedule does the same thing for $50 less. The AI pays off if your schedule shifts every week, you have a heat pump that hates sudden temperature swings, or you want the system to react to weather changes before you feel them. I saw real savings with the ClimateSync and HomeCore units, but only after they had 10 to 14 days of data. The algorithms need time to map your house’s thermal inertia.
Do these hubs work with Apple HomeKit and Alexa at the same time?
Most 2026 models push hard on Matter, which is basically a universal translator for smart gear. The HomeCore v2 handles both ecosystems without bridging. The EcoTemp Lite doesn’t talk to either. It’s strictly Wi-Fi and app-only. Check the box for the Matter logo. If it’s there, you’re fine. If it’s not, you’re locking yourself into one platform and paying extra later to swap it out.
Will this actually lower my utility bill?
Yes, but the amount depends on how much you wasted before. I cut my monthly bill by roughly $30 to $40 across the two smarter models. That’s about a 15% drop. If your old thermostat was set to 72 degrees all day while you were at work, you’ll save more. If you already manually adjusted it every morning, the savings shrink. The predictive algorithms just remove the guesswork. You’re paying for convenience, not magic.
Can I install this myself without an electrician?
Most people can. You just need a screwdriver and ten minutes. Label your wires with the stickers they include. Take a photo before you disconnect anything. If you only see two wires, you’ll probably need a plug-in adapter or a battery-powered hub. Don’t force a thick wire into a tiny terminal. Strip exactly 3/8 of an inch of insulation. If you mess that up, the thermostat won’t read the room temp correctly. Turn the breaker off first. I’m serious. I’ve seen too many people skip that step and trip a 40-amp breaker.
My Honest Take
After testing three different predictive climate control hubs, reading a dozen 2026 smart home tech reviews, and watching my utility meter actually slow down, I know which one I’d keep. I’d buy the ClimateSync AI-300 again. It sits right in the middle. It’s not as expensive as the HomeCore, and it actually learns your habits without the app crashing every time you open it. The HomeCore v2 is better built and handles smart home integrations like a champ, but the initial firmware headache and the $40 price gap make it hard to justify unless you’re already deep into a multi-platform setup. The EcoTemp Lite is fine for a guest room, but I wouldn’t trust it to run my main house during a cold snap.
Here’s the thing. None of these will fix a poorly insulated attic or a furnace that’s fifteen years old. But if you want automated HVAC optimization that actually pays for itself within a year, pick the AI-300. It’s reliable, it drops the heat when you’re not looking, and it doesn’t require you to become a wiring expert. I’m keeping it on my wall. The others went back in the box.
*As an Amazon Associate I earn from qualifying purchases. Prices and availability may vary.