Introduction
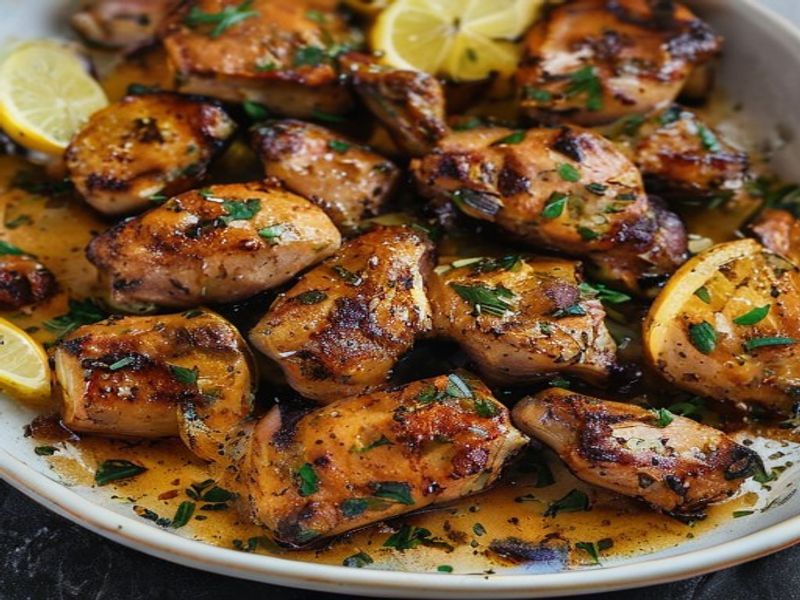
This sheet pan chicken recipe delivers restaurant-quality results with minimal active time. The combination of harissa and honey creates a balanced glaze that caramelizes perfectly under high heat, while toasted cumin and fresh lemon cut through the richness. Bone-in, skin-on thighs are chosen for their high fat content and forgiving nature, ensuring juicy meat even if slightly overcooked. Designed as a reliable easy weeknight dinner, this one-pan meal requires zero specialized skills, just precise temperature control and proper spacing. The entire process falls squarely within standard 30-minute dinner ideas. I find that mastering this foundational technique gives you a repeatable template for dozens of quick dinner recipes. Whether you’re feeding a family or meal-prepping healthy family meals, this gluten-free weeknight dinner delivers consistent, flavorful results every single time.
What You’ll Need
Ingredient selection directly impacts texture and flavor development. Use precise amounts for consistent results.
- 1.5 pounds bone-in, skin-on chicken thighs (approximately 4 pieces): Select uniform sizes for even cooking. Skin-on is mandatory for fat rendering and crispness.
- 2 tablespoons olive oil: Divided use. Extra virgin works fine; its smoke point is sufficient for the oven temperature.
- 2 tablespoons harissa paste: Choose a smooth, oil-based North African variety. Avoid chunky blends with excessive vinegar.
- 1.5 tablespoons raw honey: Provides glaze viscosity and rapid Maillard reaction at high heat.
- 1 teaspoon whole cumin seeds: Toasting whole seeds unlocks volatile oils that pre-ground powder loses during storage.
- 1/2 teaspoon smoked paprika: Adds earthy depth without competing with the chili heat.
- 1 teaspoon kosher salt (Diamond Crystal): If using fine table salt, reduce to 3/4 teaspoon to prevent over-salting.
- 1/2 teaspoon freshly cracked black pepper: Adds structural bite to the glaze.
- 1 large lemon: Zest 1 teaspoon, juice 2 tablespoons, reserve 2 wedges for finishing.
- 2 cloves garlic: Grated on a microplane for seamless emulsion into the paste.
Required Equipment
- Standard half-sheet baking pan (18 x 13 inches / 45 x 33 cm)
- Heavy-duty aluminum foil or silicone baking mat
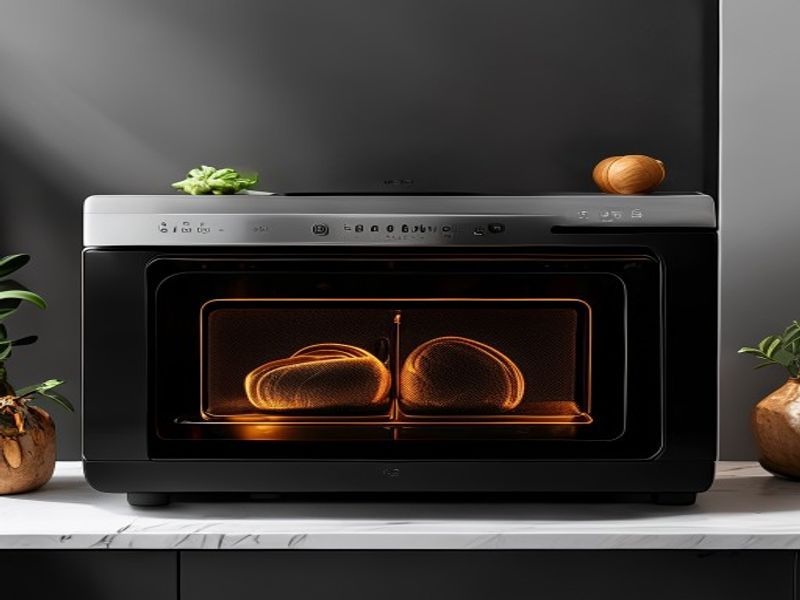
- Instant-read digital thermometer [Check Price on Amazon]
- Small mixing bowl and silicone basting brush
- Microplane grater and chef’s knife
- Small dry skillet for toasting spices
Prep Work
Proper mise en place dictates success in any high-heat roasting method. Begin by removing the chicken from the refrigerator exactly 15 minutes before cooking. Cold protein hitting a hot oven causes rapid surface cooling, which traps moisture and promotes steaming instead of roasting. While the chicken approaches room temperature, pat every piece completely dry with paper towels. Moisture is the primary enemy of crispy skin. Transfer the dried thighs to a clean plate.
Heat your dry skillet over medium-low heat (325°F / 160°C). Add the 1 teaspoon of cumin seeds and toast for exactly 90 seconds, shaking the pan continuously until they darken slightly and release a nutty, earthy aroma. Immediately transfer to a mortar or spice grinder, pulse into a fine powder, and let cool for 2 minutes. In your small mixing bowl, combine the freshly ground cumin, smoked paprika, kosher salt, black pepper, 1 tablespoon of olive oil, harissa paste, honey, lemon juice, lemon zest, and grated garlic. Whisk vigorously for 30 seconds until the mixture emulsifies into a uniform, glossy paste. This glaze can be prepared up to 24 hours in advance and stored covered in the refrigerator. Bring it back to room temperature 20 minutes before roasting to ensure it spreads evenly without seizing on cold meat.
Cooking Instructions
- Preheat the oven: Set your oven to 425°F / 220°C on the standard bake setting. Allow it to fully stabilize for 15 minutes before inserting food. This high temperature is critical for rapidly rendering subcutaneous fat and initiating Maillard browning on the skin. Line your half-sheet pan with foil and lightly coat with the remaining 1 tablespoon of olive oil.
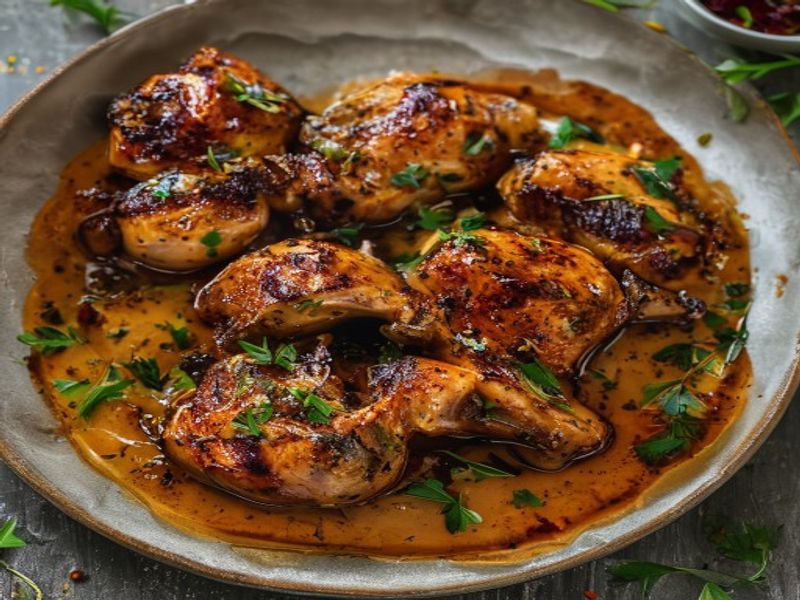
- Coat the protein: Pour approximately 80% of the harissa-honey glaze over the chicken thighs. Use clean hands to massage the paste thoroughly under and over the skin, ensuring every crevice and fold is coated. Reserve exactly 20% of the glaze in the mixing bowl for the finishing step. Avoid piling excess paste on top; a thin, even layer caramelizes faster and more uniformly.
- Arrange for airflow: Place the thighs skin-side up on the prepared pan, spacing them at least 1 inch apart. Crowding the pan traps evaporated moisture, creating a humid environment that yields rubbery, pale skin. Position the pan on the center oven rack. Roast undisturbed for 25-28 minutes.
- Monitor the roast: At the 18-minute mark, carefully rotate the pan 180 degrees to compensate for hot spots in your oven. Watch the skin closely; it should pull back slightly from the bone edges and develop a deep mahogany color with blistered, glossy patches. You will hear a steady, active sizzle as the fat renders into the pan. If the edges begin to char excessively before the 20-minute mark, lower the temperature to 400°F / 200°C.
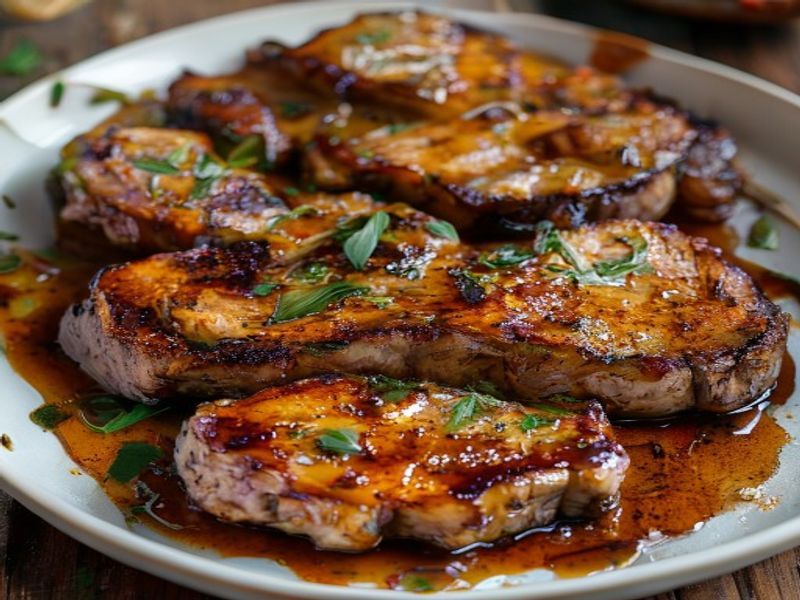
- Apply the final glaze: Remove the pan from the oven. Using a silicone brush, evenly apply the reserved 20% glaze over the hot skin. Return to the oven for exactly 4-5 minutes. The sugars in the honey will set rapidly, creating a lacquered finish. Do not walk away; honey scorches quickly above 400°F / 200°C, turning bitter.
- Verify doneness: Insert an instant-read thermometer into the thickest part of the thigh, avoiding contact with the bone. The target internal temperature is 165°F / 74°C. The meat should yield slightly when pressed with tongs, and the juices should run completely clear.
- Rest before plating: Transfer the thighs to a clean cutting board and rest for exactly 5 minutes. Resting allows denatured muscle fibers to relax and reabsorb expelled juices. Squeeze the reserved lemon wedges over the surface just before serving to brighten the heavy spice profile.
Common Mistake to Avoid: Never flip the chicken mid-cook. The skin requires uninterrupted exposure to dry, convective heat to achieve proper crispness. Flipping breaks the forming crust and releases trapped steam.
Pro Tips
- Spice Integrity: In my experience, toasting whole cumin and grinding it fresh yields a significantly brighter, more complex flavor profile than pre-ground powder. The essential oils degrade rapidly once exposed to oxygen and light.
- Harissa Substitution: If authentic North African harissa is unavailable, substitute with 1 tablespoon tomato paste, 1/2 teaspoon cayenne pepper, and 1/4 teaspoon ground coriander. The flavor will shift slightly, but the spicy-sweet structural balance remains intact.
- Glaze Application Timing: I find that applying the majority of the glaze at the start builds a flavor foundation, while brushing the remainder during the final 4 minutes prevents the honey from carbonizing. This two-stage approach guarantees both deep seasoning and a glossy, sweet finish.
- Make-Ahead Storage: For meal prep, roast the chicken, cool completely to room temperature, and store in airtight containers for up to 3 days. Reheat uncovered at 350°F / 175°C for 10-12 minutes to restore skin texture without drying the meat.
Serving Suggestions
This dish naturally pairs with neutral, absorbent starches that balance the bold harissa honey glazed chicken. Serve over 1.5 cups of fluffy couscous per portion, or alongside roasted fingerling potatoes and charred broccolini tossed in 1 teaspoon of olive oil. The bright citrus notes cut beautifully through creamy sides like labneh or a quick cucumber-yogurt salad. For a complete healthy family meals spread, add a simple arugula and shaved fennel salad with a lemon vinaigrette. Each thigh provides a generous 4-6 ounce protein portion, making it highly satiating for active adults. Adjust portions for children by trimming the skin before serving and offering a side of steamed rice to absorb any excess pan juices.
FAQ
Can I use frozen chicken thighs?
Yes, but you must thaw them completely in the refrigerator for 24 hours before cooking. Roasting from frozen causes the exterior to overcook while the interior remains underdone. Never attempt to speed-thaw in warm water, as it promotes bacterial growth and ruins the skin texture.
How do I know when it’s done without a thermometer?
Insert a sharp knife into the thickest section near the bone. If the meat pulls away cleanly from the bone with gentle resistance and the expelled juices run completely clear, it has reached the safe target of 165°F / 74°C. Pink, translucent, or gelatinous flesh indicates it requires 3-4 additional minutes in the oven.
Can I prep this ahead for a quick weeknight meal?
Absolutely. Marinate the thighs in the glaze base (excluding the honey) for up to 12 hours in the refrigerator. Add the honey only right before roasting. The acid in the lemon and harissa will begin to denature proteins if left too long, resulting in a mushy surface texture.
Is this recipe naturally gluten-free?
Yes. Every ingredient listed is inherently free of wheat, barley, and rye. Always verify your harissa paste and smoked paprika labels, as some commercial brands add anti-caking agents or wheat flour during processing.
*As an Amazon Associate I earn from qualifying purchases.