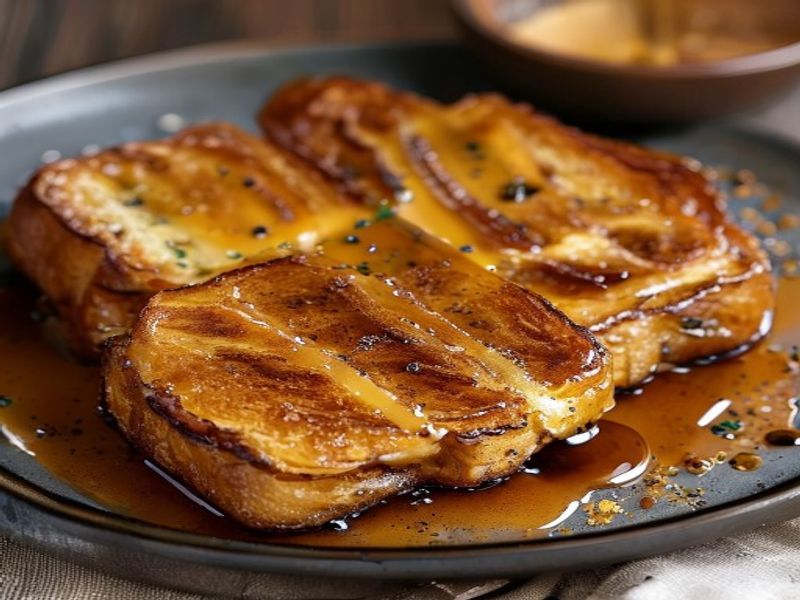
15-Minute Skillet-Crisped Sweet Potato & Ricotta Breakfast Fritters with Brown Butter Sage
This recipe delivers a high protein vegetarian breakfast that balances earthy sweetness with rich, savory depth in exactly fifteen minutes. By using pre-cooked sweet potato and properly draining whole-milk ricotta, the batter binds quickly without heavy starches, creating a tender interior that shatters into a crisp, golden crust. The technique relies on controlled pan heat and precise moisture management to prevent steaming, making it an ideal quick healthy morning meal or one of your most reliable skillet breakfast ideas. Suitable for beginner to intermediate cooks, this savory breakfast recipe teaches foundational heat control and fat management. The brown butter sage drizzle adds a professional finish, infusing the dish with toasted nuttiness that transforms a simple sweet potato ricotta recipe into standout weekend brunch ideas. 
What You’ll Need
Ingredients
- 1.5 cups (about 250g) cooked sweet potato, cooled completely and finely grated
- 0.75 cup (180g) whole-milk ricotta, drained
- 2 large eggs, room temperature
- 0.25 cup (30g) fine rice flour
- 1 tablespoon cornstarch
- 0.5 teaspoon kosher salt
- 0.25 teaspoon freshly cracked black pepper
- 1.5 tablespoons neutral high-smoke-point oil (avocado or grapeseed)
- 3 tablespoons unsalted butter, cubed
- 12 fresh sage leaves, patted completely dry
- Optional garnish: 0.25 teaspoon flaky sea salt, microplane lemon zest
Ingredient Notes: Use dense, orange-fleshed sweet potatoes roasted until fork-tender. Whole-milk ricotta provides the necessary fat for a tender crumb; avoid fat-free varieties as they will make the fritters rubbery. Ensure eggs are at 70°F / 21°C for optimal emulsification.
Equipment
- 12-inch heavy-bottomed cast iron or carbon steel skillet [Check Price on Amazon]
- Fine mesh strainer or cheesecloth
- Offset spatula or fish turner
- Instant-read thermometer
- 1-quart mixing bowl
Prep Work
Mise en Place and Moisture Control
Proper moisture management dictates whether these breakfast fritters crisp or steam. Begin by placing the ricotta in a fine mesh strainer set over a bowl and pressing gently with the back of a spoon for exactly 5 minutes to extract excess whey. Transfer the cooled sweet potato to a clean kitchen towel, gather the edges, and twist firmly until 3 to 4 tablespoons of liquid are removed. The potato should feel dry to the touch but still hold its shape when squeezed. In a 1-quart bowl, whisk the 2 room-temperature eggs with the rice flour, cornstarch, salt, and pepper until completely smooth and free of lumps. Fold in the drained ricotta and grated sweet potato using a silicone spatula, mixing just until incorporated to avoid deflating the egg proteins. Form six equal portions (approximately 0.5 cup each) and flatten into 3.5-inch patties, about 0.5-inch thick.
Temperature & Timing Notes: Keep the batter chilled if your kitchen exceeds 75°F / 24°C, as cold fats hold structure better during initial searing. This prep stage requires exactly 6 minutes and can be completed up to 2 hours ahead if covered tightly and refrigerated. This is an easy savory brunch component that tolerates brief refrigeration without degrading.
Cooking Instructions
Skillet Searing and Brown Butter Sage Drizzle
- Heat the Skillet: Place your 12-inch skillet over medium-high heat and add the 1.5 tablespoons of neutral oil. Allow the pan to heat for 3 minutes until the oil reaches approximately 375°F / 190°C. You will know the pan is ready when a single drop of water flicked into the oil beads and dances across the surface rather than evaporating instantly.
- Sear the Fritters: Carefully lower three patties into the oil, leaving 1.5 inches of space between each. Do not move them for exactly 3 minutes. Listen for a steady, medium-pitch sizzle; if the sound becomes aggressive or the oil smokes, reduce heat to medium. After 3 minutes, check the underside with a spatula. You are looking for a deep golden-brown crust with defined, lacy edges. Flip carefully and cook the second side for 2 minutes until equally crisp and the internal temperature reaches 165°F / 74°C. Transfer to a wire rack.
- Repeat: Wipe the skillet with a folded paper towel to remove excess oil and carbonized bits. Return to medium-high heat, and repeat with the remaining three patties for 3 minutes on the first side and 2 minutes on the second.
- Brown Butter Sage Drizzle: Reduce heat to medium-low. Add the 3 tablespoons of cubed unsalted butter to the clean skillet. Melt slowly for 60 seconds, swirling constantly. Once the foam subsides and the milk solids turn a light amber color (approximately 300°F / 150°C), carefully add the 12 dry sage leaves. Fry for exactly 60 to 90 seconds until the leaves curl and become crisp, and the butter emits a toasted hazelnut aroma. Immediately remove from heat to prevent the butter from burning.
Common Mistakes to Avoid: Moving the fritters too early tears the forming crust and releases starch into the oil. Overcrowding the pan drops the surface temperature below 300°F / 149°C, causing the fritters to absorb oil and become greasy. Letting the brown butter foam boil past amber results in a bitter, acrid flavor that cannot be salvaged.
Pro Tips
- Moisture Extraction: In my experience, the single most common failure point in ricotta fritters is residual whey. Squeezing the sweet potato in a towel is non-negotiable; a damp batter will never achieve a true crust.
- Gluten-Free Crispness: If you require a strict gluten-free breakfast, rice flour combined with cornstarch outperforms single-grain alternatives because the cornstarch gelatinizes at lower temperatures, creating a glassy, shatter-prone exterior that stays crisp for up to 20 minutes after cooking.
- Make-Ahead Strategy: The raw batter holds well for 4 hours refrigerated. Form the patties and layer them between parchment paper in an airtight container. I find that letting them sit at room temperature for exactly 10 minutes before hitting the skillet prevents thermal shock and guarantees an even sear across the entire surface.
Serving Suggestions
Serve immediately while the crust remains hot and brittle. Plate two to three fritters per portion for a standard morning meal, or three to four for a larger gathering. The brown butter sage drizzle should be poured tableside in 1.5 tablespoon portions directly over the center of the stack. Pair with a lightly dressed arugula salad (1 teaspoon olive oil, lemon juice, shaved Parmesan) to cut through the richness. For a complete protein profile, top with a 145°F / 63°C soft-poached egg or a dollop of full-fat Greek yogurt tempered with black pepper and chili flakes. The contrast of cool, creamy dairy against the hot, crisp fritter provides the ideal textural balance for any brunch menu.
FAQ
Can I use frozen sweet potato for this recipe?
Yes, provided it is fully thawed and drained. Frozen sweet potato releases significantly more cellular water during thawing. Squeeze it thoroughly in a kitchen towel until it yields only 1 to 2 tablespoons of liquid, then proceed with the recipe as written. Do not microwave to thaw, as it creates a mushy texture that compromises structural integrity.
How do I know when the fritters are fully cooked?
Visual and tactile cues are your primary indicators. The exterior must be uniformly golden with rigid, non-flexible edges. Insert an instant-read thermometer into the center; it should register 165°F / 74°C. When pressed lightly with tongs, the fritter should feel firm with a slight spring back, indicating the egg proteins have fully coagulated.
Can I prep these ahead and reheat them?
You can store cooked fritters in a single layer in the refrigerator for up to 3 days. Reheating in a microwave will soften the crust. Instead, place them on a baking sheet in a preheated 400°F / 200°C oven for 6 to 8 minutes. This restores the surface crispness without drying the ricotta interior. The brown butter sage drizzle is always best prepared fresh.
*As an Amazon Associate I earn from qualifying purchases.