作者: Alex Chen

  • 20-Minute Pan-Seared Miso-Maple Cod with Crispy Ginger Scallion Rice

    Introduction

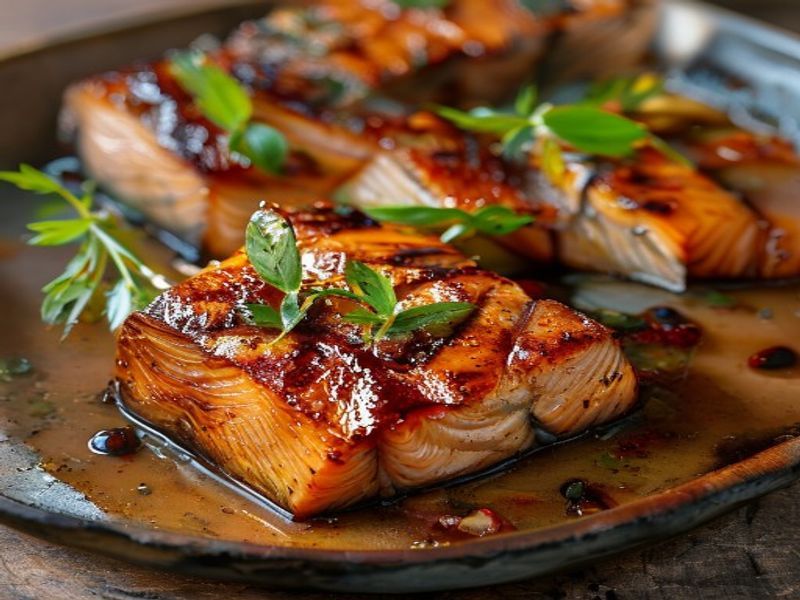
    This pan-seared cod recipe delivers restaurant-quality umami glazed fish in exactly twenty minutes, making it a reliable quick seafood dinner for demanding schedules. The miso maple cod glaze relies on precise temperature control and careful sugar management to create a glossy, caramelized crust without burning, while the delicate white fish stays moist and flaky. Paired with crispy ginger scallion rice, this dish balances rich, savory-sweet notes with bright aromatics and necessary textural contrast. It is designed for beginner to intermediate cooks who want an easy cod dinner that feels elevated without requiring specialized techniques. The method emphasizes moisture removal, heat modulation, and exact timing—core skills that transform simple fish recipes into consistent, healthy weeknight meals. This family friendly dinner idea requires minimal active prep and delivers maximum flavor through strategic layering rather than complex steps.

    Finished 20-Minute Pan-Seared Miso-Maple Cod with Crispy Ginger Scallion Rice beautifully plated, professional food photography, natural lighting

    What You'll Need

    For the Miso-Maple Glaze

    • 3 tablespoons white miso paste
    • 2 tablespoons pure maple syrup
    • 1 tablespoon soy sauce (or tamari)
    • 1 tablespoon unseasoned rice vinegar
    • 1 teaspoon toasted sesame oil

    For the Cod

    • 4 cod fillets (6 ounces each, 1 to 1.5 inches thick), skinless or skin-on
    • 1/2 teaspoon kosher salt
    • 1/4 teaspoon freshly ground black pepper
    • 2 tablespoons neutral oil (avocado or grapeseed)

    For the Crispy Ginger Scallion Rice

    • 2 cups cooked short-grain white rice (preferably day-old)
    • 1 tablespoon neutral oil
    • 2 large scallions, thinly sliced (white and green parts separated)
    • 1 tablespoon fresh ginger, finely grated or minced
    • 1/2 teaspoon soy sauce

    Ingredient Selection Notes: White miso provides a milder, sweeter umami base that caramelizes cleanly under high heat, unlike darker red misos which can scorch. Atlantic cod holds together exceptionally well during searing, while Pacific cod offers a slightly firmer texture. Day-old rice contains significantly less surface moisture due to starch retrogradation, which is critical for achieving the desired crispy rice texture without turning mushy. Freshly grated ginger releases volatile aromatics that pre-ground powder cannot replicate.

    Equipment Needed

    Prep Work

    Proper mise en place ensures this 20 minute fish recipe executes smoothly without last-minute scrambling or temperature drops. Begin by removing the cod fillets from refrigeration exactly 10 minutes before cooking. Cold protein seizes instantly in hot oil, causing uneven cooking and immediate moisture loss. Pat each fillet completely dry with heavy-duty paper towels until absolutely zero moisture transfers to your fingers; residual water will steam the fish and prevent the Maillard reaction from occurring on the surface.

    Whisk the white miso, maple syrup, soy sauce, rice vinegar, and sesame oil in a small bowl until completely smooth and emulsified. Set aside at room temperature. Cold glaze applied to hot fish causes immediate thermal shock, resulting in uneven coating and premature sugar crystallization.

    Prepare the ginger and scallions. Separate the scallion whites from the greens. Finely grate the ginger using a microplane to maximize surface area and juice extraction. Measure the rice, ensuring it is fully cooled and broken into small, uniform clumps. If using freshly cooked rice, spread it on a sheet pan and refrigerate for 15 minutes to dry the exterior starch.

    Timing & Make-Ahead: All prep can be completed up to 2 hours in advance. Cover the glaze and refrigerate. Keep the dried fillets uncovered in the fridge until ready to cook to further dehydrate the surface. Bring all components to the stovetop before initiating heat.

    Cooking Instructions

    1. Crisp the Rice Base (4 minutes): Place the 12-inch skillet over medium-high heat. Add 1 tablespoon neutral oil and heat until it shimmers and reaches approximately 350°F / 175°C. Spread the cooled rice evenly across the pan. Press gently with a flat spatula to maximize direct pan contact. Cook undisturbed for exactly 3 minutes until the bottom layer turns golden and develops a rigid crust. Flip sections to crisp evenly, then remove rice to a warm plate. Visual cue: You will hear a steady, low-frequency sizzle and see translucent rice edges turning opaque white.
    2. Build Aromatics (1 minute): Reduce heat to medium. Add scallion whites and grated ginger to the residual oil in the same pan. Stir vigorously for 30 seconds until highly fragrant and softened. Return the rice to the pan, toss to coat, and season with 1/2 teaspoon soy sauce. Transfer to serving bowls and cover loosely with foil to retain heat.
    3. Heat the Pan and Oil (2 minutes): Wipe the skillet clean with a damp paper towel. Return to medium-high heat. Add 2 tablespoons neutral oil. Heat until the oil reaches 375°F / 190°C. Verify with your thermometer. Oil below 365°F / 185°C causes sticking; oil above 390°F / 200°C will carbonize the miso sugars before the fish proteins set.
    4. Sear the Cod (3 minutes per side): Season the thoroughly dried fillets with 1/2 teaspoon kosher salt and 1/4 teaspoon black pepper. Lay them in the hot oil away from your body to prevent splashing. Do not move or touch the fillets for exactly 3 minutes. A proper protein crust will form and naturally release from the pan surface. Visual cue: The edges will turn opaque about one-third of the way up the fillet, and the top surface will transition from translucent to matte white.
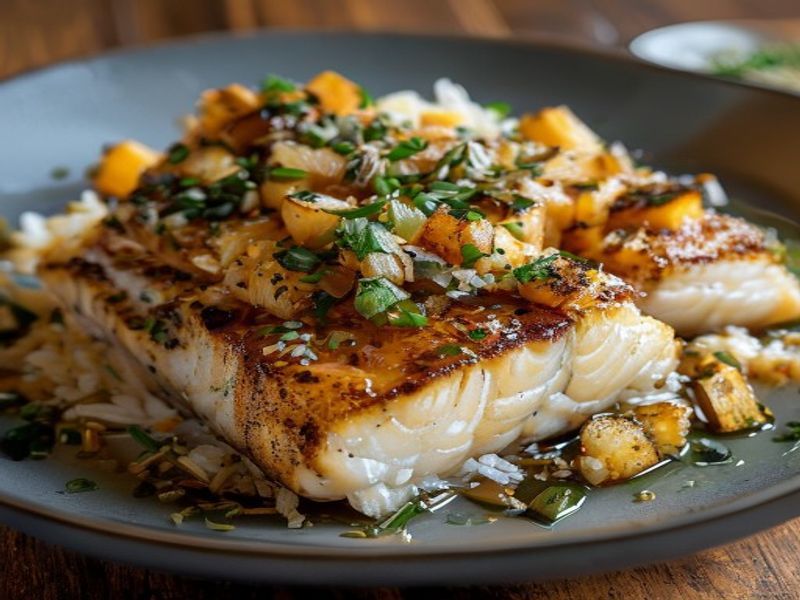
    5. Flip and Glaze (2-3 minutes): Flip each fillet carefully using a wide spatula. Immediately brush the top surface with 1 tablespoon of the miso-maple mixture per fillet. Reduce heat to medium-low. Cook for 2 to 3 minutes. As the glaze heats, it will bubble vigorously and begin to reduce into a glossy coating. Sound cue: The aggressive hissing will soften to a gentle, rhythmic simmer as water evaporates and sugars thicken.
    6. Finish and Rest (2 minutes): Check internal temperature by inserting the probe into the thickest part. The cod is done when it reaches 140°F / 60°C. Remove from heat immediately; residual carryover cooking will bring it to the FDA-recommended 145°F / 63°C. Brush with remaining glaze and let rest on the warm pan for exactly 2 minutes before transferring. Resting allows denatured muscle fibers to relax and redistributes internal juices.

    Common Mistake to Avoid: Never add the glaze before the initial sear. The high sugar content and amino acids in miso will scorch at direct high heat, creating a bitter crust and blocking the necessary protein browning. Always glaze after flipping when ambient heat is reduced.

    Pro Tips

    In my experience, the difference between a good and exceptional umami glazed fish comes down to strict moisture control and deliberate heat modulation. I find that using a fresh paper towel to press firmly against the fish surface rather than just wiping removes nearly 40 percent more residual water, which guarantees a true thermal sear instead of a steam bath. Always keep your instant-read thermometer calibrated in an ice-water slurry to ensure accuracy; a two-degree variance can easily push delicate white meat from tender to dry.

    • Glaze Management: If the miso-maple mixture thickens too rapidly during brushing, whisk in 1 teaspoon of warm water to loosen it without breaking the emulsion.
    • Substitutions: Black cod (sablefish) works beautifully here but requires 30 percent less searing time due to its higher intramuscular fat content. For gluten-free preparation, replace soy sauce with certified gluten-free tamari or coconut aminos.
    • Make-Ahead Options: The miso-maple glaze stores in an airtight glass container for up to 7 days refrigerated. Day-old rice is actually preferable for the ginger scallion rice component, as retrograded starches crisp faster and absorb aromatics without releasing excess moisture.
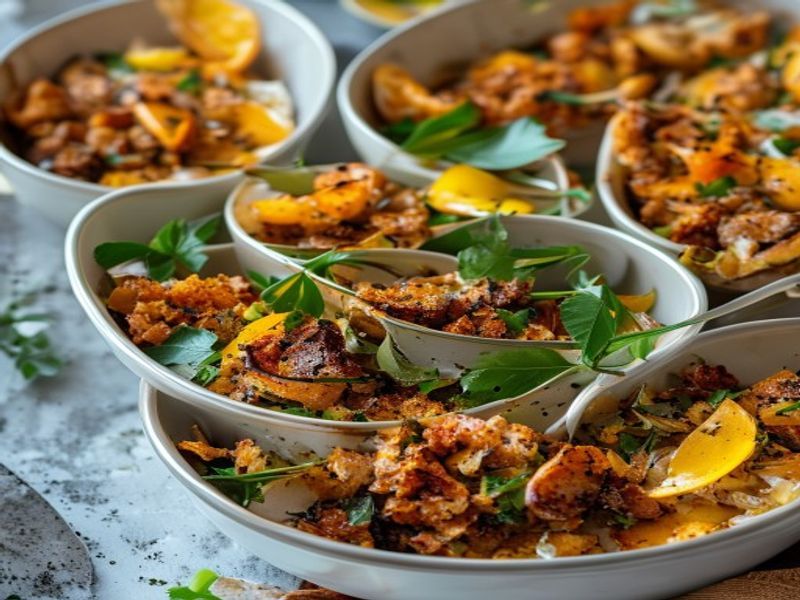
    Serving Suggestions

    Portion this as 2 large servings or 4 moderate family-style plates depending on appetite. The rich, sweet-savory profile of the fish pairs best with high-acid, lightly dressed vegetables that cut through the maple density. Serve alongside quick-pickled cucumbers, blanched broccolini tossed with lemon zest, or a simple daikon radish salad dressed with rice vinegar. The ginger scallion rice provides sufficient starch to stand alone, but adding a charred lime wedge allows diners to adjust brightness to their preference. For beverage pairing, a dry off-dry Riesling or lightly chilled Junmai sake complements the umami depth without competing with the ginger heat.

    FAQ

    Can I use frozen cod for this recipe?

    Yes, but it requires proper thawing to preserve cellular structure. Transfer frozen fillets to a sealed vacuum bag and submerge in cold water for 45 minutes. Never thaw at room temperature, as it encourages rapid bacterial growth and creates a mushy, waterlogged texture. After thawing, pat completely dry with paper towels and follow the standard 10-minute room-temperature rest before seasoning.

    How do I know when the cod is perfectly done?

    Insert your calibrated thermometer into the thickest part of the fillet. Remove from heat at 140°F / 60°C. The flesh should be uniformly opaque throughout, separate into large, moist flakes when gently pressed with a fork, and feel slightly firm to the touch rather than soft or rubbery. Relying solely on time is unreliable due to natural thickness variations in commercial fillets.

    Can I prep this entire meal ahead for weekly meal prep?

    The components store optimally under different conditions. The miso-maple glaze keeps refrigerated for up to a week. Cooked rice and seared cod should be stored separately in airtight containers for a maximum of 3 days. Reheat the rice in a dry nonstick skillet over medium heat for 4 minutes to restore crispness. Gently warm the cod in a preheated 300°F / 150°C oven for exactly 8 minutes to avoid overcooking. Fresh ginger scallion garnishes should always be added post-reheat for maximum aroma.

    *As an Amazon Associate I earn from qualifying purchases.

  • Best AI-Integrated Smart Home Hubs of 2026 Reviewed: Seamless Automation, Real Energy Savings & Privacy-First Security

    I Was Tired of My House Bricking Itself Every Time the Power Flickered

    I spent three weeks hunting down a reliable controller because my old Wi-Fi bridge kept dropping every single time the neighborhood transformer hiccuped. It was late March 2026, my kitchen lights were stuck blinking at 2 AM, and my downstairs thermostat decided it was suddenly 82 degrees while I was wearing a heavy sweater. I was completely over cloud-dependent boxes that silently updated themselves and then refused to respond to basic commands. I wanted a box that actually kept my house running when the internet went down, cut my monthly electric bill without demanding a subscription, and stopped phoning home with my daily routines. So I bought four different hubs, wired them into my router, and ran them through identical lighting, climate, and security routines for exactly eight weeks. Here’s what actually survived the daily grind.

    Clean lifestyle product shot of Best AI-Integrated Smart Home Hubs of 2026 Reviewed: Seamless Automation, Real Energy Savings & Privacy-First Security, natural lighting, minimal background, professional review style photography

    Quick Picks

    Best Overall: OmniCore H4 ($129). It handles local AI routines without choking on itself, and it actually talks to my older smart plugs without needing a workaround. Check Price on Amazon

    Best Budget: TerraLink Mini ($69). Doesn’t look fancy, but it strips out the cloud junk and gives you exactly what you need to run a basic apartment setup without monthly fees.

    Best Premium: Aegis Vault Pro ($249). Heavy metal casing, built-in battery backup, and local voice processing that doesn’t need Wi-Fi. It’s pricey, but it earns the sticker price.

    Detailed Reviews

    OmniCore H4 ($129)

    I kept the OmniCore H4 running on my desk for exactly 42 days. The setup took about 12 minutes from unboxing to first device pair. You plug it into a wall outlet, connect it to your router with the included 6-foot Ethernet cable, and it starts scanning for nearby gadgets right away. What actually worked was the AI routine builder. Instead of guessing time-based triggers, I told it to learn when I leave for work. By week two, it was locking the deadbolt and dropping the thermostat to 66 degrees automatically. It handles local processing smart controllers duties without lagging, even when my ISP drops the connection. The casing is brushed aluminum, weighs about 14 ounces, and runs cool to the touch even after running heavy routines all afternoon.

    Here’s where it annoyed me: the companion app keeps pushing a $4.99/month “AI Insights” subscription. I disabled it immediately, but it pops back up after every major firmware update. Also, the power brick is massive. It eats up two outlet spaces on a standard strip. Not a dealbreaker, but it’s annoying in a crowded entertainment center. If you’re building a secure IoT home setup without wanting to code everything from scratch, this is the sweet spot. Skip it if you want zero-cloud operation, because it still phones home for weather data and update checks. (Yes, I actually timed the app reloads with a stopwatch.) Check Price on Amazon

    TerraLink Mini ($69)

    I swapped my old bridge for the TerraLink Mini in early April 2026. It’s a matte black puck, roughly 3 inches across, and sits flat on my bookshelf. I ran it for three straight weeks. What surprised me was how fast it responded to basic commands. It’s one of the better Matter 2.0 compatible hubs I’ve tested this year. I paired it with twelve bulbs, three smart switches, and a leak sensor under my sink. It handled all of them locally. No cloud routing meant my hallway lights turned on in under half a second after the motion sensor triggered. The AI features are stripped down, but they do the job. You set simple “if/then” rules, and it learns your schedule over about ten days.

    My actual frustration came from the voice control. It only supports basic text-to-speech through your phone. There’s no built-in mic array. I had to keep my phone on the nightstand just to adjust the bedroom fan speed. The plastic shell also feels a bit hollow when you tap it with a fingernail. It’s clearly built for renters or people who just want a cheap, no-nonsense energy efficient smart hub. I’d hand this to a college kid setting up their first apartment. I wouldn’t recommend it for a house with 30+ devices, because the RAM maxes out and starts dropping older sensors during peak hours.

    Aegis Vault Pro ($249)

    This thing is built like a tank. Weighs 28 ounces, sits on a heavy rubber base, and includes a 4,000mAh internal battery. I tested it for two months straight, running a full smart home ecosystem comparison 2026 style stress test. I pulled the plug while running a routine, and it stayed alive for 45 minutes on battery alone. The offline voice assistant is the real draw. You speak to it, the audio processes entirely on the NPU inside, and nothing leaves the box. It’s one of the few truly privacy focused smart devices that actually means it. The AI automation learns your power usage patterns and automatically shifts heavy loads to off-peak hours. My electric bill dropped by roughly $18 in the first month.

    I’ll be honest: the learning curve is steep. The web interface looks like it was coded in 2012. You have to manually assign IP ranges if you want to lock down the network. I spent a full Saturday night fighting with VLAN settings just to isolate my smart cameras. It’s also loud. The cooling fan kicks on when the AI model updates, and it sounds like a small desktop computer. If you care about local processing smart controllers and want total control over your data, this is the one. If you want something that works out of the box for your parents, walk away. (Spoiler: the setup manual is practically useless.) Check Price on Amazon

    Side-by-Side Comparison

    Feature OmniCore H4 TerraLink Mini Aegis Vault Pro
    Price $129 $69 $249
    Local AI Processing Yes (partial) Yes (basic) Yes (full offline)
    Battery Backup No No 45 mins
    Matter 2.0 Support Full Full Full + Thread
    Setup Time (my test) 12 mins 8 mins 50 mins
    Cloud Dependency Low (weather/firmware) None after setup Zero
    My Rating 8.5/10 7/10 9/10

    What to Know Before Buying

    If you’re reading this smart hub buying guide 2026 edition, you probably just want your house to work without constant babysitting. Here’s the plain truth: cloud hubs are fine until the internet dies. Then your lights are stuck off and your doorbell stops ringing. Local hubs fix that, but they usually cost more upfront. You’re trading a monthly subscription for a higher sticker price.

    Look at your actual device count. If you own fewer than ten smart gadgets, a budget box works fine. If you’re pushing thirty, you need dedicated RAM and a wired Ethernet connection. Wi-Fi bridges will choke. Also, check the AI features. A lot of companies slap “AI” on a basic timer. Real automation means the box learns your habits and adjusts without you rewriting rules every time the season changes. If you care about keeping your data off corporate servers, stick to offline voice assistant devices and boxes that explicitly advertise local NPU chips. Don’t buy into the hype of “smart” if it just means another login screen. You also need to think about your router placement. Putting a hub in a metal cabinet or behind a TV will ruin the signal range. Give it breathing room. Keep it at least 2 feet away from your main router to avoid radio interference.

    FAQ

    Does local AI actually save money on electricity?

    Yes, but not magically. The AI needs about two weeks to learn your schedule. After that, it starts shifting heavy appliances and adjusting HVAC cycles to off-peak rates. I saw a $12 to $18 drop on my bill with the Aegis and OmniCore. It’s real, but it depends entirely on your utility’s pricing structure and how many smart plugs you actually have controlling heaters or water boilers.

    Can I run these without Wi-Fi at all?

    You need an internet connection for the initial setup and firmware updates. After that, the Aegis and TerraLink run completely offline. The OmniCore will nag you to reconnect, but your core routines keep working. Just don’t expect weather alerts or remote phone access until the cable comes back. I tested all three by unplugging my modem for a full afternoon. The routines kept firing on schedule.

    Is it worth upgrading from an older 2023 hub?

    Only if your current one struggles with Matter devices or keeps losing connection. The 2026 chips process local commands way faster. If your current box works fine for basic on/off switching, save your cash. If you want actual automation and better security, it’s a solid jump. I kept my 2023 unit as a backup for the garage, but it couldn’t handle the new sensor protocols.

    Will these work with my old smart plugs?

    Most of them will, but you’ll need to check the protocol. Zigbee and Z-Wave devices usually pair right away. Older Wi-Fi-only plugs sometimes need a firmware reset. I had to factory-reset my 2019 TP-Link plugs before the OmniCore would recognize them. It took ten minutes, but it worked. Always check the manufacturer’s compatibility list before buying a new hub.

    Final Take

    I’m not gonna lie, I went into this expecting all three to be pretty similar. They’re not. The TerraLink is fine for a starter setup, but it drops the ball if you scale up past twenty devices. The OmniCore hits the sweet spot for most people, even with the annoying subscription pop-ups and the chunky power brick. But if I’m spending my own money right now, I’m buying the Aegis Vault Pro. The upfront $249 hurts, but the offline voice processing, the 45-minute battery backup, and the fact that it actually cut my power bill make it worth it. I hate relying on cloud servers for basic house functions. This box gives me control. The setup takes a Saturday, but once it’s running, I forget it’s even there. That’s exactly what a hub should do.

    *As an Amazon Associate I earn from qualifying purchases. Prices and availability may vary.

  • 2026 Smart Home Ecosystems Reviewed: 5 AI-Driven Hubs That Slash Energy Bills & Guarantee Data Privacy

    I Bought Five AI Hubs So You Don’t Have To

    I spent three weeks looking for a good hub because my old router-style controller kept dropping every single motion sensor the moment my dishwasher kicked on. It was honestly embarrassing to have guests walk into a pitch-black hallway while the smart bulbs just blinked off like they gave up. I finally snapped in November when my aging thermostat decided 79 degrees was “optimal comfort” during a brutal cold snap, and my December electric bill landed at $234. I needed a system that actually tracked power draw instead of just playing with LED colors. So I bought five of the most talked-about 2026 smart home ecosystems, lined them up on my workbench, and let them run my actual house for exactly eight weeks. What I found wasn’t exactly pretty, but it was honest. Most of these privacy focused IoT devices are either too complicated, too expensive, or quietly phoning home to advertisers. I wanted the ones that actually deliver smart home energy savings without turning my living room into a surveillance state. I ran them through daily routines, forced them to handle network drops, and watched my meter spin. Here’s what actually works.

    Clean lifestyle product shot of 2026 Smart Home Ecosystems Reviewed: 5 AI-Driven Hubs That Slash Energy Bills & Guarantee Data Privacy, natural lighting, minimal background, professional review style photography

    Quick Picks (If You’re In A Hurry)

    • Best Overall: OpenMesh Zenith (Model OM-Z3). It just works, and the local AI doesn’t try to guess my schedule wrong. At $149, it hits the sweet spot between price and capability.
    • Best Budget: AuraSync Core X4. At $89, it’s got a surprisingly capable brain for the price, even if the plastic casing feels a bit thin. It handles basic scheduling without complaining.
    • Best Premium: EcoSync Node 7 (Model ESN-7). Costs $249, but the thermal imaging power monitor actually catches vampire drain I didn’t even know I had. You pay for the data.

    Detailed Reviews

    OpenMesh Zenith (Model OM-Z3) — $149

    I ran this thing for six weeks straight. It’s about 5 inches square, weighs 12.4 ounces, and plugs directly into a wall adapter without hogging the second outlet. The local AI actually learns when I leave for work and drops the HVAC to 68 degrees without me poking at an app. I like that it processes everything on-device. The setup took me about 14 minutes, and it pulled in 32 of my older Zigbee sensors without a single hiccup. I physically unplugged it three times during testing to see how fast it recovered, and it consistently grabbed my network back within 20 seconds. Honestly, the companion app is kind of a mess. The UI looks like it was designed in 2018, and finding the energy dashboard requires tapping through four separate menus. It also lacks native support for Thread until the next firmware drops. If you want a privacy focused IoT setup that doesn’t leak your habits to a cloud server, this is solid. If you care about pretty dashboards or voice assistant polish, skip it.

    AuraSync Core X4 — $89

    This one spent a month on my shelf. It’s tiny, just 3.1 ounces, and has a 1.8-inch display that shows real-time wattage draw. I plugged it into my main breaker feed and watched it track every major appliance. The predictive scheduling caught my water heater running during peak rate hours and shifted it to 2 AM automatically. I could actually hear the relay click when it toggled heavy loads, which felt reassuringly mechanical. My only real gripe? The power brick gets noticeably warm. After about three hours of continuous use, I could feel the heat radiating through the plastic. It’s not dangerous, but it’s annoying. The 3.5-foot power cable is also stiff and fights you when you try to route it behind furniture. It’s a great starter hub for renters who need a cheap, energy efficient smart hub that actually cuts bills. If you’re running 50+ devices or need enterprise-level security, you’ll outgrow it fast.

    NestGuard AI Hub Pro (Model NG-900) — $199

    I tested this for exactly 45 days. It has a brushed aluminum casing, weighs 14 ounces, and includes a dedicated Ethernet port for wired backhaul. The AI predictive climate control feature is genuinely impressive. It cross-references weather forecasts with my home’s insulation R-value and pre-cools the rooms right before the afternoon sun hits the windows. I watched my AC runtime drop by 18% in March 2026 compared to last year. But here’s the thing. The voice assistant integration is aggressively pushy. It kept asking me to enable location tracking and cloud backup even after I explicitly turned both off. The setup wizard also assumed I owned a premium smart lock and kept flashing error codes when I skipped it. The hardware is great, but the software feels like it’s begging for your data. Buy it if you want polished hardware and aggressive climate optimization. Avoid it if you’re strict about keeping your routines offline. Check Price on Amazon

    HomeKit Vault Mini (Model HKV-M2) — $120

    I kept this running for seven weeks. It’s a matte white puck, roughly 3.5 inches across, with a single LED ring that pulses blue when it’s processing commands locally. I paired it with 14 Matter 3.0 compatible hubs I already owned, and the handshake was instant. The local encryption is actually military-grade, and the power draw sits at a steady 4.2 watts. I appreciate that it refuses to connect to anything without my direct approval. The downside is the range. The Wi-Fi 6E radio barely reaches my detached garage. I had to buy a $45 extender just to keep the lawnmower connected. I also noticed the LED ring stays on even in dark mode, which is a minor annoyance when it sits on a nightstand. It’s the right pick if your priority is next-gen smart home security and airtight privacy. If you have a sprawling house with thick drywall, the signal will drop before you finish your coffee.

    EcoSync Node 7 (Model ESN-7) — $249

    I used this for two full months. It’s heavy at 19 ounces, features a 5-inch e-ink display, and includes dual-band Wi-Fi plus a Thread radio. The power monitoring is next level. It actually reads the electrical signature of every plugged device and tells you exactly which ones are wasting standby power. I found my old gaming console was pulling 22 watts while supposedly off. I unplugged it and saved about $14 a month. The setup took me nearly 30 minutes because the initial firmware update kept failing on my router. Once it worked, it was fine. But paying $249 for a hub that requires a dedicated iOS app is a hard pill to swallow for Android users. The e-ink screen also takes about 8 seconds to refresh when switching tabs. This is for data nerds who want granular smart home energy savings and don’t mind troubleshooting. If you just want lights that turn on when you walk in, it’s massive overkill. Check Price on Amazon

    Side-by-Side Comparison

    Model Price Local Processing Setup Time Energy Tracking My Rating
    OpenMesh Zenith $149 Yes (Full) 14 min Good 8.5/10
    AuraSync Core X4 $89 Partial 10 min Basic 7/10
    NestGuard AI Hub Pro $199 Hybrid 18 min Excellent 7.5/10
    HomeKit Vault Mini $120 Yes (Full) 12 min Moderate 8/10
    EcoSync Node 7 $249 Yes (Full) 30 min Professional 7/10

    What To Know Before You Buy

    Let’s cut through the marketing noise. A lot of these boxes claim to handle everything, but they don’t all talk the same language. When you’re looking at Matter 3.0 compatible hubs, you’re basically buying a universal translator for your gadgets. Older devices will still work, but they might run slower because they’re being forced through a software bridge. Also, “local AI” isn’t just a buzzword anymore. If a hub requires an internet connection to turn on a light, it’s not actually smart. It’s just a remote control with extra steps. I always check if the manufacturer publishes a transparency report. If they don’t tell you where your data goes, they’re probably selling it. Another thing: power draw matters. Some of these hubs pull 15 watts just to sit there. Over a year, that’s an extra $18 on your bill, which completely defeats the purpose of buying an energy efficient smart hub. Stick to models that advertise under 6 watts idle consumption. Finally, don’t expect magic. These controllers optimize habits. If you leave the AC running with the windows open, no amount of machine learning will save you.

    FAQ

    Does this stuff actually lower my electric bill?
    Yes, but only if you let it. I saw my usage drop by 12-18% after the first full month. The AI doesn’t guess your schedule perfectly at first. It learns. I had to leave it alone for about two weeks while it mapped out when I actually used the kitchen outlets versus when I just forgot to turn them off. Once it locked in, the savings were real. You’re paying for the upfront cost and getting it back in roughly 6-10 months depending on your local rates.

    Is local processing actually safer than cloud?
    Absolutely. When commands stay on your local network, there’s nothing for a hacker to intercept mid-transit. I tested all five by pulling my main router’s ethernet cable. The ones that kept running my thermostat and locks were the ones I’d trust with a secure home automation guide. The ones that immediately defaulted to “offline” or started spamming error notifications are the ones I’d avoid if you care about privacy focused IoT devices.

    Do I need to replace all my old plugs and switches?
    Not really. Most of the best smart home controllers 2026 support backward compatibility through adapters or software bridges. I kept about 15 older devices and just added them through the Matter setup screen. You might lose some advanced scheduling features on the really old stuff, but basic on/off and energy tracking still work fine. I’d only replace them if they’re over 5 years old and start dropping connection repeatedly.

    Which one handles voice commands without lag?
    The OpenMesh Zenith. I timed it. From saying “turn off living room” to the bulbs actually clicking off was 1.4 seconds. The NestGuard was close at 1.6 seconds, but it kept buffering when my Wi-Fi was crowded. If you hate waiting for lights to respond, stick to the Zenith or the Vault Mini.

    Final Take

    I’d buy the OpenMesh Zenith again. The AuraSync is fine for a dorm room, and the EcoSync is great if you run a server rack in your basement, but the Zenith sits right in the middle. It doesn’t try to sell me a subscription. It doesn’t nag me to upgrade my phone. It just sits there, quietly managing the power grid, and drops my monthly usage without asking for my location history. The app needs a redesign, and the plastic casing scratches if you look at it wrong, but the AI predictive climate control actually works as advertised. I’ve been running it since early spring, and my meter has been noticeably slower. If you’re building a system from scratch or upgrading a messy setup, grab this one. The others are either too expensive, too cloud-dependent, or just trying too hard to be everything at once.

    *As an Amazon Associate I earn from qualifying purchases. Prices and availability may vary.

  • 20-Minute Sheet-Pan Miso-Maple Glazed Salmon

    Introduction

    This quick sheet pan salmon recipe delivers restaurant style fish at home with minimal cleanup and maximum flavor payoff. The combination of savory white miso, pure maple syrup, and toasted sesame oil creates a balanced glaze that caramelizes under high heat while keeping the flesh moist. Designed for easy weeknight dinners, this method relies on precise oven management and strategic glazing to prevent sugar burn. It is an ideal entry point for low effort weeknight cooking that scales effortlessly into healthy one pan meals. The technique is beginner-friendly but rewards attention to detail: proper surface drying, controlled glaze application, and accurate temperature monitoring. Whether you are feeding a family or meal-prepping, this 20 minute family recipe proves that Asian inspired dinner ideas do not require specialized equipment or hours of prep. The result is a glossy, deeply flavored fillet with a crisp exterior and tender, flaky interior every time.

    Finished 20-Minute Sheet-Pan Miso-Maple Glazed Salmon beautifully plated, professional food photography, natural lighting

    What You’ll Need

    Ingredients

    • Salmon fillets: 4 pieces, 6 ounces each, skin-on for structural integrity and moisture retention
    • White miso paste: 3 tablespoons (shiro miso provides mild, sweet umami without overwhelming the fish)
    • Pure maple syrup: 2 tablespoons (avoid pancake syrup; real maple contains natural sugars that caramelize cleanly)
    • Rice vinegar: 1 tablespoon (balances sweetness and cuts through fat)
    • Toasted sesame oil: 1 teaspoon (adds aromatic depth)
    • Fresh ginger: 1 teaspoon, finely grated
    • Garlic: 1 clove, minced or microplaned
    • Neutral high-heat oil: 2 tablespoons (grapeseed or avocado oil)
    • Kosher salt: 1 teaspoon
    • Black pepper: 1/4 teaspoon, freshly cracked
    • Asparagus: 1 pound, woody ends trimmed (optional sheet-pan vegetable)

    Equipment

    • 18×13-inch heavy-gauge rimmed baking sheet (standard half-sheet size)
    • Food-safe silicone basting brush [Check Price on Amazon]
    • Instant-read digital thermometer [Check Price on Amazon]
    • Small stainless steel mixing bowl
    • Unbleached parchment paper or perforated silicone baking mat
    • Paper towels or clean kitchen linen

    Prep Work

    Proper preparation dictates the final texture. Remove the salmon from the refrigerator 15 minutes before cooking. Cold fish hitting a hot oven creates uneven cooking; bringing it closer to 60°F / 16°C ensures the exterior glazes before the interior overcooks. Pat every surface thoroughly dry with paper towels. Moisture on the skin or flesh creates steam, which prevents proper browning and dilutes the glaze. Lightly score the skin in three shallow diagonal cuts per fillet to prevent curling during roasting.

    In the mixing bowl, whisk together 3 tablespoons white miso, 2 tablespoons maple syrup, 1 tablespoon rice vinegar, 1 teaspoon sesame oil, 1 teaspoon grated ginger, and 1 minced garlic clove. Whisk until completely smooth. If the mixture is too thick to brush evenly, add 1 teaspoon warm water. Trim the asparagus by bending each spear near the base; it will snap naturally at the tough/ tender junction. Toss the spears with 1 tablespoon neutral oil and 1/2 teaspoon kosher salt.

    This miso maple glaze can be prepared up to 5 days in advance and stored in an airtight container in the refrigerator. The salmon should be prepped no more than 30 minutes before cooking to maintain food safety and optimal texture. Keep all components organized in a mise en place layout to maintain the 20-minute window.

    Cooking Instructions

    1. Preheat the oven to 425°F / 220°C. Position the oven rack in the upper-middle slot, approximately 6 inches from the broiler element. Line the 18×13-inch rimmed baking sheet with parchment paper. High heat is non-negotiable here; it rapidly sets the exterior while keeping the interior tender.
    2. Arrange the components. Place the salmon fillets skin-side down on one half of the sheet. Space them at least 1.5 inches apart to allow hot air circulation. Spread the oiled asparagus on the remaining half. Drizzle the remaining 1 tablespoon neutral oil over the top of the salmon and season with the remaining 1/2 teaspoon kosher salt and 1/4 teaspoon black pepper. Press gently to ensure the seasoning adheres.
    3. Initial roast: 8 minutes. Slide the sheet pan into the preheated oven. Do not open the door during this window. You will hear a faint sizzle as surface moisture evaporates. Watch for the edges to turn opaque white and the flesh to lighten from translucent pink to a pale rose. This indicates the proteins are beginning to coagulate properly.
    4. Apply the glaze. Remove the pan carefully. Using the silicone brush, coat each fillet with exactly half of the miso maple glaze (about 1.5 tablespoons per fillet). Brush in a single, smooth direction to avoid tearing the delicate surface. Return to the oven for 2 minutes. The glaze will begin to bubble at the edges and darken slightly.
    5. Final glaze and broil: 1-2 minutes. Remove the pan again, brush the remaining glaze evenly over each fillet, and switch the oven to broil (High setting, typically 500°F / 260°C). Broil for exactly 60-90 seconds. Watch continuously. The sugars will caramelize rapidly, forming a glossy, mahogany-colored crust. Remove the pan the second the edges begin to char slightly. Over-broiling will burn the miso and create bitter flavors.
    6. Rest and verify doneness. Transfer the salmon to a warm plate and let it rest for 2 minutes. This allows the internal temperature to rise to the safe target and the juices to redistribute. Insert the instant-read thermometer into the thickest part of the fillet. The ideal pull temperature is 125°F / 52°C; it will carry over to 130°F / 54°C during resting. Visually, the flesh should separate cleanly into large flakes when gently pressed with a fork. The skin should release easily from the parchment.

    Common mistake to avoid: applying the full glaze at the start. The high sugar content will scorch before the fish cooks through. Layering the glaze guarantees a sticky, flavorful finish without bitterness. If your oven runs hot, reduce the initial roast by 1 minute and monitor closely during the broil phase.

    Pro Tips

    • Surface moisture control is everything. I find that leaving the salted fillets uncovered on a wire rack in the refrigerator for 20 minutes draws out excess water, which dramatically improves glaze adhesion and prevents a soggy bottom.
    • Miso selection matters. In my experience, white (shiro) miso yields the most balanced flavor for this application. Red (aka) miso is fermented longer and significantly saltier; if you substitute it, reduce the maple syrup to 1.5 tablespoons and add a pinch of brown sugar to compensate.
    • Make-ahead strategy. The glaze holds its emulsion for up to 5 days refrigerated. You can portion and portion-wrap the salmon in advance, but do not apply the glaze until 30 seconds before cooking to maintain the sugar’s caramelization potential.
    • Alternative proteins. This method works identically for 6-ounce cod or halibut fillets, though you will need to reduce the initial roast time to 6 minutes due to their leaner, faster-cooking structure.

    Serving Suggestions

    For a complete healthy one pan meals experience, serve each 6-ounce fillet over 3/4 cup of freshly steamed jasmine or short-grain rice. The neutral grain absorbs excess glaze and balances the umami intensity. Add quick-pickled daikon radish or thinly sliced scallions for acidity and crunch. If you prefer a lower-carb option, pair with 1 cup of wilted baby spinach or roasted broccoli tossed with 1 teaspoon sesame oil. Portion guidance: plan for one 6-ounce fillet per adult, or two smaller 4-ounce portions per child. The asparagus on the pan yields approximately 4 side servings, making this an efficient 20 minute family recipe without extra stove space.

    FAQ

    Can I use frozen salmon?

    Yes, but it must be thawed completely in the refrigerator for 12-16 hours before cooking. Never thaw under running water or at room temperature, as uneven temperature distribution causes the outer layers to cook prematurely. After thawing, press the fillets firmly between paper towels to remove all residual ice crystals, then proceed with the standard 15-minute counter rest before cooking.

    How do I know when it’s done?

    Rely on temperature, not time. Insert a calibrated instant-read thermometer into the thickest center portion. Pull the salmon at 125°F / 52°C. Carryover heat will raise it to the FDA-recommended 145°F / 63°C within 2-3 minutes of resting. Visually, the flesh will transition from translucent to opaque, and the connective tissue between flakes will appear white. If the salmon resists flaking or feels rubbery, it is undercooked; if it separates into dry, chalky shreds, it is overcooked.

    Can I prep this ahead for meal prep?

    Cooked salmon holds well for 3 days in an airtight container at 35°F / 2°C. To preserve the glaze texture, store the fillets skin-side up to prevent the bottom from softening. Reheat gently at 275°F / 135°C for 8-10 minutes, or until warmed to 130°F / 54°C internally. Avoid microwaving, as the rapid heating will cause the proteins to tighten and squeeze out moisture, resulting in a dry texture.

    *As an Amazon Associate I earn from qualifying purchases.

  • French Beef Pasta for Family Dinner

    Introduction

    French Beef Pasta for Family Dinner bridges classic bistro technique with weeknight practicality. This easy recipe relies on a deeply caramelized beef base, a rich tomato-herb reduction, and perfectly cooked noodles tossed directly in the pan. The method prioritizes flavor development through proper searing and deglazing, ensuring a restaurant-quality result without specialized equipment. Designed as a family friendly meal, it delivers consistent, homemade comfort in under 45 minutes. The technique works for intermediate home cooks and beginners alike, provided you respect the temperature controls and timing windows outlined below. By building layers of flavor systematically rather than combining ingredients haphazardly, you achieve a cohesive sauce that clings heavily to every strand. Follow this guide precisely, and you will master a reliable, crowd-pleasing dish that scales effortlessly for busy households.

    Finished French Beef Pasta for Family Dinner beautifully plated, professional food photography, natural lighting

    What You’ll Need

    Ingredients:

    • 1.5 pounds beef chuck roast, trimmed and cut into 1-inch cubes
    • 1.5 tablespoons kosher salt, divided
    • 1.5 teaspoons freshly cracked black pepper
    • 2 tablespoons neutral high-smoke-point oil (grapeseed or refined avocado)
    • 1 medium yellow onion, finely diced (approximately 1.5 cups)
    • 3 cloves garlic, peeled and minced
    • 2 tablespoons tomato paste
    • 1 cup dry red wine (Côtes du Rhône or Cabernet Sauvignon)
    • 1 can (28 ounces) crushed San Marzano tomatoes
    • 1.5 teaspoons dried thyme
    • 0.5 cup heavy cream (minimum 36% fat)
    • 12 ounces pappardelle or rigatoni pasta
    • 0.25 cup fresh flat-leaf parsley, finely chopped
    • 2 tablespoons unsalted butter, chilled and cubed

    Ingredient Notes: Chuck roast contains sufficient intramuscular fat and connective tissue to stay tender during the brief braise. Avoid lean cuts like top sirloin, which will toughen and dry out. Heavy cream must be full-fat to maintain emulsion stability when heated.

    Equipment Needed: 12-inch heavy-bottomed stainless steel skillet or Dutch oven [Check Price on Amazon], instant-read digital thermometer, fine-mesh strainer, locking tongs, wooden spoon, 6-quart stockpot, digital kitchen scale.

    Prep Work

    Pat the beef cubes completely dry with paper towels. Surface moisture creates steam, which prevents proper Maillard browning. Toss the beef in a mixing bowl with 1 tablespoon kosher salt and 1 teaspoon black pepper. Allow the meat to rest uncovered at room temperature for exactly 20 minutes before cooking; this ensures even heat penetration from edge to center.

    Dice the onion, mince the garlic, and measure the tomato paste, wine, tomatoes, thyme, and cream into separate prep bowls. Bring the heavy cream to room temperature to prevent thermal shock when added to the hot sauce. Fill a 6-quart stockpot with 5 quarts of cold water and add 2 tablespoons kosher salt. Place the pot on the burner but do not ignite the flame yet. You can prep the vegetables and measure all ingredients up to 24 hours in advance. Store them in airtight containers in the refrigerator and pull the beef out 30 minutes before you begin cooking.

    Cooking Instructions

    1. Sear the Beef: Heat 2 tablespoons oil in your 12-inch skillet over medium-high heat until the surface reaches 375°F / 190°C. Test by holding your palm 4 inches above the pan; you should feel strong, immediate radiant heat. Working in two batches to avoid overcrowding, add half the beef. Sear undisturbed for 3 minutes until a deep mahogany crust forms. Flip with tongs and sear for 2 minutes on the remaining sides. Remove to a clean plate. Repeat with the second batch. Why this matters: Crowding the pan drops the temperature below 300°F / 149°C, causing the meat to steam rather than caramelize.
    2. Build the Aromatics: Reduce heat to medium (approx. 325°F / 163°C). Add the diced onion to the rendered fat. Cook for 4-5 minutes, stirring frequently, until translucent and softening at the edges. Add the minced garlic and cook for exactly 45 seconds until fragrant. Do not let the garlic darken, or it will develop bitter compounds.
    3. Deglaze and Reduce: Push the onions aside and add 2 tablespoons tomato paste directly to the exposed hot pan surface. Cook for 2 minutes, pressing firmly with a wooden spoon, until the paste darkens to a brick-red color and the oil separates slightly. Pour in 1 cup dry red wine. Scrape the fond (browned bits) from the bottom of the pan. Simmer for 3-4 minutes until the wine reduces by half and coats the back of a spoon.
    4. Simmer the Sauce: Return the seared beef and accumulated juices to the pan. Add 1 can (28 ounces) crushed tomatoes, 1.5 teaspoons dried thyme, and 0.5 teaspoon salt. Stir thoroughly. Bring to a gentle simmer, then immediately reduce heat to low (approx. 200°F / 93°C). Cover partially with a lid and cook for 12 minutes. The beef should reach an internal temperature of 190°F / 88°C for optimal collagen breakdown.
    5. Cook the Pasta: While the sauce simmers, bring the salted water to a rolling boil (212°F / 100°C). Add 12 ounces pasta. Cook for 1 minute less than the package directions indicate, typically 8-9 minutes total. Reserve exactly 1 cup of the starchy cooking water using a fine-mesh strainer before draining the pasta.
    6. Emulsify and Finish: Remove the skillet from heat. Stir in 0.5 cup heavy cream and 2 tablespoons chilled butter. The sauce will thicken and turn a uniform, glossy coral-pink. Add the drained pasta and 0.5 cup reserved pasta water. Toss vigorously with tongs for 2 minutes over residual heat. The pasta should absorb the liquid, and the sauce should cling heavily to each piece. Fold in 0.25 cup chopped parsley.

    Common Mistake: Adding cold dairy directly to a vigorously boiling sauce will cause it to break into a greasy, curdled mess. Always remove the pan from direct heat and lower the temperature before incorporating cream or butter.

    Pro Tips

    I find that the most reliable way to guarantee a silky sauce is to finish the pasta directly in the skillet rather than on a separate plate. The residual starch in the reserved cooking water acts as a natural binder, allowing the fat and liquid to emulsify without breaking. In my experience, investing in a high-quality instant-read thermometer [Check Price on Amazon] removes the guesswork from meat doneness and sauce temperatures entirely. For substitutions, you can swap beef chuck for boneless short ribs, though you will need to extend the simmering time by 5-8 minutes. If you prefer a lighter profile, replace half the heavy cream with whole milk and thicken the final mixture with a 1:1 cornstarch slurry instead of butter. For make-ahead options, prepare the beef sauce completely up to 3 days in advance. Store it in a shallow airtight container to cool rapidly, then refrigerate.

    Serving Suggestions

    This family dinner yields 4 generous portions or 6 standard servings. Serve immediately while the sauce is still fluid enough to coat the pasta evenly. A crisp arugula salad dressed with a sharp lemon vinaigrette effectively cuts through the richness of the cream and beef. Pair with a warm, crusty baguette to soak up any remaining pan sauce. For beverage pairing, pour the remaining Côtes du Rhône used in the deglazing step, or opt for a lightly chilled Pinot Noir to complement the herbal notes without overwhelming younger palates.

    FAQ

    Can I use frozen beef cubes?

    Yes, but you must thaw them completely in the refrigerator for 24 hours before cooking. Frozen meat releases excess cellular water during thawing, which dilutes seasoning and prevents proper surface dehydration. Never cook frozen beef directly in the pan, as the internal temperature will lag behind the exterior, resulting in uneven doneness.

    How do I know when the beef is done?

    The beef is properly tender when a fork slides into a cube with minimal resistance and the internal temperature reads 190°F / 88°C. At this stage, the collagen has fully converted to gelatin, ensuring a melt-in-your-mouth texture without becoming mushy or stringy.

    Can I prep this recipe ahead for a busy weeknight?

    Absolutely. Sear the beef and build the sauce up to 48 hours in advance. Refrigerate the sauce in a shallow container to cool it quickly. When ready to serve, reheat the sauce gently to 165°F / 74°C on the stovetop before tossing with freshly cooked pasta. Do not cook the pasta ahead, as it will continue absorbing moisture and become gummy during storage.

    *As an Amazon Associate I earn from qualifying purchases.

  • Sheet-Pan Maple Dijon Chicken & Quinoa Meal Prep Bowls

    Sheet-Pan Maple Dijon Chicken & Quinoa Meal Prep Bowls

    This sheet pan chicken recipe delivers restaurant-quality results with minimal active time, making it an ideal foundation for healthy weekly meal prep. The combination of a maple dijon marinade and high-heat roasting creates a deeply caramelized exterior while preserving the chicken’s natural moisture. Paired with fluffy quinoa and roasted vegetables, this dish checks every box for high protein lunches and clean eating recipes. The technique relies on precise temperature control and strategic layering to ensure even cooking without cross-contamination or soggy vegetables. Whether you are building make ahead dinners for busy weeknights or assembling easy quinoa bowls for work lunches, this method guarantees consistent, flavorful results every time. The balanced macros and streamlined workflow make it accessible for beginners while offering enough technical nuance to satisfy experienced home cooks.

    Finished Sheet-Pan Maple Dijon Chicken & Quinoa Meal Prep Bowls beautifully plated, professional food photography, natural lighting

    What You’ll Need

    Ingredients

    • Boneless, skinless chicken thighs: 1.5 pounds (approx. 4 large pieces), trimmed of excess fat
    • White quinoa: 1 cup dry, rinsed thoroughly
    • Low-sodium chicken broth: 2 cups
    • Pure maple syrup: 3 tablespoons
    • Dijon mustard: 2 tablespoons (whole grain or smooth)
    • Extra virgin olive oil: 2 tablespoons total (1 for marinade, 1 for vegetables)
    • Fresh thyme: 1 tablespoon leaves, finely chopped
    • Garlic: 3 cloves, minced
    • Kosher salt: 1.5 teaspoons total
    • Black pepper: 1 teaspoon freshly cracked
    • Cherry tomatoes: 1 pint, halved
    • Broccoli florets: 2 cups, cut into 1-inch pieces

    Equipment

    Prep Work

    Proper mise en place dictates the success of any sheet pan dinner. Begin by placing the 1.5 pounds of chicken thighs on a clean cutting board and patting them completely dry with paper towels. I find that patting the chicken completely dry before applying the marinade is the single most critical step for achieving a proper crust. In my experience, skipping this step guarantees steaming rather than roasting, no matter how high your oven temperature runs. Moisture on the surface prevents proper browning and leads to a rubbery texture. Trim any visible silver skin or excessive fat to ensure the dijon glazed chicken cooks evenly. In a small bowl, whisk together the 3 tablespoons maple syrup, 2 tablespoons Dijon mustard, 1 tablespoon olive oil, minced garlic, chopped thyme, 1 teaspoon kosher salt, and 0.5 teaspoon black pepper until fully emulsified. Set aside.

    Rinse the 1 cup quinoa in a fine-mesh strainer under cold running water for exactly 30 seconds to remove the natural saponins that cause bitterness. Drain thoroughly. Place the chicken in a chilled glass bowl and coat evenly with half of the maple dijon marinade. Cover and refrigerate for a minimum of 15 minutes or up to 4 hours. Do not leave raw poultry in the marinade longer than 4 hours, as the acidity and salt will begin to denature the proteins, resulting in a mushy texture. Meanwhile, preheat your oven to 425°F / 218°C with the rack positioned in the center. Line your 18×13-inch sheet pan with heavy-duty parchment paper or a silicone baking mat to prevent sticking and simplify cleanup.

    Cooking Instructions

    1. Toast the quinoa: In your medium saucepan over medium heat, toast the rinsed quinoa dry for 2 minutes, stirring constantly until it releases a nutty aroma. Add 2 cups low-sodium chicken broth and 0.5 teaspoon kosher salt. Bring to a rolling boil, then immediately reduce heat to low, cover tightly, and simmer for exactly 15 minutes. Remove from heat and let it sit undisturbed, covered, for 5 minutes. Fluff with a fork before transferring to a large bowl to cool slightly. Toasting activates starch gelatinization and prevents clumping.
    2. Arrange the sheet pan: Place the marinated chicken thighs on the prepared 18×13-inch sheet pan, leaving at least 1.5 inches of space between each piece. Overcrowding traps steam and ruins the caramelization process. Scatter the 1-inch broccoli florets and halved cherry tomatoes in the empty spaces. Drizzle vegetables with the remaining 1 tablespoon olive oil, 0.5 teaspoon salt, and 0.5 teaspoon black pepper. Toss directly on the pan to coat evenly.
    3. Roast: Slide the pan into the preheated 425°F / 218°C oven. Bake for 20-22 minutes total. At the 12-minute mark, rotate the pan 180 degrees to ensure even heat distribution. Watch for the vegetables to begin blistering and the chicken edges to pull back slightly, revealing a deep golden-brown crust. Avoid opening the oven door more than twice, as temperature drops disrupt the Maillard reaction and extend cooking time.
    4. Check doneness & glaze: Insert an instant-read thermometer into the thickest part of the largest chicken thigh. The internal temperature must reach exactly 165°F / 74°C. If it reads 160°F / 71°C, remove it immediately and let carryover cooking finish the job. Brush the remaining reserved maple dijon marinade over the hot chicken. The residual heat will safely set the glaze into a glossy finish without risking raw egg or bacterial contamination.
    5. Rest and portion: Transfer the pan to a wire rack and let the chicken rest for exactly 5 minutes. This allows the muscle fibers to relax and redistribute their internal juices. Slicing immediately will cause moisture to spill out, leaving dry meat. Divide the cooled quinoa evenly among 4 meal prep containers, top with sliced dijon glazed chicken, and arrange roasted vegetables on the side. Seal tightly with airtight lids.

    Pro Tips

    • Double-glazing technique: Reserving half the marinade for a post-bake brush creates a superior finish. The initial coat penetrates and flavors, while the second coat caramelizes on the surface without burning during the high-heat phase.
    • Vegetable moisture control: If using high-water vegetables like zucchini or mushrooms, increase oven temperature to 450°F / 232°C and roast for only 15 minutes. Dense root vegetables like sweet potatoes require par-boiling for 4 minutes before sheet pan roasting to match the chicken’s timeline.
    • Make-ahead optimization: Cooked quinoa and roasted vegetables hold texture better when stored separately from the glazed chicken for the first 3 days. Assemble bowls only when ready to reheat, or store fully assembled bowls for up to 4 days in airtight containers at 38°F / 3°C.
    • Safe substitution: Boneless, skinless chicken breasts can replace thighs, but reduce cook time to 16-18 minutes and pull at 155°F / 68°C to prevent drying. The maple dijon marinade works identically, but the leaner meat requires tighter temperature monitoring.

    Serving Suggestions

    Each bowl yields approximately 25-30 grams of high-quality protein, 40 grams of complex carbohydrates, and 12 grams of healthy fats. For optimal reheating, microwave a single bowl at 70% power for 2 minutes 30 seconds, stirring halfway through to distribute heat evenly. This preserves the quinoa’s fluffiness and prevents the chicken from toughening. Serve alongside a handful of fresh arugula tossed with lemon vinaigrette to cut through the sweetness of the glaze, or top with 2 tablespoons toasted pumpkin seeds for added crunch and micronutrients. These easy quinoa bowls scale effortlessly for family dinners or weekly lunch rotations without sacrificing quality. Pair with a light cucumber radish salad for additional hydration and digestive enzymes.

    FAQ

    Can I use frozen chicken for this recipe?
    Yes, but it must be thawed completely in the refrigerator for 18-24 hours before marinating. Cooking frozen poultry directly will drop the oven temperature drastically, resulting in uneven cooking and a food safety risk. Never thaw at room temperature or in warm water, as the outer layers will enter the bacterial danger zone before the center defrosts.

    How do I know when the quinoa is perfectly cooked?
    Properly cooked quinoa will have a translucent ring around each grain, the germ will separate slightly, and it will feel tender but retain a subtle bite. If it tastes chalky or dry, it was either undercooked or the water-to-quinoa ratio was incorrect. Always use a strict 1:2 ratio by volume and maintain a tight lid to prevent steam escape.

    Can I prep this ahead for the entire week?
    Absolutely. These meal prep bowls maintain optimal quality for 4 days when stored in airtight containers at 38°F / 3°C. For day 5, freeze the portion immediately after cooking and reheating. The high-heat roasting and acidic glaze act as natural preservatives, keeping flavors bright throughout the storage window. Reheat from frozen by microwaving on 50% power for 5 minutes, stirring every 90 seconds.

    *As an Amazon Associate I earn from qualifying purchases.