Introduction
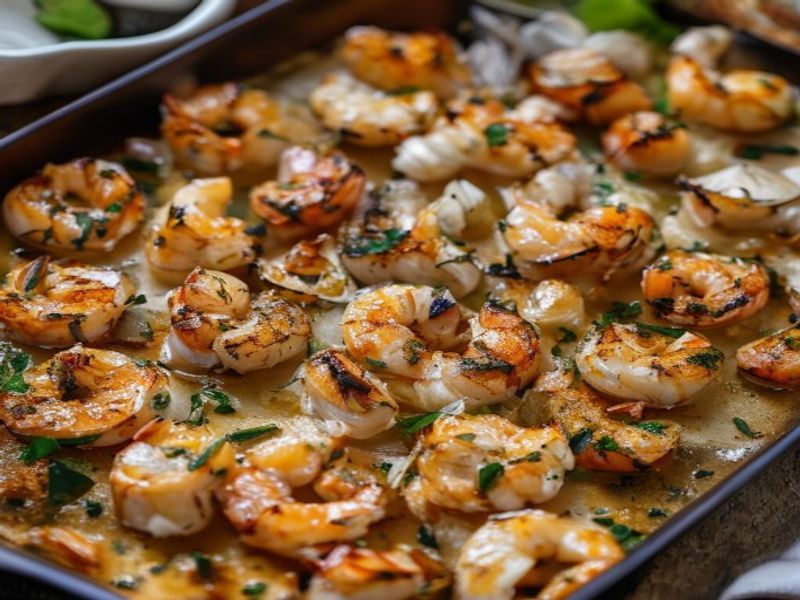
This sheet pan shrimp skillet with garlic butter delivers restaurant-quality flavor through a streamlined, high-heat roasting method. The technique leverages a hot oven to rapidly cook large shrimp while concentrating the aromatics in a rich, emulsified garlic butter sauce. This easy recipe is designed for weeknight efficiency without sacrificing precision. It requires no advanced knife work, relies on a single cooking surface, and produces a homemade quick dinner in under 20 minutes. Ideal for cooks who want consistent results, the method focuses on moisture control, proper spacing, and exact thermal timing. Whether you use a heavy rimmed baking sheet or a professional-grade skillet, the principles remain identical: dry protein, high heat, and controlled fat integration. Master this approach and you will have a reliable template for any quick-cooking seafood.
What You’ll Need
Ingredients
- Shrimp: 1.5 pounds large (21/25 count), peeled and deveined, tails on or off per preference
- Unsalted butter: 4 tablespoons, divided
- Fresh garlic: 6 cloves, finely minced (approximately 2 tablespoons)
- Extra virgin olive oil: 2 tablespoons
- Lemon: 1 medium, juiced (3 tablespoons) plus 1 teaspoon zest
- Fresh parsley: 1/4 cup, finely chopped
- Kosher salt: 1.5 teaspoons
- Black pepper: 1/2 teaspoon, freshly cracked
- Smoked paprika: 1/4 teaspoon
Ingredient Selection Notes: Choose fresh or high-quality frozen shrimp with firm flesh and a clean ocean scent. Avoid “pre-cooked” or “soaked” varieties, as added phosphates cause excess water release during cooking. Use European-style butter (82% fat) for a richer sauce and better emulsion. Fresh garlic is non-negotiable here; jarred garlic contains water and preservatives that will burn at high heat.
Equipment
- 13×9-inch rimmed baking sheet (heavy-gauge aluminum preferred)
- 12-inch stainless steel or cast iron skillet [Check Price on Amazon] (if cooking stovetop)
- Instant-read digital thermometer
- Microplane zester and sharp chef’s knife
Prep Work
Proper preparation prevents the most common failure in shrimp cookery: steaming instead of roasting. Start by placing the peeled shrimp in a colander and rinsing briefly under cold water. Pat them aggressively dry with paper towels until the surface feels completely tacky. Moisture is the enemy of browning. If using frozen shrimp, thaw them overnight in the refrigerator at 38°F / 3°C, then dry thoroughly.
Prepare the garlic butter mixture by combining 3 tablespoons of softened butter, 2 tablespoons olive oil, minced garlic, 1 teaspoon kosher salt, black pepper, and smoked paprika in a small bowl. Fold until uniform. Keep the remaining 1 tablespoon of butter chilled; you will finish the sauce with cold butter to stabilize the emulsion. Juice and zest the lemon, keeping the liquid and zest separate. Chop the parsley. Store the dried shrimp, garlic butter, and aromatics in separate containers in the refrigerator. You can complete this mise en place up to 4 hours in advance. Do not toss the shrimp in the butter mixture until immediately before cooking, as salt will draw moisture to the surface over time.
Cooking Instructions
- Preheat the oven and pan: Set your oven to 425°F / 218°C. Place the empty 13×9-inch rimmed baking sheet on the middle rack during preheating. Heating the pan first creates immediate thermal shock when the shrimp hit the surface, promoting a quick sear and preventing sticking. Allow the oven to reach temperature for a full 20 minutes.
- Combine and season: Transfer the thoroughly dried shrimp to a large mixing bowl. Pour the prepared garlic butter mixture over them and toss vigorously for 30 seconds until every piece is evenly coated. Add the lemon zest and fold once to distribute.
- Arrange for maximum browning: Carefully pull the hot sheet pan from the oven and place it on a heatproof surface. Immediately pour the shrimp onto the pan, spreading them into a single, non-overlapping layer. Overcrowding drops the pan temperature and forces the shrimp to steam in their own juices, resulting in a rubbery texture. If your pan cannot hold 1.5 pounds in one layer, divide the batch and roast sequentially.
- Roast to exact doneness: Return the pan to the 425°F / 218°C oven. Cook for exactly 6 to 8 minutes. Watch for the visual transformation: the flesh will turn from translucent gray to opaque pink, and the edges will curl into a tight “C” shape. An “O” shape indicates overcooking. The internal temperature should reach 120°F / 49°C before resting. At the 6-minute mark, listen for a steady, light sizzle. If the sound stops or turns to a hiss, the pan is too crowded or the oven temperature dropped.
- Finish and emulsify: Remove the pan from the oven. Immediately sprinkle the chilled 1 tablespoon of butter over the hot shrimp, followed by the fresh lemon juice and chopped parsley. The residual heat will melt the butter and emulsify it with the pan drippings. Toss gently with heatproof tongs for 15 seconds. Do not return to the oven.
- Rest and serve: Let the dish rest on the counter for 3 minutes. Resting allows the proteins to relax, redistributing internal moisture. Serve immediately while the garlic butter is glossy and warm.
Common Mistakes to Avoid: Do not skip drying the shrimp. Do not add cold butter at the start of roasting, as it will separate and burn. Never use garlic powder as a substitute for fresh; it lacks the volatile oils needed for this sauce and will scorch instantly at 425°F / 218°C.
Pro Tips
In my experience, the difference between good and exceptional shrimp comes down to moisture management and fat temperature control. I find that patting the shrimp completely dry and preheating the pan eliminates 90% of the texture issues home cooks report. If you want a deeper garlic flavor without risking bitterness, roast the minced garlic in the butter at 325°F / 163°C for 5 minutes before combining it with the shrimp. This gentle infusion softens the raw bite while preserving sweetness.
Substitutions: For a dairy-free version, replace the butter with high-quality avocado oil and finish with a splash of toasted sesame oil. You can swap lemon juice for dry white wine (2 tablespoons), but reduce the cooking time by 30 seconds to account for the added liquid.
Make-Ahead Options: While this dish is best served immediately, you can prepare the garlic butter mixture and store it in an airtight container in the refrigerator for up to 5 days. Bring it to room temperature before tossing with the shrimp to ensure even coating. Do not marinate the shrimp in the butter mixture overnight; the acid and salt will begin to denature the proteins, creating a mushy texture.
Serving Suggestions
This quick dinner is highly adaptable to both light and hearty accompaniments. Serve 1/2 pound of cooked shrimp per person as a main course. For optimal balance, pair with a neutral starch that absorbs the garlic butter, such as crusty sourdough, toasted baguette slices, or steamed jasmine rice. Roasted asparagus or blistered cherry tomatoes on a separate sheet pan complement the dish without competing for oven space. If plating for a dinner party, spoon the shrimp into a shallow ceramic bowl and ladle the emulsified pan juices over the top. Garnish with a final crack of flaky sea salt and a lemon wedge.
FAQ
Can I use frozen shrimp for this recipe?
Yes, but they must be thawed properly and dried thoroughly. Place frozen shrimp in a sealed bag submerged in cold water for 15 minutes, or thaw overnight in the refrigerator. Never cook frozen shrimp directly, as the ice crystals will lower the pan temperature and create a steaming effect. Once thawed, pat them completely dry with paper towels before seasoning.
How do I know when the shrimp are perfectly done?
Look for three simultaneous cues: color changes from translucent gray to opaque pink, the shape forms a gentle “C” curl, and the flesh feels firm but yields slightly to pressure. The internal temperature will read 120°F / 49°C when removed from the oven and will carry over to 145°F / 63°C during the 3-minute rest. If the shrimp form a tight “O” or feel hard, they have been overcooked.
Can I prep this ahead for a busy weeknight?
You can complete the mise en place up to 4 hours in advance, but keep components separate. Store the dried shrimp in the refrigerator, keep the garlic butter at room temperature if cooking within 2 hours, and prepare the lemon juice and parsley in airtight containers. Combine and cook within 30 minutes of bringing everything together to preserve texture and prevent moisture migration.
*As an Amazon Associate I earn from qualifying purchases.
发表回复