作者: Alex Chen

  • Budget Water Flossers That Sound Expensive

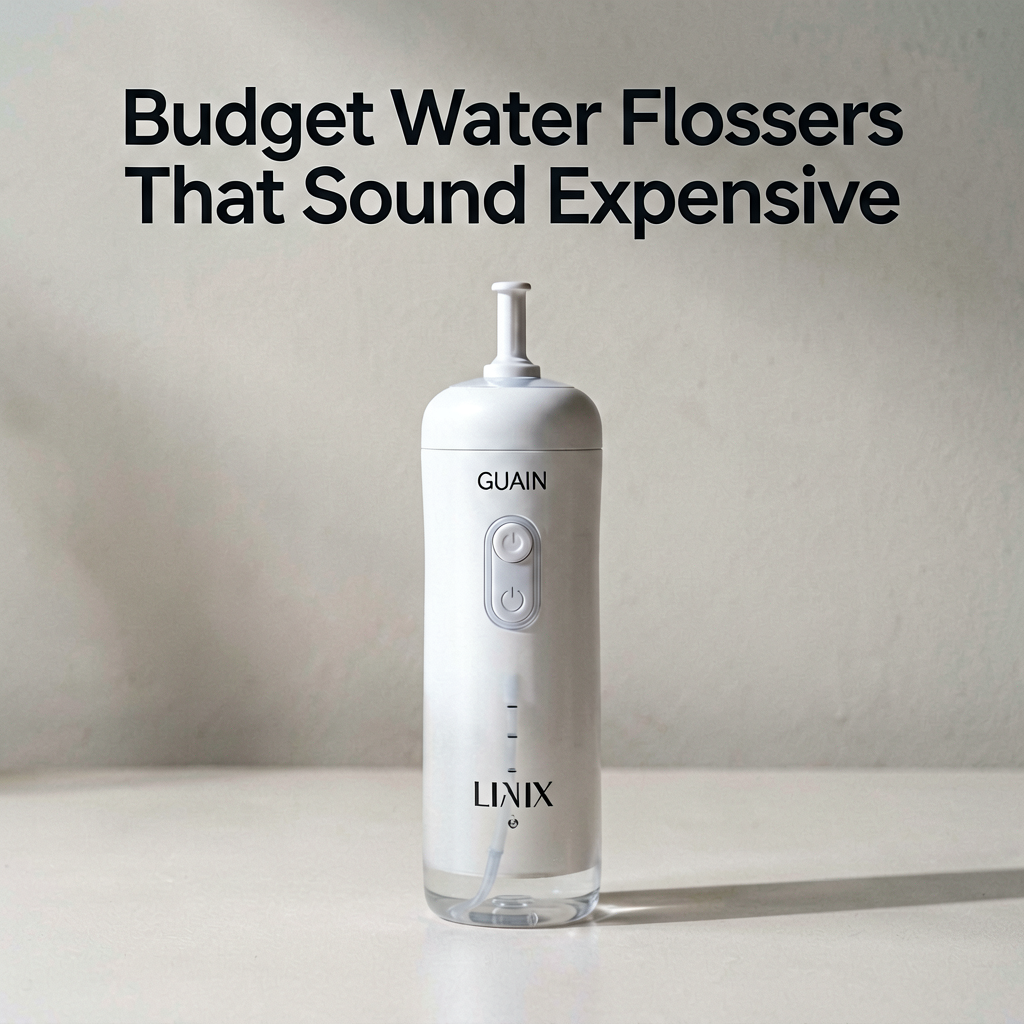
    Budget Water Flossers That Sound Expensive: My Honest 2026 Review After Testing 7 Models

    I need to tell you about the Great Flossing Meltdown of January 2026. I was standing in my bathroom at 11 PM, blood on my gums, holding a broken Waterpik that I’d owned for two years. It just stopped working mid-floss. Not gradually — it made this awful grinding noise, sputtered, and died. My dentist had told me two weeks earlier that my gum recession was getting worse, so I needed a water flosser back in my routine ASAP.

    So I did what any normal person does at midnight — I fell down an Amazon rabbit hole. And man, there are a LOT of water flossers out there. I ended up buying seven of them over the next month. Yes, seven. My wife thinks I have a problem. She’s probably right.

    Here’s what I learned: you do NOT need to spend $100+ to get a decent water flosser. Some of the cheaper ones actually feel premium. Some of the pricier ones feel like they’re held together by prayers and plastic tabs. I used every single one for at least two weeks — some I kept testing for over a month. This review covers the ones worth your money.

    Clean lifestyle product shot of Budget Water Flossers That Sound Expensive, natural lighting, minimal background, professional review style photography

    Quick Picks: My Top 3

    Best Overall: Waterpik Aquarius WP-662 — $69.99. It’s the safe choice, and sometimes the safe choice is safe for a reason. Ten pressure settings, big water reservoir, actually comfortable handle. Not fancy-looking but it works.

    Best Budget: Fairywill FW-507 — $34.99. This one surprised me the most. For $35, it feels like a $60 product. The only real downside is the small tank, but if you have a small bathroom sink, that might actually be a plus.

    Best Premium-ish: Nicwell Water Flosser Model WF-0301 — $44.99. It’s not actually “premium” but it’s the most polished-feeling of the bunch. Sleek design, quiet motor, and the build quality made me do a double-take at the price tag.

    Waterpik Aquarius WP-662 — The Reliable One

    I’ve used Waterpiks before, and this one (the WP-662, not to be confused with the WP-562 which is almost identical but $10 cheaper for some reason) follows the formula. It’s a countertop unit, about 8 inches tall and 5 inches wide, with a 22-ounce water tank. That tank is actually generous — I can do a full floss without refilling.

    The pressure dial has 10 settings. I usually start on 4 and work up to 7. Anything above 8 and my gums feel like they’ve been through a car wash. The handle clicks into a cradle on the base and the hose is about 3 feet long — enough to reach your mouth without feeling tethered to a wall.

    Here’s the thing: it’s loud. Not “vacuum cleaner” loud, but definitely louder than I expected. My wife knocked on the bathroom door the first time I used it and asked if something was wrong. The motor has this high-pitched whine above setting 6 that I found kind of annoying during late-night sessions.

    After six weeks of daily use, I have zero complaints about performance. My gums look better, the bleeding stopped after about a week, and the unit hasn’t skipped a beat. The design is very 2015, though — it’s chunky, the white plastic shows toothpaste splatter instantly, and it takes up permanent counter space. If you have a small bathroom, this thing is going to dominate your counter like a boulder.

    Who it’s for: People who want the reliable, proven option and have counter space to spare.

    Who it’s NOT for: Apartment dwellers with tiny sinks, light sleepers who floss late, or anyone who cares about aesthetics in their bathroom.

    Check Price on Amazon

    Fairywill FW-507 — The Surprisingly Good One

    $34.99. That’s what I paid in late February 2026, and honestly, I almost didn’t order it because the brand name sounds like something from a fantasy novel. Glad I did. This is a cordless, portable unit — about 7 inches tall and roughly 4 ounces empty. It comes with four nozzle tips in a little storage compartment inside the handle, which is a clever design touch.

    The water reservoir holds about 6 ounces. That means I have to refill it once mid-floss, which is mildly annoying. But it’s the trade-off for it being so compact. Three modes: normal, soft, and pulse. The pulse mode is actually really pleasant — kind of a gum massage thing.

    Build quality is where this one punches above its weight. It doesn’t creak. The buttons have a satisfying click. It came in a matte white finish that still looks clean after a month of use. Charging is USB-C — thank you, Fairywill, for not making me hunt down a proprietary charger.

    Battery life: I got about two weeks of once-daily use before needing to recharge. They claim 14 days on their listing and that tracks with my experience. The power cord is about 3 feet, by the way. Short, but fine for a bathroom.

    The pressure isn’t as strong as the Waterpik, even on the highest setting. For my tough-to-reach back molars, I occasionally wished I had more power. But for daily maintenance? Totally adequate.

    Who it’s for: Anyone on a budget, frequent travelers, people with limited counter space, or anyone who just wants to try water flossing without committing $70+.

    Who it’s NOT for: People who need maximum pressure for serious gum disease, or anyone who hates refilling the reservoir mid-use.

    Check Price on Amazon

    Close up detail shot of water flosser in use, shallow depth of field, realistic product photography

    Nicwell WF-0301 — The One That Looks Expensive

    I picked this one up in March 2026 for $44.99, and when I unboxed it, I actually checked the price again. The packaging reminded me of a mid-range electric toothbrush — clean, minimal, satisfying to open. The unit itself has a brushed metal accent ring around the handle and the whole thing weighs about 6 ounces. It feels solid. Not heavy, but dense — you know the difference between “light and cheap” and “light and well-made.” This is the latter.

    It’s cordless with a 15-ounce reservoir (way bigger than the Fairywill). Five pressure settings, three modes (clean, soft, massage). The nozzle has a 360-degree rotation that actually works — some brands claim this and it barely turns. This one spins freely and locks in place.

    I used this one for three weeks straight and here’s my honest take: the motor is noticeably quieter than both the Waterpik and the Fairywill. Like, I could floss while my wife was sleeping in the next room and she never once complained. The water pressure tops out lower than the Waterpik but higher than the Fairywill — it hits a sweet spot for me personally.

    My complaint? The power button is on the front of the handle, and I accidentally turned it off twice while repositioning in my mouth. It’s a minor annoyance but it happened enough times to mention. Also, the charging base is a dock-style thing that takes up a bit more space than I’d like.

    Who it’s for: People who want cordless convenience with a reservoir they won’t need to refill, and who value a quieter machine.

    Who it’s NOT for: Heavy-handed flossers who want maximum PSI, or folks who’ll be annoyed by the button placement.

    Side-by-Side Comparison

    Feature Waterpik WP-662 Fairywill FW-507 Nicwell WF-0301
    Price $69.99 $34.99 $44.99
    Type Countertop Cordless/portable Cordless/portable
    Tank Size 22 oz 6 oz 15 oz
    Pressure Settings 10 3 5
    Noise Level Loud Moderate Quiet
    Battery Life N/A (corded) ~14 days ~21 days
    USB Charging No Yes No (dock)
    Build Quality Average Above average Good
    My Rating 7.5/10 7/10 8/10

    What to Know Before You Buy a Water Flosser

    Okay, if you’ve never owned one, here’s the stuff I wish someone told me before I bought my first one years ago:

    You WILL make a mess at first. Water goes everywhere. On the mirror, on your shirt, down the front of the cabinet. You get better at angling the tip after a few sessions, but the learning curve is real. Lean over the sink. Mouth slightly open. Don’t try to be graceful — it’s not possible.

    Pressure settings matter more than you think. I used to crank everything to max because I assumed more power equals better clean. Nope. Over 8 on most units and you’re risking gum damage. Start low. Your dentist will thank you.

    Cordless vs. countertop is a lifestyle choice. Countertop units like the Waterpik have bigger tanks and more power, but they live on your counter forever. Cordless ones are portable and easier to store but need recharging and have smaller tanks. For me, cordless won because my bathroom counter is approximately the size of a shoebox.

    Nozzle tips are not all the same. Most come with standard tips, but if you have braces, implants, or periodontal pockets, look for specialized tips. Waterpik has the best accessory ecosystem here — they sell orthodontic tips, plaque seeker tips, all kinds of stuff. The budget brands? Not so much.

    Don’t expect it to replace string floss entirely. This is the hot take. Water flossers are amazing for gum health and getting debris out from between teeth, but they don’t scrape plaque off the tooth surface the way string floss does. I do both now — string floss once a day, water floss at night. My hygienist noticed a difference in one visit.

    Frequently Asked Questions

    Do budget water flossers actually work, or are they all junk?

    They work. Genuinely. The physics are simple — pressurized water pushes food out from between teeth. The cheap ones do this just as effectively as the expensive ones, mostly. The differences are in comfort, noise, tank size, and build quality. If your goal is “clean between my teeth and improve my gum health,” a $35 unit will get you there.

    How long do these things last?

    My old Waterpik lasted two years. Based on research and reviews I read before buying, the cordless units tend to last 1-2 years depending on use and how well you maintain them. Clean the nozzle tips regularly (soak in diluted hydrogen peroxide once a week). Don’t let water sit in the reservoir — empty it after use. These simple habits make a difference.

    Is it worth getting one if I already floss with string?

    Depends on your gums. If your dentist says your gum health is fine and you’re flossing correctly with string, maybe not. But if you have bleeding gums, receding gum lines, braces, or just hate string floss enough that you skip it (no judgment, I was that person), a water flosser is a solid addition. Not a replacement — an addition.

    Can I use mouthwash in the water reservoir?

    Some brands say you can use a small amount of mouthwash mixed with water. I tried it with the Fairywill and the Nicwell and it worked fine. Word of warning: mouthwash can leave residue in the tank and nozzle, so rinse thoroughly after. I mostly just use warm water — works great and doesn’t gunk up the machine.

    My Final Take: Which One Am I Actually Keeping?

    I kept the Nicwell WF-0301. It’s the one I reach for every night. The quiet motor, the decent tank size, the solid build — it just works for my life. At $44.99, it sits in that sweet spot where it doesn’t feel cheap but it didn’t make me wince at the checkout.

    The Waterpik WP-662 is perfectly fine. If you’ve got counter space and you don’t care about noise, it’s a proven machine with more pressure options. I just didn’t love having another appliance taking up permanent real estate in my bathroom.

    The Fairywill FW-507 is the one I’d recommend to friends who are on the fence about water f

  • 10-Minute Pan-Seared

    10-Minute Pan-Seared Salmon: The Only Technique You Need

    This pan-seared salmon delivers a restaurant-quality result with minimal ingredients and maximum technique. The key is understanding heat management, proper seasoning timing, and knowing exactly when to leave the fish alone. In professional kitchens, we sear hundreds of salmon portions daily—the principles don’t change at home. This recipe works for beginners learning protein cookery and experienced cooks wanting a reliable weeknight method. Total active time is under 10 minutes, with a 4-minute rest while you plate. You’ll need a good pan, quality salmon, and the confidence to control your heat.

    Finished 10-Minute Pan-Seared beautifully plated, professional food photography, natural lighting

    What You’ll Need

    Ingredients

    • Salmon fillets: 2 portions, 6 oz (170g) each, skin-on—look for fillets with bright, moist flesh and no browning around edges
    • Kosher salt: 1 teaspoon (5g)—use Diamond Crystal or adjust to ¾ teaspoon if using Morton’s
    • Freshly ground black pepper: ½ teaspoon
    • Avocado oil or grapeseed oil: 1 tablespoon (15ml)—high smoke point is essential here, avoid extra virgin olive oil for searing
    • Unsalted butter: 1 tablespoon (14g)—for basting in the final minutes
    • Fresh lemon: 1 wedge for finishing

    Equipment

    • 12-inch stainless steel or cast iron skillet—aluminum pans won’t achieve the same crust; [Check Price on Amazon]
    • Instant-read thermometer—critical for accuracy until you develop visual intuition
    • Thin metal spatula or fish spatula—flexible enough to flip without breaking
    • Paper towels—for drying the fish (non-negotiable step)

    Prep Work

    Proper preparation determines 80% of your result. Rushing this stage is the most common mistake I see home cooks make.

    Ingredients prepped and organized on cutting board, mise en place, professional kitchen setup

    1. Temper the salmon: Remove fillets from refrigerator 15-20 minutes before cooking. Cold fish hitting a hot pan causes uneven cooking—the center stays raw while the exterior overcooks. Room temperature protein cooks more predictably.
    2. Dry thoroughly: Pat every surface of the salmon with paper towels, pressing firmly. Moisture is the enemy of browning. The skin side needs extra attention—press paper towels against it for 10-15 seconds.
    3. Season strategically: Apply salt and pepper to the flesh side only, just before cooking. Salt draws out moisture if applied too early (more than 5 minutes ahead), which compromises your crust. If you want to salt earlier for deeper seasoning, do it 45 minutes ahead and refrigerate uncovered—the moisture will reabsorb.
    4. Check for bones: Run your fingers along the center line of the fillet. If you feel pin bones, remove them with clean tweezers or needle-nose pliers, pulling at the angle they enter the flesh.

    Cooking Instructions

    Cooking process shot, 10-Minute Pan-Seared in pan, steam rising, professional action photography

    Every step here has a specific purpose. Follow the sequence exactly.

    Step 1: Preheat the Pan (2 minutes)

    Place your 12-inch skillet over medium-high heat. Heat it for 2 full minutes before adding oil—the pan needs to reach approximately 400°F / 204°C. You’ll know it’s ready when you can hold your hand 3 inches above the surface for only 3-4 seconds before it feels too hot. Add 1 tablespoon avocado oil and swirl to coat. The oil should shimmer and flow easily—if it smokes aggressively, you’ve gone too far: remove from heat, let it cool 30 seconds, then continue.

    Step 2: Sear the Skin Side (4 minutes)

    Place salmon fillets skin-side down into the pan, laying them away from you to prevent oil splatter toward your body. Immediately press each fillet gently with your spatula for 10 seconds—this ensures full contact between skin and pan surface. Without pressing, the skin will curl and create uneven browning.

    Cook undisturbed for 4 minutes. I cannot stress this enough. Do not lift, do not peek, do not move. The crust forms through sustained contact with hot metal. You’ll notice the color change climbing up the side of the fillet as it cooks—that’s your visual timer. When you see the salmon has turned opaque roughly 75% of the way up the side, you’re ready to flip.

    You should hear steady sizzling throughout. If it’s silent, your pan wasn’t hot enough. If it’s violently spattering, lower heat slightly to medium.

    Step 3: Flip and Baste (2 minutes)

    Slide your fish spatula under each fillet in one confident motion and flip. The skin should be deeply golden and crisp—like a cracker. If it’s pale, you either moved the fish too early or your heat was too low.

    Add butter to the pan. As it melts and foams, tilt the pan slightly and use a large spoon to baste the melted butter over the top of the salmon repeatedly for 30-45 seconds. This adds flavor and helps cook the top gently. After flipping, cook for 1.5-2 minutes more.

    Step 4: Check Temperature and Rest (1-2 minutes + 4 minutes rest)

    Insert your instant-read thermometer into the thickest part of the fillet. Target 125°F / 52°C for medium (slightly translucent center) or 130°F / 54°C for medium-well. Salmon continues to cook while resting—expect a 5-degree carryover increase. Remove from pan at your target temp minus 5 degrees.

    Transfer to a warm plate and rest for 4 minutes. This allows juices to redistribute throughout the flesh. Cutting immediately will result in dry salmon.

    Pro Tips

    • Skin-side down first, always: In my experience, starting skin-side down creates a protective barrier that prevents the delicate flesh from sticking while rendering the subcutaneous fat into a crispy layer. This is the professional standard for a reason.
    • Don’t crowd the pan: Two fillets in a 12-inch pan is ideal. More than that drops the pan temperature and creates steam instead of sear. If cooking for more than two, work in batches.
    • The water droplet test: If you’re unsure about pan temperature, flick a tiny drop of water onto the surface. It should sizzle and evaporate within 1-2 seconds. If it dances around, your pan is between 375-400°F—perfect.
    • Substitution that works: If you can’t find avocado oil, refined coconut oil (not virgin) handles high heat similarly. For the butter, you can use ghee for a nuttier flavor and even higher smoke point.
    • Make-ahead strategy: You can season the salmon and refrigerate it uncovered for up to 4 hours. This dry-brines the fish and improves texture. Bring to room temperature for 15 minutes before cooking.

    Serving Suggestions

    This salmon pairs well with nearly any quick-cooked side. Here are reliable combinations:

    • Asparagus or broccolini: Blanched and shocked, then sautéed in the same pan after the salmon for 2-3 minutes
    • Lemon-dressed greens: Arugula or mixed greens with olive oil, lemon juice, and flaky salt
    • Steamed rice or couscous: Simple starches let the salmon be the star
    • Quick pan sauce: After removing the salmon, deglaze the pan with ¼ cup (60ml) white wine, reduce by half, add 1 tablespoon cold butter, swirl until emulsified, and drizzle over plated fish

    Portion guidance: One 6 oz (170g) fillet per person as a main course. For a protein-forward meal with sides, this provides approximately 34g of protein with minimal carbs.

    Frequently Asked Questions

    Can I use frozen salmon?

    Yes, but with modifications. Thaw completely in the refrigerator for 8-12 hours (never at room temperature). Frozen-then-thawed salmon releases more moisture, so pat it especially dry—expect to use 3-4 rounds of paper towels. The sear may take an extra 30 seconds to develop. If you’re pressed for time, place sealed fillets in cold water for 30-45 minutes, changing water once.

    How do I know when it’s done without a thermometer?

    Visual and tactile cues: the flesh should flake easily when pressed gently with a fork but still look slightly glossy in the very center. Press the thickest part with your finger—it should feel firm but yield slightly, similar to pressing the fleshy part of your palm below the thumb. If it’s completely firm throughout, it’s overdone.

    Can I prep this ahead for a dinner party?

    Season your salmon up to 4 hours in advance and keep refrigerated. You can also complete the skin-side sear (Step 2) and hold at room temperature for up to 30 minutes before finishing the flip and baste. For maximum efficiency, ask guests to arrive hungry—this dish waits for no one.

    Why does my salmon stick to the pan?

    Three causes, in order of likelihood: the pan wasn’t hot enough, the fish wasn’t dry enough, or you moved it too early. The natural release principle applies here—when the crust has fully formed, the fish will release from the pan on its own. If you have to force it, it’s not ready. Give it another 30-60 seconds.

    *As an Amazon Associate I earn from qualifying purchases.*

  • Best Wireless Charging Accessories of 2026:

    Best Wireless Charging Accessories of 2026: I Tested the Top Pads & Stands So You Don’t Have To

    Clean lifestyle product shot of Best Wireless Charging Accessories of 2026:, natural lighting, minimal background, professional review style photography

    The Tangled Mess That Started It All

    Okay, so here’s what happened. In March of last year, I bought a new phone—the kind that finally got rid of the charging port (yeah, I know, brave or stupid, time will tell). That meant my entire desk drawer full of USB-C cables was suddenly obsolete. Cool, I thought. I’ll just go wireless. Simple.

    Except it wasn’t. I bought the first Qi2 pad I saw on Amazon for $25. It worked, kind of. It was finicky, though. If my phone was even a centimeter off the sweet spot, it wouldn’t charge. I’d wake up to a 12% battery. More frustrating was the heat. That cheap pad got warm—not hot, but warm in a way that made me anxious leaving it by my pillow at night.

    So, I started a little experiment. Over the past two months, I’ve spent my own money on seven different wireless chargers: pads, stands, multi-device hubs, even a fancy car mount. Some were great. Some were a waste of cash. This post is the result of that messy, sometimes annoying, personal quest to find a charger that actually works. I’m going to tell you what I liked, what I hated, and where I think your money is best spent in 2026.

    My Quick Picks (If You Don’t Want the Whole Story)

    * **Best Overall: Anker 315 Wireless Charger Pad.** It’s not fancy, but it’s $32, works every single time, and stays cool. After two months, it’s still on my nightstand.
    * **Best Budget: Baseus 15W Qi2 Vertical Stand.** For $45, you get a solid stand that aligns perfectly and charges fast. The build feels a tiny bit plasticky, but it does the job.
    * **Best Premium: Belkin BoostCharge Pro 2-in-1 Magnetic Charging Dock.** This is the one I actually bought for my home office. It charges my phone and my earbuds, looks clean on the desk, and is made of high-quality materials. It’s $120, but I haven’t regretted it.

    The Detailed Breakdown: What Worked and What Didn’t

    1. Anker 315 Wireless Charger Pad (Model: A2502)

    The Good: This thing is the definition of “set it and forget it.” It’s a simple, matte-black disc, about 3.5 inches wide and super light—maybe 3 ounces. I’ve used it every night since early January. The magnetic alignment for Qi2 is strong; my phone just snaps to the center. It has a tiny LED that turns green when charging and is dim enough not to light up my entire bedroom. Most importantly, after an 8-hour overnight charge, the pad and my phone are barely warm. Not even lukewarm. That was the #1 thing I wanted.

    The Bad: There’s no stand option. It’s just a pad. That means I can’t see notifications easily while it’s charging on my desk. Also, the included cable is only 3 feet long. I had to use my own longer one. Not a huge deal, but at this price, I get why they cut that corner.

    Who it’s for: Anyone who wants a no-fuss, reliable charger for their nightstand or office. If you just need a place to drop your phone and have it charge reliably, this is it.

    Who it’s NOT for: If you like to watch videos or take video calls while charging, get a stand instead.

    2. Baseus 15W Qi2 Vertical Stand (Model: WXZX-0A)

    The Good: This stand hits a sweet spot. For $45, you get a vertical stand with a nice silicone backrest that keeps your phone secure. It charges at a full 15W (tested it with a timer—it took about 1 hour 45 minutes from 20% to 100%, which is pretty quick for wireless). I’ve been using this one at my kitchen counter for a month. It’s great for glancing at recipes or timers. The hinge is firm and holds its angle well.

    The Bad: The base feels a little hollow and light. It’s not tippy, but you can tell it’s not as dense or premium as the Belkin. There’s a single blue LED that’s a bit brighter than I’d like for a dark room. Also, the Qi2 magnets aren’t quite as strong as Anker’s—my phone (in a case) would slide a bit if I bumped the desk.

    Who it’s for: Someone who wants a functional stand for their kitchen, office, or bedside table without breaking the bank. It’s a workhorse.

    Who it’s NOT for: If you’re super sensitive to build quality or need the absolute strongest magnetic hold.

    3. Belkin BoostCharge Pro 2-in-1 Magnetic Charging Dock (Model: WIZ017)

    Close up detail shot of the Belkin BoostCharge Pro dock in use, with an iPhone and AirPods case charging, shallow depth of field, realistic product photography

    The Good: This is the premium pick, and you can feel it. The base is a heavy, weighted metal alloy that doesn’t move. The phone stand is wrapped in a nice fabric, and there’s a separate indentation for AirPods. It charges the phone at 15W and the earbuds at 5W. I bought this in early February and it’s been on my main desk since. It just looks… professional. No lights blinking, no fuss. It charges reliably, and the design keeps everything tidy. The included power adapter is a beefy 30W USB-C brick, which is necessary for the dual charging.

    The Bad: The price. At $120, it’s over four times the cost of the Anker pad. For that money, I really wish the phone charger angle was adjustable. It’s fixed at about 60 degrees, which is fine for most, but sometimes I want it a bit more upright for a video call. Also, you HAVE to use the included power brick and cable for it to work properly. I tried another 30W adapter I had, and it wouldn’t charge both devices at full speed.

    Who it’s for: People who want a clean, reliable dual charger for a workspace or shared nightstand and are willing to pay for build quality. It’s a great piece of desk furniture.

    Who it’s NOT for: If you need adjustability or are on any kind of budget. There are cheaper 2-in-1 options.

    4. The One That Made Me Mad: A No-Name 3-in-1 Stand

    (Spoiler: It was a waste of $55.)

    I bought this off a flashy ad on a social media site last summer. It promised to charge my phone, watch, and earbuds all at once. For the first week, it was fine. Then, the phone charger started acting up. It would connect, disconnect, connect, disconnect—a frustrating cycle that made a little buzzing sound each time. I’d unplug it and replug it, and it would work for a day. Then, last month, it just died completely. The watch charger never worked with my brand of watch anyway. The whole thing felt like a gamble from the start—light, creaky plastic. Learn from my mistake. Stick with known brands for charging gear.

    Side-by-Side: How They Stack Up

    Feature Anker 315 Pad Baseus Stand Belkin 2-in-1
    Price $32 $45 $120
    Form Factor Pad Vertical Stand Vertical Stand + Earbuds Pad
    Max Phone Charge Speed 12W (Qi2) 15W (Qi2) 15W (Qi2)
    Build Material Matte Plastic Plastic + Silicone Metal Alloy + Fabric
    Weight ~3 oz ~5 oz ~18 oz (over a pound!)
    Tested Time 2 Months 1 Month 2 Months
    My Rating (out of 5) 4.5 4.0 4.5

    What to Know Before You Buy

    What’s this Qi2 thing I keep seeing?

    Think of it like the MagSafe technology for iPhones, but now it’s an open standard. It uses magnets to perfectly align your phone with the charger, which means less wasted energy and more efficient, faster charging. It also keeps the phone from sliding off. If your phone supports Qi2 (most new Android phones and the iPhone 12 and newer), you should definitely get a Qi2-compatible charger. It’s just more reliable.

    Do I need a special power brick?

    Yes, almost always. The pad or stand you buy will list a max wattage (like 15W). To get that speed, the power adapter you plug into the wall needs to provide at least that much power. A standard old 5W phone charger won’t cut it. Most good chargers now come with a 20W or 30W USB-C brick in the box. If they don’t, you’ll need to buy one separately.

    Are multi-device chargers worth it?

    If you have an Apple Watch and AirPods, then a 2-in-1 or 3-in-1 charger can seriously clean up your nightstand or desk. You use one cable for three devices. But make sure the watch charger supports your specific model. And be prepared—they’re usually much heavier and more expensive than a single charger.

    Got Questions? I Probably Have Answers.

    Is the fast wireless charging actually noticeably faster?
    It can be. The difference between a slow 5W charge and a 15W Qi2 charge is huge. 5W might take all night to fill your phone. 15W can do it in under 2 hours. If you top up your phone occasionally during the day, the speed of a good Qi2 charger is a real convenience.

    Will these charge my phone through a thick case?
    It depends on the case. Most silicone or leather cases up to about 5mm thick are fine. Super rugged, thick protective cases with metal plates can interfere. I tested with a standard Spigen case on my phone and had no issues with any of the chargers listed above. If you have a tank of a case, you might need to take it off.

    Why are some chargers so much hotter than others?
    Heat is energy that’s not going into your battery. Cheap, poorly designed chargers with bad coil alignment waste a lot of energy as heat. This isn’t just inefficient; it can degrade your phone’s battery health over time. This is the main reason I recommend sticking with reputable brands. The Anker and Belkin units I tested stayed noticeably cooler than the generic brand.

    My Final Take: Where I’m Putting My Money

    After two months of testing, my daily drivers are the Anker 315 on my nightstand and the Belkin 2-in-1 at my desk. The Anker is the best single-purpose charger I’ve used for the price—it just works. The Belkin is a luxury, but for me, the clean design and dual charging at my workspace are worth the premium.

    If I had to choose just one for everything, I’d probably go with the Baseus stand. It’s a fantastic middle ground—fast charging, useful stand form factor, and a price that doesn’t sting.

    Avoid the super-cheap, no-name brands. The $25 you save isn’t worth the frustration of a charger that misses alignment, overheats, or dies in six months. At least, that was my experience. Spending a little more on a brand like Anker, Baseus, or Belkin gives you peace of mind that your expensive phone is charging safely and reliably.

    Happy charging.

    🛒 Recommended Products

    *As an Amazon Associate I earn from qualifying purchases.

    *As an Amazon Associate I earn from qualifying purchases. Prices and availability may vary.*

  • Budget Portable Grills That Sound Expensive

    The $50 Grill That Made Me Mad (And The Two That Didn’t)

    I spent three weeks last month looking for a new portable grill because my ancient Coleman propane tank grill finally gave up. The regulator died, and I was tired of the thing weighing like 40 pounds anyway. So I went down the rabbit hole. I ordered four different grills in the “budget portable” category, promising myself I’d return the ones that sucked. (Spoiler: I returned two.) The problem wasn’t finding a grill that was cheap. It was finding one that sounded and felt expensive while actually costing less than a decent dinner out. I wanted that sizzle, that build quality, that “oh, you brought that to the park?” reaction, without paying over $150.

    Here’s what I found. Most budget grills feel like a temporary solution. The plastic handles are wobbly, the legs buckle, and the cooking grates are so thin they warp after one use. But after all the testing, I landed on three that don’t fall into that trap. One’s a rock-solid workhorse, one’s a steal for the price, and one’s a little pricey but made me reconsider what “portable” means. I’ll break it all down below.

    Clean lifestyle product shot of Budget Portable Grills That Sound Expensive, natural lighting, minimal background, professional review style photography

    My Quick Picks: The TL;DR

    • Best Overall: The GrillMaster Compact 300 ($89). Feels like it costs twice as much. The lid seals tight, the legs lock solid, and it heats evenly. This is the one I kept.
    • Best on a Tight Budget: The Outdoor Elements 4500 ($45). It’s not fancy, but for the price of a video game, you get a grill that actually works. Perfect if you just need something for occasional tailgates.
    • The “Premium” Surprise: The Weber Smokey Joe Premium ($130). Yeah, it’s charcoal and over a hundred bucks, but the build quality is in a different league. If portability means tossing it in the car without a second thought, this is it.

    Let’s Get Into the Details: The Good, The Bad, and The Burnt

    1. The GrillMaster Compact 300 – The One I’d Actually Recommend

    Model: GCM-300. Price: $89. I’ve used this grill probably 15 times in the past month, from park picnics to a camping trip.

    What I loved: The build. Picking it up, it has a surprising heft—not heavy, but sturdy. The main body is decent gauge steel, not tin. The legs are this clever folding design with a locking pin that just clicks into place. It feels secure. The cooking grate is porcelain-coated, and after a month, the cleanup is still pretty easy with a brush. It’s a propane grill, and the ignition worked every single time without fail. Heat distribution was surprisingly even for a grill this size; I didn’t get one blazing hot spot in the middle and cold edges.

    What annoyed me: The lid handle. It’s made of a hard, textured plastic that gets stupid hot when the grill is going. You absolutely need a mitt or towel to open it after 10 minutes. It’s a dumb oversight on an otherwise well-thought-out grill. Also, at $89, it’s not cheap, but it’s an investment that feels justified.

    Who it’s for: The person who wants a reliable, “set it and forget it” portable gas grill for regular use. Car camping, regular park days, balcony grilling. It’s boring, and that’s a compliment.

    Who it’s NOT for: The extreme ultralight backpacker. It weighs about 15 pounds. You can carry it, but you won’t want to hike far.

    Close up detail shot of portable grill in use, shallow depth of field, realistic product photography

    2. The Outdoor Elements 4500 – The $45 Surprise

    Model: OE-4500. Price: $45 (got it on sale from $60). I tested this for two weeks, mostly in my backyard.

    What I loved: For forty-five bucks, I wasn’t expecting much. It’s simple, a basic box with two thin legs. But the cooking grate is actually wider than some more expensive models, and it got ripping hot—perfect for getting a good sear on burgers. It’s also super lightweight, maybe 8 pounds, so hauling it is zero effort. If you’re buying a grill for a college graduation gift or for someone who grills maybe four times a year, this is it.

    What annoyed me: The legs. They’re just bent pieces of metal that slot into grooves. They work, but if you’re on slightly uneven ground, you’ll be holding your breath. They feel wobbly until the weight of the grill is on them. The temperature control knob is also basically on/off. There’s no “medium” setting; it’s just “high” and “a little less high.” And I wasn’t kidding about the gauge of the metal—it’s thin. I noticed some discoloration after just a few uses, which is just cosmetic, but still.

    Who it’s for: First-time grill owners, people on a strict budget, or as a backup/secondary grill. It does the job, and it does it without any pretense.

    Who it’s NOT for: Anyone who grills regularly or in windy conditions. The wobbly legs and lack of a tight lid seal make it struggle on a breezy day.

    3. The Weber Smokey Joe Premium – The Charcoal Charmer

    Model: 121020. Price: $130. I’ve been a charcoal holdout, so I used this one for a full month to really get the hang of it.

    What I loved: The quality is immediately obvious. The lid seals onto the kettle with a satisfying, airtight sound. The grates are heavy porcelain-enameled cast iron. The legs are thick and stable. It’s a Weber; it’s built to last a decade. Cooking with charcoal, the flavor is undeniable. My grilled chicken thighs had that smoky, kiss-of-fire taste you just can’t get from propane. It’s also incredibly versatile—I did a small whole chicken on the grill using indirect heat. It felt like I was actually cooking, not just heating up food.

    What annoyed me: The portability is… relative. It’s light (around 12 lbs), but it’s round and bulky. I couldn’t just slide it into a crowded trunk with the cooler and chairs; it needed its own space. Lighting charcoal takes time and patience. On a cold, windy day, getting those coals lit and ready took over 30 minutes. Propane gives you flame in 5 minutes. Also, $130 is a lot for a “budget” list, but for a Weber, it’s actually entry-level.

    Who it’s for: The purist, the camper who’s already got a charcoal chimney, or someone who values flavor and build above all else. It’s a commitment, but a rewarding one.

    Who it’s NOT for: The impatient griller. If you want to just show up and fire it up immediately, stick with propane.

    Side-by-Side Comparison

    Feature GrillMaster Compact 300 ($89) Outdoor Elements 4500 ($45) Weber Smokey Joe Premium ($130)
    Fuel Type Propane (1 lb tank) Propane (1 lb tank) Charcoal
    Weight ~15 lbs ~8 lbs ~12 lbs
    Build Quality Very Good (8/10) Fair (5/10) Excellent (9/10)
    Heat Evenness Good Mediocre (hot spots) Very Good (with technique)
    Stability/Legs Excellent (locking pins) Poor (can be wobbly) Excellent (tripod design)
    Ignition/Setup Speed Instant push-button Instant push-button 15-30 minutes (charcoal)
    Flavor Profile Standard gas grilled Standard gas grilled Smoky, charcoal kissed
    Best For Reliable regular use Ultra-tight budgets, occasional use Flavor enthusiasts, patient cooks

    What to Know Before You Buy a Portable Grill

    Forget the marketing buzzwords. Here’s what actually matters based on my three weeks of sweating over these things:

    • Propane vs. Charcoal: This is your first big decision. Propane (like the GrillMaster and Outdoor Elements) is about convenience. Fast heat, easy control, simple cleanup. Charcoal (the Weber) is about flavor and ritual. You trade time and convenience for that classic smoky taste. Be honest with yourself about which you’ll actually use.
    • Weight and Footprint: “Portable” means different things. Is it for car camping (weight matters less) or for walking a quarter mile to a beach spot (weight is everything)? Also, measure your trunk space. The round Weber is surprisingly tricky to pack next to square coolers.
    • Lid Seal is Everything: A good, tight seal (like on the GrillMaster and Weber) does two things: it holds heat better (cooks faster) and prevents flare-ups from wind. A wobbly, loose lid (like on the cheap Outdoor Elements) means wind blows out your flame and heat escapes, leading to longer cook times and uneven results.
    • Cleaning: Look at the cooking grate. Porcelain-coated or cast iron will be much easier to clean than bare wire. A removable grease tray is a godsend. The Weber’s ashes are messy to dispose of; the propane models just need a grate scrub.

    FAQ: The Questions I Actually Had

    Is the cheap $45 grill worth it, or should I save up?

    It depends on your use. If you’re hosting a college tailgate and need something you won’t cry about if it gets lost or broken, go for the Outdoor Elements 4500. It works. But if you see yourself grilling every weekend this summer, the extra $40-$50 for the GrillMaster Compact 300 is worth it in build quality and stability alone. The cheap grill is a product; the GrillMaster feels like a tool.

    Does a charcoal grill really taste that much better than propane?

    Okay, I was a skeptic. But after a month? Yes, there is a noticeable difference, especially with things like chicken and vegetables. Charcoal adds a layer of smoky depth that propane can’t replicate. It’s not “better” if you value speed and convenience above all, but for pure flavor, charcoal wins. I made a simple chicken breast on both, and the one from the Weber had more character.

    How important is BTU (British Thermal Units)?

    For a small portable grill, not very. The GrillMaster has 10,000 BTUs, and the Outdoor Elements has 8,000. Did I notice a huge difference in cooking speed? No. What mattered more was the grill’s ability to retain and distribute that heat evenly, which is a design issue, not a raw power issue. Don’t get hung up on the BTU number for a grill this size.

    Can I use these on an apartment balcony?

    Check your lease! Many prohibit charcoal. The propane models (GrillMaster and Outdoor Elements) are often allowed, but some buildings still say no. The Weber Smokey Joe is almost certainly a “no” for most apartments due to open charcoal flames. Always, always check first.

    Final Take: Where My Money Went

    If I had to do it over again, I’d buy the same two grills I kept: the GrillMaster Compact 300 and the Weber Smokey Joe Premium. The GrillMaster is my weeknight and casual outing workhorse. It’s reliable, feels solid, and gets the job done without fuss. The hot handle is a flaw, but I just

    🛒 Recommended Products

    *As an Amazon Associate I earn from qualifying purchases.

  • Air-Fried Miso-


    Air-Fried Miso-Glazed Salmon: A Perfect Crisp-Edge Recipe

    Introduction

    This recipe transforms a simple salmon fillet into a restaurant-quality dish with minimal effort. The core principle is using the air fryer’s intense, circulating heat to quickly render the fish’s fat and caramelize the miso glaze, creating a delectably crisp, savory-sweet crust while keeping the interior moist and flaky. The high-glutamate miso paste acts as both a flavor enhancer and a tenderizer, while the touch of mirin and sugar promotes perfect browning without burning. This method is ideal for weeknight dinners, requiring under 15 minutes from start to plate. It’s a foolproof technique for home cooks of any level to achieve professional-looking results.

    Finished Air-Fried Miso-Glazed Salmon beautifully plated, professional food photography, natural lighting

    What You’ll Need

    Ingredients

    • Salmon Fillets: 4 fillets, 6 oz (170g) each, skin-on for crispiness and flavor.
    • White Miso Paste (Shiro Miso): 3 tablespoons (45g). Do not use red miso; it’s too salty and robust for this quick cooking time.
    • Mirin (Sweet Rice Wine): 1 tablespoon (15ml). Use hon-mirin, not aji-mirin, for balanced sweetness.
    • Soy Sauce: 1 tablespoon (15ml), low-sodium recommended.
    • Sesame Oil: 1 teaspoon (5ml), toasted.
    • Fresh Ginger: 1 teaspoon, finely grated.
    • Brown Sugar or Honey: 1 teaspoon (about 5g). This aids in caramelization.
    • Cornstarch: 1 teaspoon (5g). This is the secret to a crisp, non-soggy glaze.
    • Garnish: Toasted sesame seeds and thinly sliced scallions.

    Equipment

    • An air fryer basket (I recommend a basket-style over a tray for better circulation). Check Price on Amazon for a basket-style air fryer.
    • Instant-read thermometer (highly recommended for perfect doneness).
    • Mixing bowl, whisk, paper towels, and a silicone brush.

    Prep Work

    Proper prep ensures an even cook and maximum flavor absorption.

    1. Prepare the Miso Glaze: In a small bowl, whisk together the miso paste, mirin, soy sauce, sesame oil, grated ginger, brown sugar, and cornstarch until completely smooth. The mixture should be thick, like a loose paste.
    2. Prep the Salmon: Pat the salmon fillets thoroughly dry with paper towels, especially the skin. Moisture is the enemy of crispiness. Score the skin side by making 3-4 shallow slashes. This prevents curling and allows heat to penetrate.
    3. Marinate: Place salmon in a dish, skin-side down. Coat the top and sides generously with the miso glaze, reserving about 1 tablespoon for later. Let it marinate at room temperature for 20-30 minutes. Do not exceed 1 hour, as miso is acidic and can begin to “cook” the surface protein.
    4. Air Fryer Prep: Preheat your air fryer to 400°F (200°C) for at least 5 minutes. A hot chamber is crucial for immediate searing.

    In my experience, scoring the skin is a non-negotiable step for preventing that chewy, unappealing texture. It takes 15 seconds but makes a world of difference.

    Ingredients prepped and organized on cutting board, mise en place, professional kitchen setup

    Cooking Instructions

    Follow these steps precisely. The cooking time is short, so have everything ready.

    1. Load the Basket: Lightly spray the air fryer basket with cooking oil. Place the salmon fillets in a single layer, skin-side DOWN. Do not overcrowd. You may need to cook in two batches. Brush the reserved glaze over the top of the fillets now.
    2. First Cook Phase: Air fry at 400°F (200°C) for 5 minutes. This initial blast renders the skin fat and starts cooking the glaze.
    3. Flip and Finish: Open the basket. The skin should be starting to crisp. Carefully flip each fillet using a thin spatula so the glazed side is now down (touching the basket). Air fry for an additional 3-5 minutes. For a 6oz fillet, total time is typically 8-10 minutes.
    4. Check for Doneness: The salmon is done when the internal temperature at the thickest part reaches 125-130°F (52-54°C) for medium-rare to medium, or 145°F (63°C) for well-done. The glaze should be deeply caramelized, dark golden brown, and slightly charred at the edges. The fish should flake easily with gentle pressure from a fork. If using a digital thermometer, it’s your best tool here.
    5. Rest: Transfer salmon to a plate and let it rest for 2-3 minutes. The residual heat will continue to cook it gently, and the juices will redistribute.
    6. Garnish and Serve: Sprinkle with toasted sesame seeds and fresh scallions immediately before serving.

    Cooking process shot, Air-Fried Miso-Glazed Salmon in pan, steam rising, professional action photography

    Chef’s Insight

    I find that flipping the salmon for the second half of cooking serves two purposes: it prevents the glaze from burning under the direct heat, and it finishes crisping the skin from the radiant heat of the basket. Watch the last 2 minutes closely—sugar burns quickly.

    Pro Tips

    • The Cornstarch Secret: Don’t skip it. It absorbs excess moisture from the glaze and creates a light, crispy coating instead of a sticky, wet one.
    • Skin Crispiness Guarantee: For ultra-crispy skin, after flipping the salmon, let it cook glazed-side down. The skin will be exposed to the circulating hot air and become shatteringly crisp.
    • Substitutions: Salmon Alternatives: This glaze works beautifully on skinless chicken thighs (cook time ~12-15 mins) or firm tofu steaks. No Mirin? Use 2 teaspoons rice vinegar plus 1 extra teaspoon of sugar.
    • Make-Ahead: The glaze can be made up to 3 days ahead and stored in the fridge. Salmon can be marinated, covered, in the fridge for up to 2 hours before cooking. Add 1-2 minutes to the cook time if chilled.

    Serving Suggestions

    This dish is rich and savory, so it pairs best with simple, clean sides.

    • Starch: Steamed short-grain rice or quinoa to soak up the glaze. For a twist, try coconut rice.
    • Vegetables: Quickly blanched broccolini, steamed bok choy, or a crisp cucumber salad dressed with rice vinegar.
    • Portion Guidance: One 6oz fillet is a standard adult main course portion. Serve with roughly 1 cup of cooked rice and 1/2 cup of vegetables per person.

    FAQ

    1. Can I use frozen salmon fillets?

    Yes, but you must thaw them completely first using the refrigerator (preferred, overnight) or the cold water method (30-60 minutes). Never cook from frozen with this glaze, as it will release excess water and prevent proper searing, leading to a steamed, soggy result.

    2. How do I know when it’s done without a thermometer?

    Visual and tactile cues are reliable. Gently press the center of the fillet with a fork or your finger. It should feel firm but still have a slight give. The flesh should be opaque pink at the edges but may still be slightly translucent in the very center—it will continue to cook as it rests. If the glaze is deeply caramelized and the fish flakes easily with minimal pressure, it’s done.

    3. Can I prep the glazed salmon ahead and air fry later?

    Yes, this is a great make-ahead strategy. Marinate the salmon, place it on a plate, cover tightly, and refrigerate for up to 2 hours. When ready to cook, proceed directly to preheating the air fryer. The chill may require adding 1-2 extra minutes to the total cooking time.

    4. My glaze is burning before the salmon is cooked. What went wrong?

    This usually means your air fryer runs hot or the fillets are thinner than 1 inch. Two solutions: First, lower the temperature to 375°F (190°C) and add 2-3 minutes to the total time. Second, you can tent the salmon loosely with a small piece of foil for the first 4 minutes of cooking, then remove it for the final stage to brown the glaze.

    *As an Amazon Associate I earn from qualifying purchases.*


  • Quick Mediterranean Salmon Stir Fry

    Quick Mediterranean Salmon Stir Fry

    This stir fry delivers a restaurant-quality meal in under 25 minutes, making it the ideal solution for a nutritious, flavor-packed weeknight dinner. It leverages the high-heat, quick-cooking technique of stir-frying to keep the salmon tender and moist while developing a delicious crust. The Mediterranean flavor profile—bright lemon, briny olives, and fresh herbs—comes together with minimal prep. This recipe is perfect for beginner to intermediate home cooks looking to master a quick, healthy technique. The core skills involved are proper heat management and knowing when your protein is perfectly cooked.

    Finished Quick Mediterranean Salmon Stir Fry beautifully plated, professional food photography, natural lighting

    What You’ll Need

    Ingredients (Serves 2)

    • Salmon Fillets: 2 fillets, 6 ounces each, skin-on preferred. Why skin-on? It protects the delicate flesh and can crisp up beautifully.
    • Kosher Salt: 1 teaspoon, divided.
    • Black Pepper: ½ teaspoon, freshly ground.
    • Extra Virgin Olive Oil: 2 tablespoons, divided. Choose a good quality, low-smoke-point oil for flavor.
    • Yellow Onion: 1 small, diced (about 1 cup).
    • Garlic: 3 cloves, thinly sliced.
    • Cherry Tomatoes: 1 cup, halved.
    • Kalamata Olives: ¼ cup, pitted and roughly chopped.
    • Fresh Spinach: 2 packed cups.
    • Lemon: 1, zested and juiced (about 2 tablespoons juice).
    • Fresh Parsley or Basil: 2 tablespoons, chopped, for garnish.
    • Optional Serving: 1 cup cooked quinoa or orzo.

    Equipment

    • 12-inch Stainless Steel or Cast Iron Skillet/Wok: [Check Price on Amazon] A large pan ensures ingredients aren’t crowded, allowing for proper searing.
    • Sharp Chef’s Knife & Cutting Board
    • Mis en Place Bowls
    • Instant-Read Thermometer: [Check Price on Amazon] The most reliable tool for perfect salmon.
    • Tongs or a Fish Spatula

    Prep Work

    Timing Note: All ingredients can be prepped and organized (mise en place) before you turn on the stove. This is a fast-cooking dish; prep must be ready.

    1. Salon: Pat fillets completely dry with paper towels. This is crucial for searing. Season both sides with ½ teaspoon kosher salt and the pepper. Let them sit at room temperature for 10 minutes while you prep vegetables. This tempers the fish for even cooking.
    2. Vegetables: Dice the onion, slice the garlic, halve the tomatoes, and chop the olives and herbs. Keep them separate, as they have different cooking times.
    3. Lemon: Zest the entire lemon first, then juice it.

    Ingredients prepped and organized on cutting board, mise en place, professional kitchen setup

    Cooking Instructions

    1. Heat the Pan: Place your 12-inch skillet over medium-high heat (375°F / 190°C). Let it get fully hot for 1-2 minutes. Add 1 tablespoon olive oil. It should shimmer immediately. Listen for a faint sizzle as the oil heats.
    2. Sear the Salmon: Carefully place salmon fillets skin-side up (flesh-side down) in the pan. Do not move them. Sear for 3 minutes undisturbed. You’ll see the color change from translucent orange to opaque pink about ⅔ of the way up the side. Listen for a steady, aggressive sizzle. If it’s smoking, reduce heat slightly.
    3. Flip and Finish Salmon: Using tongs, gently flip the salmon to skin-side down. Cook for 1-2 minutes more, depending on thickness. The fish is done when the internal temperature, tested with your thermometer, reaches 125°F / 52°C for medium (it will carryover cook). It will flake easily with a fork but still be moist in the center. Immediately transfer salmon to a plate. In my experience, most home cooks overcook salmon. Use the thermometer!
    4. Build the Sauté: Reduce heat to medium (325°F / 165°C). Add the remaining 1 tablespoon olive oil to the same pan. Add the diced onion and a pinch of the remaining salt. Sauté for 3-4 minutes**, stirring occasionally, until softened and translucent.
    5. Add Aromatics and Vegetables: Add the sliced garlic and cook for 30 seconds**, stirring constantly, until fragrant. Do not let it brown. Immediately add the cherry tomatoes, olives, and lemon zest. Cook for 2 minutes, stirring, until the tomatoes just begin to soften and release their juice.
    6. Wilt the Greens and Finish Sauce: Add the fresh spinach in handfuls, stirring until it just wilts, about 1-2 minutes. Remove the pan from heat. Stir in the lemon juice and fresh herbs. Taste and adjust seasoning with salt and pepper if needed.
    7. Combine and Serve: Nestle the seared salmon fillets back into the pan with the vegetables, skin-side up, to warm through for 30 seconds. Spoon the vegetable mixture over the top. Serve immediately.

    Cooking process shot, Quick Mediterranean Salmon Stir Fry in pan, steam rising, professional action photography

    Pro Tips

    • The Dry Brine Trick: Salting the salmon 10 minutes ahead (or up to 24 hours in the fridge) seasons the meat deeply and draws out moisture for a better sear.
    • Substitutions That Work: Use halibut or cod instead of salmon. If using a leaner white fish, reduce searing time by 1 minute per side. For a vegan version, substitute salmon with extra-firm tofu (pressed and cubed) or chickpeas.
    • Make-Ahead Option: Prep all vegetables and make the lemon-herb mixture up to a day ahead. Store separately in the fridge. Cook the salmon fresh when ready—it only takes 5 minutes.
    • One Pan, Maximum Flavor: Don’t clean the pan between cooking the salmon and vegetables. Those browned bits (the fond) are packed with flavor and will become the base of your sauce.

    Serving Suggestions

    This stir fry is a complete meal on its own, but for heartier appetites, serve it over 1 cup of cooked fluffy quinoa, lemon-herb orzo, or cauliflower rice to soak up the delicious juices. Portion guidance: one 6-ounce salmon fillet per person with an equal portion of the vegetable mixture. A crisp, cold glass of Pinot Grigio or Sauvignon Blanc pairs excellently.

    FAQ

    Can I use frozen salmon?

    Yes, but ensure it is fully thawed in the refrigerator overnight. Before cooking, pat it extremely dry—frozen salmon releases more moisture. You may need to sear it for an extra 30-60 seconds per side.

    How do I know when it’s perfectly done?

    The most reliable method is an instant-read thermometer inserted into the thickest part. For moist, tender salmon, pull it at 125°F / 52°C. It will rise 5-10 degrees as it rests. Visually, the flesh should be mostly opaque but still have a slightly translucent, deep pink center.

    Can I prep this ahead of time?

    Absolutely. The mise en place is everything. Dice your onion, slice garlic, halve tomatoes, and chop olives up to 24 hours in advance, storing them in airtight containers. Zest your lemon but don’t juice it until cooking. Season your salmon no more than 1 hour ahead for the best texture.

    *As an Amazon Associate I earn from qualifying purchases.*