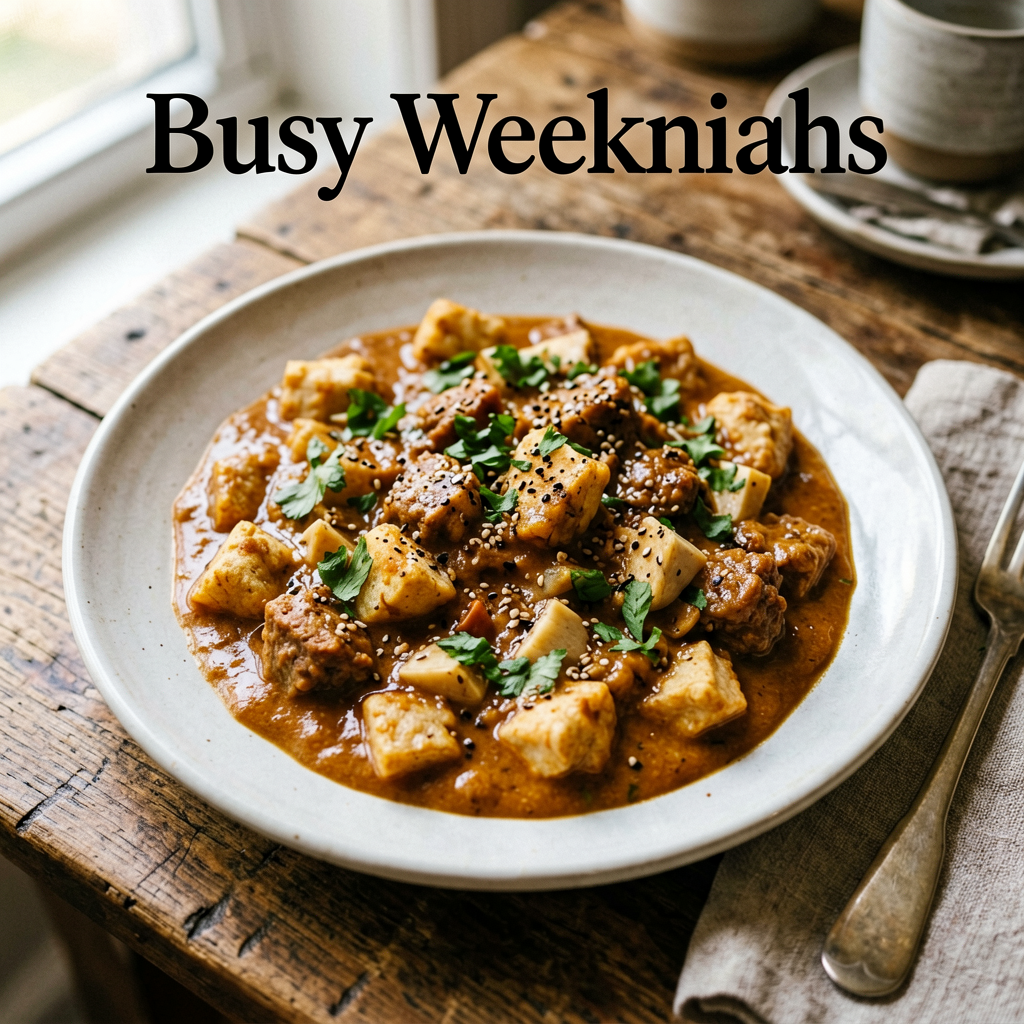
Mexican Chicken Curry for Busy Weeknights
This recipe is a practical, one-pan fusion dish that combines the earthy warmth of curry with the bright, smoky flavors of Mexican cuisine. It’s designed for efficiency, delivering deep flavor in about 30 minutes from start to finish. The technique focuses on building layers of flavor quickly—sautéing aromatics, toasting spices, and simmering—making it ideal for home cooks of any skill level seeking a hearty, homemade, and family-friendly weeknight meal. The result is tender chicken in a rich, creamy tomato-coconut sauce, balanced with lime and cilantro.
What You’ll Need
Ingredients (Serves 4)
- For the Curry:
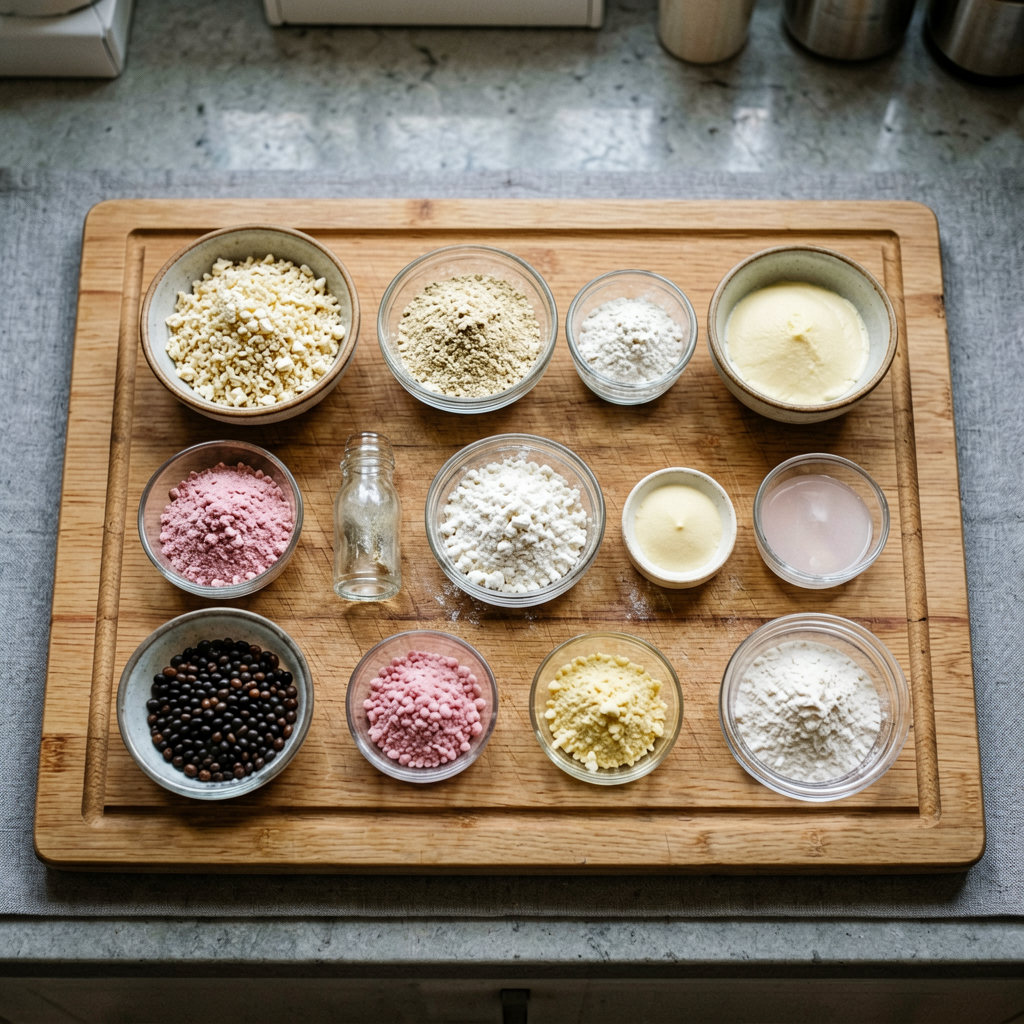
- 1.5 pounds (680g) boneless, skinless chicken thighs, cut into 1.5-inch pieces
- 1 tablespoon (15ml) neutral oil (like avocado or canola)
- 1 medium yellow onion (about 200g), finely diced
- 3 cloves garlic, minced
- 1 tablespoon (15g) fresh ginger, grated
- 1 jalapeño, seeded and finely minced (optional, for heat)
- 2 tablespoons (18g) curry powder (a standard madras blend works well)
- 1 teaspoon (3g) smoked paprika
- 1/2 teaspoon (1.5g) ground cumin
- 1 can (14.5 oz / 411g) fire-roasted diced tomatoes, undrained
- 1 can (13.5 oz / 383g) full-fat coconut milk
- 1/2 cup (120ml) low-sodium chicken broth
- 1 teaspoon (4g) granulated sugar (optional, to balance acidity)
- Salt and freshly ground black pepper to taste
- For Finishing:
- 1/4 cup (60ml) fresh lime juice (about 2 limes)
- 1/2 cup (20g) fresh cilantro, roughly chopped
Ingredient Notes: Using chicken thighs is key for juicy results; breasts can dry out. Full-fat coconut milk provides necessary richness—lite versions won’t yield the same creamy texture. The fire-roasted tomatoes add a crucial smoky depth.
Equipment Needed
- 12-inch (30cm) heavy-bottomed skillet or Dutch oven (a large capacity pan is crucial to avoid overcrowding)
- Instant-read thermometer
- Cutting board and sharp knife
- Microplane or fine grater (for ginger)
Prep Work
Proper mise en place (everything in its place) is the secret to a smooth, 30-minute cook time. Complete all prep before turning on the stove.
- Chicken: Pat the chicken thighs completely dry with paper towels. This ensures a proper sear rather than steaming. Cut into uniform 1.5-inch pieces for even cooking. Season lightly with salt and pepper.
- Aromatics: Dice the onion, mince the garlic and jalapeño, and grate the ginger. Keep them in separate piles on your cutting board or in small bowls.
- Spices: Measure out the curry powder, smoked paprika, and cumin into a small bowl. Having them ready allows you to add them quickly and prevent burning.
- Liquids: Open the cans of tomatoes and coconut milk. Have the broth and lime juice measured and ready.
Cooking Instructions
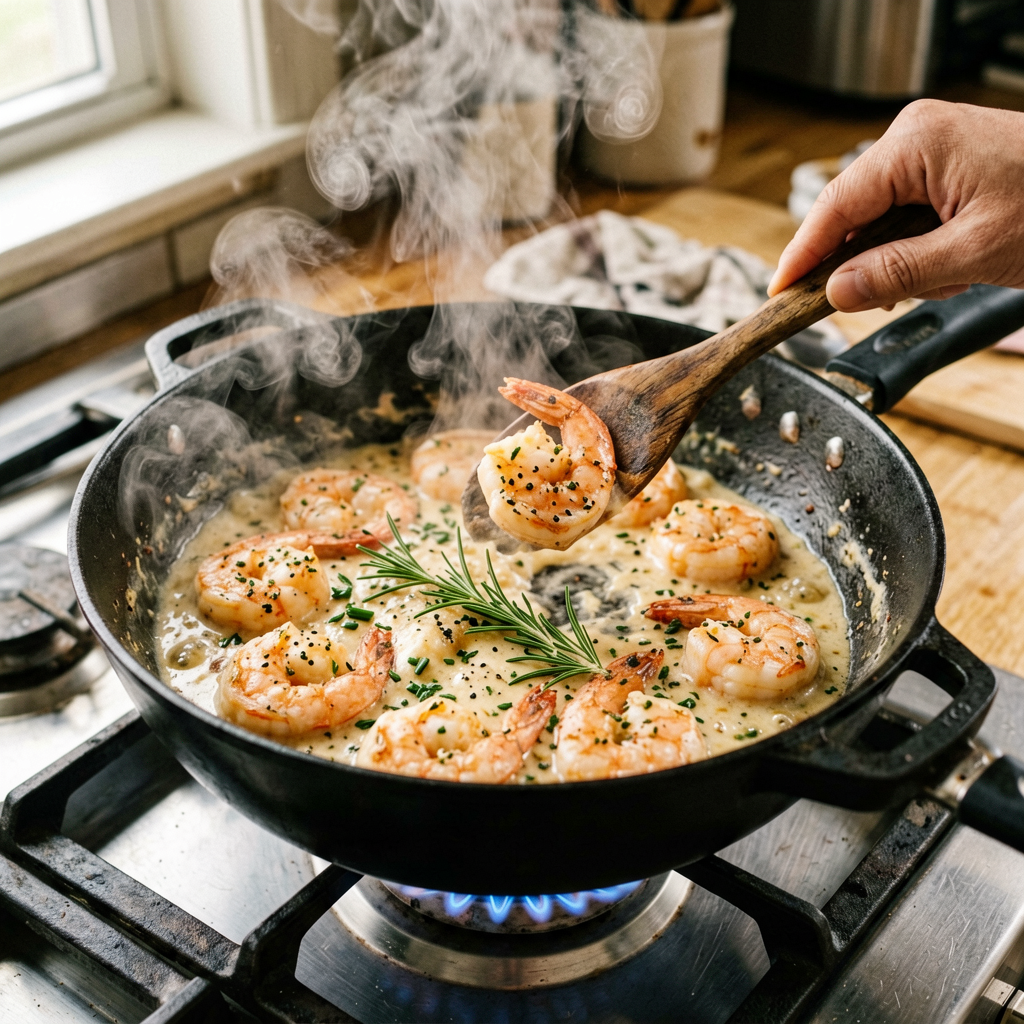
- Sear the Chicken (5-7 minutes): Heat the oil in your 12-inch skillet over medium-high heat (375°F / 190°C) until shimmering. Add the chicken pieces in a single layer without crowding the pan (work in batches if necessary). Sear for 5 minutes undisturbed until a golden-brown crust forms on the first side. Flip and cook for another 2-3 minutes until browned on a second side. The chicken does not need to be cooked through at this stage. Transfer the chicken to a plate and set aside.
- Build the Aromatic Base (4-5 minutes): Reduce heat to medium (325°F / 165°C). There should be about 1 tablespoon of fat left in the pan; add a bit more oil if the pan is dry. Add the diced onion and cook, stirring occasionally, for 3-4 minutes until softened and translucent. Add the garlic, ginger, and jalapeño. Cook for 1 minute more, stirring constantly, until fragrant. You should hear a gentle sizzle, not a harsh sear.
- Toast the Spices (1 minute): Add the bowl of spices (curry powder, paprika, cumin) to the aromatic mixture. Stir constantly for 45-60 seconds. This blooms the spices, unlocking their full flavor. The mixture will become very fragrant and slightly darker. This step is critical—don’t skip it.
- Simmer the Sauce (15-20 minutes): Pour in the fire-roasted tomatoes (with their juices), coconut milk, and chicken broth. Stir well, scraping up any browned bits from the bottom of the pan (fond). Bring the sauce to a gentle boil, then reduce heat to a low simmer. Stir in the optional sugar. Let it simmer uncovered for 10 minutes to thicken slightly and meld flavors.
- Finish the Dish (5-7 minutes): Return the seared chicken and any accumulated juices from the plate to the skillet. Stir to combine. Simmer for an additional 5-7 minutes, or until the chicken is cooked through and tender. Verify doneness with an instant-read thermometer; the internal temperature should reach 165°F / 74°C.
- Final Touches (2 minutes): Remove the pan from the heat. Stir in the fresh lime juice and cilantro. Taste and adjust seasoning with salt and pepper. The acidity from the lime should brighten all the flavors. Let it rest for 5 minutes before serving; the sauce will continue to thicken as it cools slightly.

Pro Tips
- The Toasting Technique: Blooming the spices in the fat with the onions is a professional step that transforms a good curry into a great one. It removes any raw, dusty taste and integrates the spice flavor into the oil-based sauce.
- Don’t Skip the Acid: The fresh lime juice added off-heat at the end is non-negotiable. It cuts through the richness of the coconut milk and awakens all the other flavors.
- Make-Ahead & Substitutions: This curry reheats beautifully. For a make-ahead version, complete through step 5, cool, and refrigerate for up to 3 days. Reheat gently on the stove, adding a splash of broth if needed. You can substitute 2 boneless, skinless chicken breasts (about 1.25 lbs), pounded to an even 3/4-inch thickness and cut into chunks, but thighs are more forgiving. For a vegetarian version, use 2 (15-oz) cans of drained and rinsed chickpeas or 1 lb of cubed firm tofu, added in step 5.
- My Experience: I find that using full-fat coconut milk is essential for the intended creamy, balanced texture. If you prefer a thicker curry, you can mash a few of the softened onion pieces against the side of the pan during the simmer or let it reduce for an extra 5 minutes.
Serving Suggestions
Portion size is generous; serve 1 generous cup (about 240g) of curry per person.
- Starches: Excellent over fluffy basmati rice or warm naan bread to soak up the sauce. For a lighter option, try it over cauliflower rice.
- Garnishes: A dollop of sour cream or plain yogurt, extra cilantro, a lime wedge, and sliced avocado are all fantastic additions.
- Sides: A simple cucumber raita or a crisp green salad with a lime vinaigrette provides a cool, fresh contrast.
FAQ
Can I use frozen chicken?
Yes, but thaw it completely first for even cooking. The best method is to thaw in the refrigerator overnight. A quicker method is to submerge the sealed package in cold water for 30-60 minutes, changing the water every 15 minutes. Never sear frozen chicken directly, as it will steam and turn gray.
How do I know when it’s done?
The most reliable method is an instant-read thermometer. The internal temperature of the thickest piece of chicken should reach 165°F / 74°C. Visually, the chicken should be opaque throughout, and the sauce should be simmering gently with small bubbles breaking the surface.
Can I prep this ahead?
Absolutely. The “onion-garlic-ginger” base can be prepped and stored in an airtight container in the fridge for up to 2 days. You can also measure all your dry spices into a small jar. This can reduce your active stovetop time by 5-7 minutes on a hectic night.
Is this spicy?
As written, it’s mild to moderately warm, with background heat from the spices and a hint from the jalapeño. To make it kid-friendly, omit the jalapeño entirely. For more heat, leave the seeds in the jalapeño or add 1/4 teaspoon of cayenne pepper with the other spices.
🛒 Recommended Products
*As an Amazon Associate I earn from qualifying purchases.
*As an Amazon Associate I earn from qualifying purchases.*