Introduction
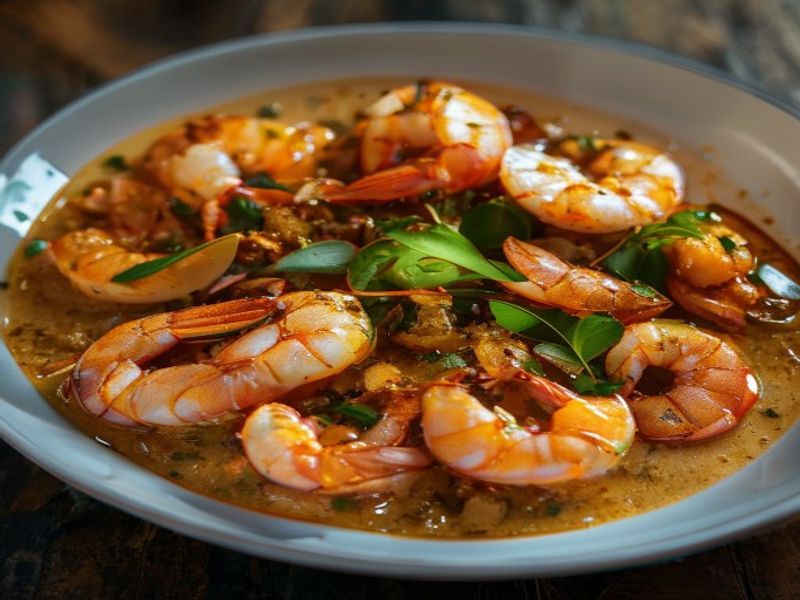
This busy weeknights american shrimp curry delivers restaurant-quality flavor in under 25 minutes. The recipe bridges classic South Asian spice profiles with streamlined American cooking techniques, prioritizing efficiency without sacrificing depth. It is designed for beginner to intermediate home cooks who need a reliable, quick dinner that scales easily for families. The key to success lies in controlled heat management, proper protein searing, and a balanced emulsion of coconut milk and aromatics. By separating the initial cook from the sauce build, you prevent rubbery texture while maximizing flavor extraction from the spice blend. This easy recipe, homemade from scratch, eliminates unnecessary simmering steps while maintaining professional culinary standards. Mastering the timing and temperature control outlined below guarantees consistent results every single night.
What You’ll Need
Ingredients
- 1.5 pounds large raw shrimp (21/25 count), peeled and deveined
- 2 tablespoons neutral oil (canola or grapeseed)
- 1 medium yellow onion (8 ounces), diced to 1/4-inch pieces
- 4 cloves garlic, finely minced
- 1 tablespoon fresh ginger root, finely grated
- 3 tablespoons American-style curry powder (mild to medium heat)
- 1 can (13.5 ounces) full-fat coconut milk, shaken thoroughly
- 1/2 cup low-sodium chicken or vegetable broth
- 1 tablespoon fish sauce (or light soy sauce)
- 1 teaspoon granulated white sugar
- 1 lime, juiced (approximately 2 tablespoons)
- 1/4 cup fresh cilantro leaves, roughly chopped
- Kosher salt and freshly ground black pepper, to taste
Ingredient Selection Notes: Select raw shrimp that smell clean and oceanic, not ammonia-like. Full-fat coconut milk is mandatory; light versions contain stabilizers that break under direct heat. American-style curry powder typically blends turmeric, coriander, cumin, and fenugreek, providing an approachable, familiar flavor base without requiring whole spice grinding.
Equipment
- 12-inch stainless steel skillet with heavy bottom [Check Price on Amazon]
- Digital instant-read thermometer
- Microplane or fine grater
- Fine-mesh strainer
- Silicone-tipped tongs and heat-resistant spatula
- Measuring cups and spoons
Prep Work
Proper mise en place prevents overcooking during high-heat execution. Begin by rinsing the shrimp under cold water, then drain through a fine-mesh strainer. Pat the 1.5 pounds completely dry with three layers of paper towels. Surface moisture creates immediate steam, which inhibits Maillard reaction and crust formation. Keep the shrimp refrigerated at 38°F / 3°C until the exact moment they hit the pan. Dice the onion, mince the garlic, and grate the ginger into a single prep bowl. Measure the curry powder and keep it uncovered. Whisk the coconut milk, broth, fish sauce, and sugar in a 2-cup measuring vessel until the sugar fully dissolves. Bring this liquid mixture to room temperature for exactly 10 minutes before cooking; adding cold coconut milk to a hot pan causes immediate protein coagulation and fat separation. Total prep time requires exactly 8-10 minutes. You can safely chop the aromatics and mix the sauce base up to 4 hours in advance, storing them covered in the refrigerator.
Cooking Instructions
- Sear the Shrimp: Place the 12-inch skillet over medium-high heat. Add 1 tablespoon of neutral oil and heat to 350°F / 175°C. Carefully arrange the dried shrimp in a single layer with zero overlap. Sear for 90 seconds undisturbed. Listen for a sharp, consistent sizzle. Flip with tongs and cook for exactly 60 seconds. The exterior should show a light pink hue with a faint golden edge, and the internal temperature must read precisely 120°F / 49°C. Transfer immediately to a clean plate. Overcooking at this stage guarantees a tough, rubbery final product.
- Build the Aromatic Base: Reduce heat to medium. Add the remaining 1 tablespoon of oil to the same pan. Scrape the browned fond from the bottom with a spatula. Add the diced onion and cook for 4 minutes, stirring every 60 seconds, until fully translucent and softened at the edges. Add the minced garlic and grated ginger. Cook for 30 seconds until fragrant. Do not allow the garlic to brown, as it will develop harsh, bitter compounds.
- Bloom the Spices: Add the 3 tablespoons of curry powder directly to the center of the pan. Stir continuously with a silicone spatula for 45 seconds. The spices will darken slightly and release a deep, toasted aroma. This step activates fat-soluble flavor molecules and eliminates raw powder taste. If the pan appears excessively dry, add 1 tablespoon of broth.
- Construct the Sauce: Pour the room-temperature coconut milk mixture into the pan. Increase heat to medium-high and bring to a gentle simmer, targeting 185°F / 85°C. Reduce to medium-low and cook for 3 minutes. The sauce will thicken slightly and coat the back of a spoon without pooling. Taste and adjust with salt. Avoid vigorous boiling, as temperatures above 195°F / 90°C will cause the coconut fat to break and separate.
- Final Assembly: Return the seared shrimp and resting juices to the pan. Toss gently to coat evenly. Cook for exactly 2 minutes. The shrimp will curl into a relaxed “C” shape and reach a safe internal temperature of 145°F / 63°C. Remove the skillet from heat immediately. Stir in the lime juice and fresh cilantro. The residual heat will finish the dish without compromising protein structure. Common mistake: Boiling the curry after recombining the protein or using a thin-walled pan, both of which destroy texture.
Pro Tips
I find that resting the seared shrimp separately from the sauce is the single most impactful technique for weeknight execution. It gives you complete control over protein doneness while allowing the curry base to reduce and concentrate without interference. In my experience, American curry blends vary significantly in salt content, so always taste the sauce before adding extra salt or fish sauce. For substitutions, firm tofu or boneless chicken thighs work reliably, but adjust cooking times accordingly (chicken requires 6-7 minutes per side to reach 165°F / 74°C). If you prefer a thicker emulsion, simmer the coconut mixture for an additional 4 minutes before returning the shrimp, or whisk in a 1:1 cornstarch slurry.
Serving Suggestions
Serve immediately over 1.5 cups of cooked jasmine rice per person. The starch effectively absorbs the emulsified coconut curry while providing textural contrast. Steamed bok choy or roasted asparagus (baked at 400°F / 200°C for 12 minutes) adds necessary acidity and crunch to balance the rich sauce. This recipe yields 4 standard portions of approximately 6 ounces of shrimp and 3/4 cup of sauce each. For a lighter presentation, spoon the curry over cauliflower rice or mixed greens, keeping the sauce ratio slightly higher to prevent dryness. Always serve hot, as coconut fat will solidify below 120°F / 49°C.
FAQ
Can I use frozen shrimp for this recipe?
Yes, but thaw completely in the refrigerator overnight or under cold running water for exactly 15 minutes. Pat them aggressively dry with paper towels. Frozen shrimp retain excess ice crystals that will steam rather than sear, so skipping the drying step destroys the crust and dilutes the sauce.
How do I know when the shrimp are done?
Visual and thermal cues are your primary indicators. The shrimp will transition from translucent gray to opaque pink/white, and their body will form a relaxed “C” curve. If they curl into a tight “O,” they are overcooked. For absolute precision, insert an instant-read thermometer into the thickest section, targeting exactly 145°F / 63°C.
Can I prep this ahead of time?
The sauce base can be fully prepared, cooled, and stored in an airtight container in the refrigerator for up to 3 days. Reheat gently on low heat to 160°F / 71°C before adding freshly seared shrimp. Do not store cooked shrimp in the sauce overnight, as the acidic lime and continued enzymatic activity will continue to denature the proteins, resulting in a tough, chalky texture.
What makes this an American-style curry?
American curry typically relies on pre-blended powder mixes, coconut milk, and a slightly sweeter, creamier profile compared to traditional regional variations. It prioritizes accessibility and speed, using pantry staples to replicate complex flavor layers without requiring whole spice toasting, tempering, or lengthy simmering times.
*As an Amazon Associate I earn from qualifying purchases.
发表回复