Introduction
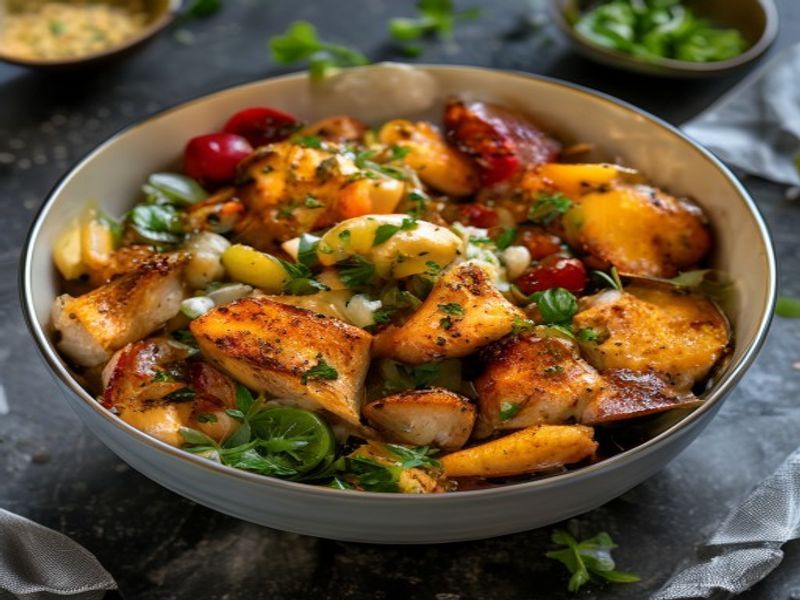
This quick one-pan chicken bowl delivers restaurant-quality balance with minimal cleanup, making it an ideal easy recipe for weeknight cooking. The foundation relies on precise heat management and sequential ingredient addition to preserve texture while building layered flavors. By cooking boneless chicken thighs alongside crisp vegetables in a single heavy-bottomed pan, you eliminate cross-contamination risks and streamline your workflow. This homemade, family friendly dish targets beginner to intermediate cooks who want reliable results without sacrificing technique. The method focuses on high-heat searing, controlled simmering, and strategic resting to lock in moisture. You will learn how to maintain consistent pan temperature, read visual doneness cues, and assemble a nutritionally complete bowl in under 25 minutes.
What You’ll Need
Ingredients
- 1.5 pounds boneless, skinless chicken thighs, trimmed of excess fat
- 2 tablespoons high-smoke point neutral oil (avocado or grapeseed)
- 1.5 cups fresh broccoli florets, cut to uniform 1-inch pieces
- 2 medium red bell peppers (approximately 12 ounces total), seeded and sliced into 1/2-inch strips
- 3 cloves garlic, finely minced
- 1 tablespoon fresh ginger, finely grated
- 3 tablespoons low-sodium soy sauce
- 1 tablespoon rice vinegar
- 2 tablespoons honey
- 1 teaspoon toasted sesame oil
- 3 stalks green onions, thinly sliced on a bias
- 1/2 teaspoon kosher salt, divided
- 1/4 teaspoon freshly ground black pepper
Selection Notes: Use chicken thighs for superior moisture retention and flavor compared to breast meat. Select bell peppers with firm, unblemished skin and heavy weight for maximum crispness. Fresh ginger and garlic yield brighter aromatics than powdered alternatives.
Equipment
- 12-inch heavy-bottomed stainless steel or cast iron skillet (essential for even heat distribution and proper searing)
- Instant-read digital thermometer [Check Price on Amazon]
- 8-inch chef’s knife and sturdy cutting board
- Small mixing bowl for sauce
- Heat-resistant silicone spatula and metal tongs
- Measuring spoons and liquid measuring cup
Prep Work
Proper preparation dictates the success of any quick one-pan execution. Begin by patting the chicken completely dry with paper towels. Surface moisture creates steam, which prevents proper Maillard browning and results in pale, rubbery meat. Cut the chicken into uniform 1-inch cubes. This size ensures rapid, even cooking without overcooking the exterior. Place the cut chicken on a plate, season with 1/4 teaspoon kosher salt and the black pepper, and allow it to rest at room temperature for exactly 15 minutes. Bringing the protein closer to room temperature reduces the temperature drop when it hits the hot pan.
While the chicken rests, prepare your vegetables. Cut the broccoli into 1-inch florets and slice the bell peppers into 1/2-inch strips. Uniform dimensions are critical here; mismatched pieces will cook at different rates, leaving some vegetables mushy and others raw. Mince the garlic and grate the ginger, keeping them separate. Combine the soy sauce, rice vinegar, honey, and toasted sesame oil in a small bowl. Whisk until the honey fully dissolves into the liquid. This sauce mixture should be prepared 100% in advance because the cooking window moves quickly. You can prep all components up to 4 hours ahead and store them covered in the refrigerator.
Cooking Instructions
- Heat the Pan and Oil: Place your 12-inch skillet over medium-high heat. Add the 2 tablespoons of neutral oil. Allow the oil to heat for 90 seconds until it reaches approximately 375°F / 190°C. You will know it is ready when the oil shimmers, thins slightly, and produces a faint wispy vapor when you hover your hand above the surface.
- Sear the Chicken: Carefully add the chicken cubes in a single layer, leaving at least 1/2 inch of space between each piece. Overcrowding drops the pan temperature below 250°F / 121°C, causing the chicken to boil in its own juices. Cook undisturbed for exactly 3 minutes. Do not stir. You are listening for a steady, aggressive sizzle and watching for a deep golden-brown crust to form on the bottom. After 3 minutes, flip the pieces and cook for an additional 3 minutes. Remove the chicken immediately with tongs and transfer to a clean plate. It will finish cooking later.
- Sauté the Vegetables: Reduce heat to medium. Add the broccoli and bell peppers to the same pan. The residual fond and remaining oil will coat them. Toss continuously for 2 minutes until the peppers soften slightly and the broccoli turns bright emerald green. Add the minced garlic and grated ginger. Cook for exactly 30 seconds, stirring constantly. Garlic burns at 275°F / 135°C; extended heat will introduce a harsh, acrid bitterness to the bowl.
- Build the Sauce and Finish: Pour the prepared soy sauce mixture into the pan. It will immediately bubble and reduce. Scrape the bottom of the skillet with your spatula to lift the browned fond; this deglazing step incorporates concentrated flavor into the liquid. Return the chicken to the pan along with any accumulated resting juices. Toss everything together and cook for exactly 2 minutes. The sauce will thicken into a glossy glaze that clings to the ingredients.
- Verify Doneness and Rest: Remove the skillet from heat immediately. Insert an instant-read thermometer into the thickest chicken cube. The internal temperature must read 165°F / 74°C. If it falls short, return to the pan over low heat for 1 additional minute. Let the entire mixture rest in the pan for 3 minutes before serving. Resting allows the muscle fibers to relax and reabsorb moisture, preventing dry, stringy bites. Garnish with sliced green onions.
Common Mistakes to Avoid: Moving the chicken during the initial sear breaks the developing crust. Adding cold vegetables to a hot pan without adjusting the heat causes uneven cooking. Skipping the resting phase forces juices out onto the plate instead of staying in the meat.
Pro Tips
Chef Secrets: Dry brining the chicken with salt 12 to 24 hours ahead draws out moisture initially, then reabsorbs seasoned liquid, significantly improving texture and flavor penetration. In my experience, maintaining a strict 375°F / 190°C pan temperature during the initial sear guarantees a crisp exterior without requiring excessive oil or prolonged cooking times. I find that reserving 1 tablespoon of the glazing sauce to drizzle over the finished bowl at the table preserves the bright, fresh acidity that high heat otherwise dulls.
Substitutions: Boneless, skinless chicken breast works if cut to 3/4-inch pieces, but reduce the initial sear time to 2 minutes per side and monitor closely for dryness. Zucchini or snap peas can replace broccoli; add them during the final 60 seconds of vegetable cooking to preserve their delicate structure.
Make-Ahead Options: The sauce can be mixed and refrigerated for up to 5 days. Pre-cut vegetables store well in airtight containers with a dry paper towel for 3 days. Do not marinate the chicken in the acidic sauce overnight; the vinegar will denature the proteins and create a mushy texture. Instead, keep components separate until cooking.
Serving Suggestions
This bowl scales efficiently for family dining. Serve over 1 cup of cooked jasmine rice or quinoa per person. The grains absorb the excess glaze and provide a neutral base that balances the savory-sweet profile. Add 1/2 cup of edamame or 2 tablespoons of toasted sesame seeds per portion for extra protein and crunch. For acidic contrast, a quick squeeze of 1/2 lime wedge over each bowl cuts through the richness. This recipe yields exactly 4 standard servings, with each bowl containing approximately 6 ounces of chicken and 1 cup of mixed vegetables.
FAQ
Can I use frozen chicken for this recipe?
No. Frozen chicken releases excessive water as it thaws in the pan, dropping the surface temperature below the Maillard reaction threshold. Always fully thaw chicken in the refrigerator for 24 hours or use a cold-water bath for 60 minutes before patting it completely dry.
How do I know when it’s done without a thermometer?
Press the thickest piece with your tongs. Properly cooked chicken will feel firm but yield slightly, similar to the base of your palm when you touch your thumb to your ring finger. Cut into the center of one cube; the meat should be opaque white with no translucent or pink areas, and the juices should run completely clear. However, an instant-read thermometer remains the only reliable method.
Can I prep this ahead and reheat it?
Yes. Store cooked components in an airtight container in the refrigerator for up to 3 days. Reheat in a skillet over medium heat with 1 tablespoon of water or broth for 3 minutes, covered, to restore moisture. Avoid microwaving on high, which rapidly dehydrates the protein and toughens the vegetables.
*As an Amazon Associate I earn from qualifying purchases.
发表回复