Easy One-Pan Beef Roast
A One-Pan Wonder: Restaurant-Quality Roast Beef, Simplified
This Easy One-Pan Beef Roast is the definitive recipe for a weeknight or weekend meal that delivers maximum flavor with minimal cleanup. It’s a practical, technique-driven approach that guarantees a tender, juicy roast with a flavorful crust and a built-in side of roasted vegetables. This method is designed for home cooks of all skill levels, focusing on foundational principles like proper searing and rest time that make a significant difference. By understanding the why behind each step, you’ll consistently produce a roast that looks and tastes like it came from a professional kitchen. In my experience, mastering this one-pan method builds confidence for more complex roasts.
What You’ll Need
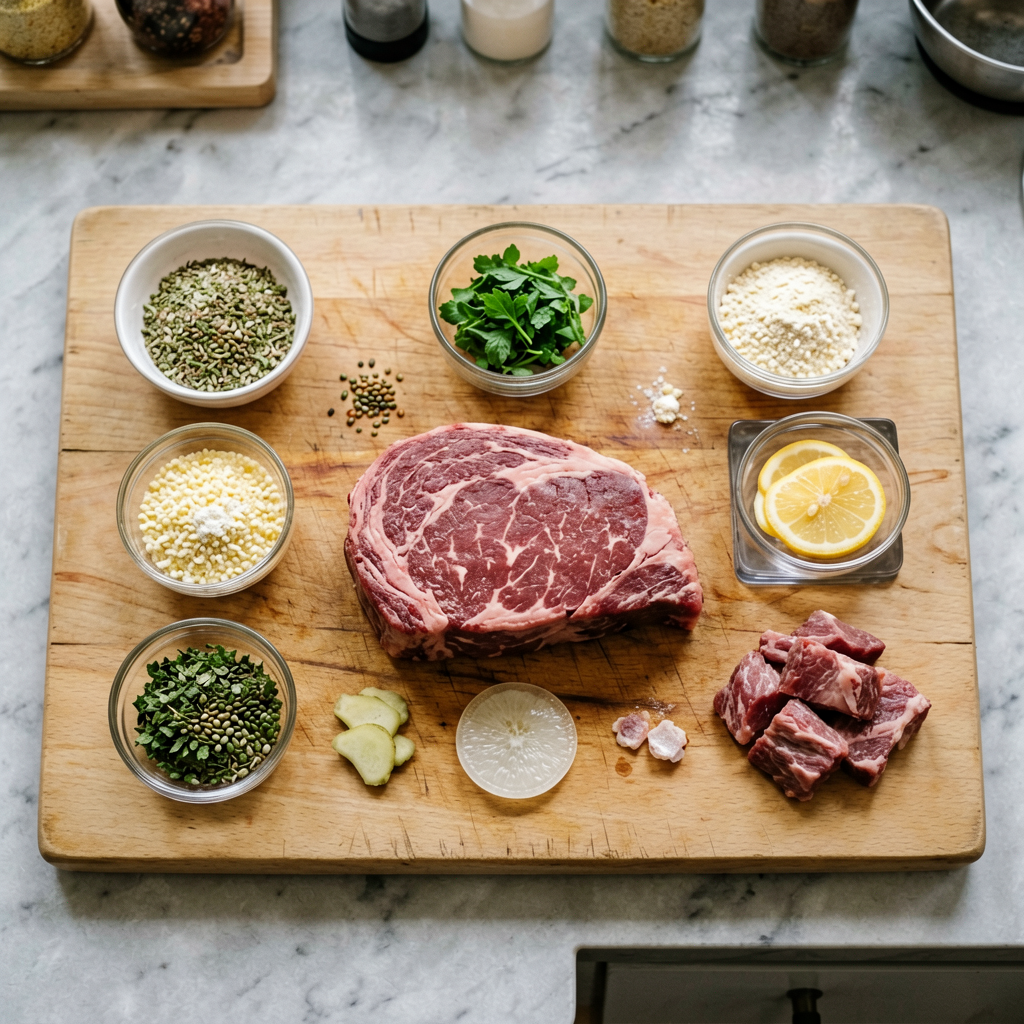
Ingredients
- Beef Chuck Roast: 1.5 pounds (680g), boneless. Choose a roast with good, even marbling throughout; this cut benefits from slow cooking and becomes exceptionally tender.
- Yellow Onion: 1 large, cut into 1-inch wedges.
- Carrots: 3 medium, peeled and cut into 1.5-inch chunks on a diagonal.
- Potatoes: 1.5 pounds (680g) Yukon Gold or red potatoes, scrubbed and cut into 1.5-inch chunks. No need to peel if the skin is thin.
- Garlic: 4 cloves, lightly smashed with the side of a knife.
- Fresh Rosemary: 4 sprigs.
- Fresh Thyme: 4 sprigs.
- Olive Oil: 3 tablespoons, divided.
- Kosher Salt: 1.5 teaspoons, plus more for seasoning vegetables.
- Black Pepper: 1 teaspoon, freshly ground.
- Beef Broth or Stock: 1 cup (240ml).
- Worcestershire Sauce: 1 tablespoon (optional, for depth).
Equipment
- 12-inch Cast Iron Skillet or Oven-Safe Sauté Pan: Heavy-bottomed is key for even searing and heat retention. Check Price on Amazon for a 12-inch Cast Iron Skillet.
- Instant-Read Thermometer: Non-negotiable for perfect doneness.
- Cutting Board and Chef’s Knife
- Tongs
Prep Work (Mise en Place)
Preparation is crucial for a seamless cooking process.
- Temper the Beef: Remove the chuck roast from the refrigerator 30-45 minutes before cooking. Bringing it to room temperature ensures even cooking from edge to center.
- Season Generously: Pat the roast completely dry with paper towels. A dry surface is essential for a deep, brown sear. Season all sides liberally with 1.5 teaspoons of kosher salt and the freshly ground black pepper. Let it sit while the oven preheats.
- Prep Vegetables: Cut your onion, carrots, and potatoes as described. Keep them in a large bowl. Do not season them yet.
- Preheat Oven: Set your oven rack to the lower-middle position and preheat to 325°F (165°C).
Cooking Instructions
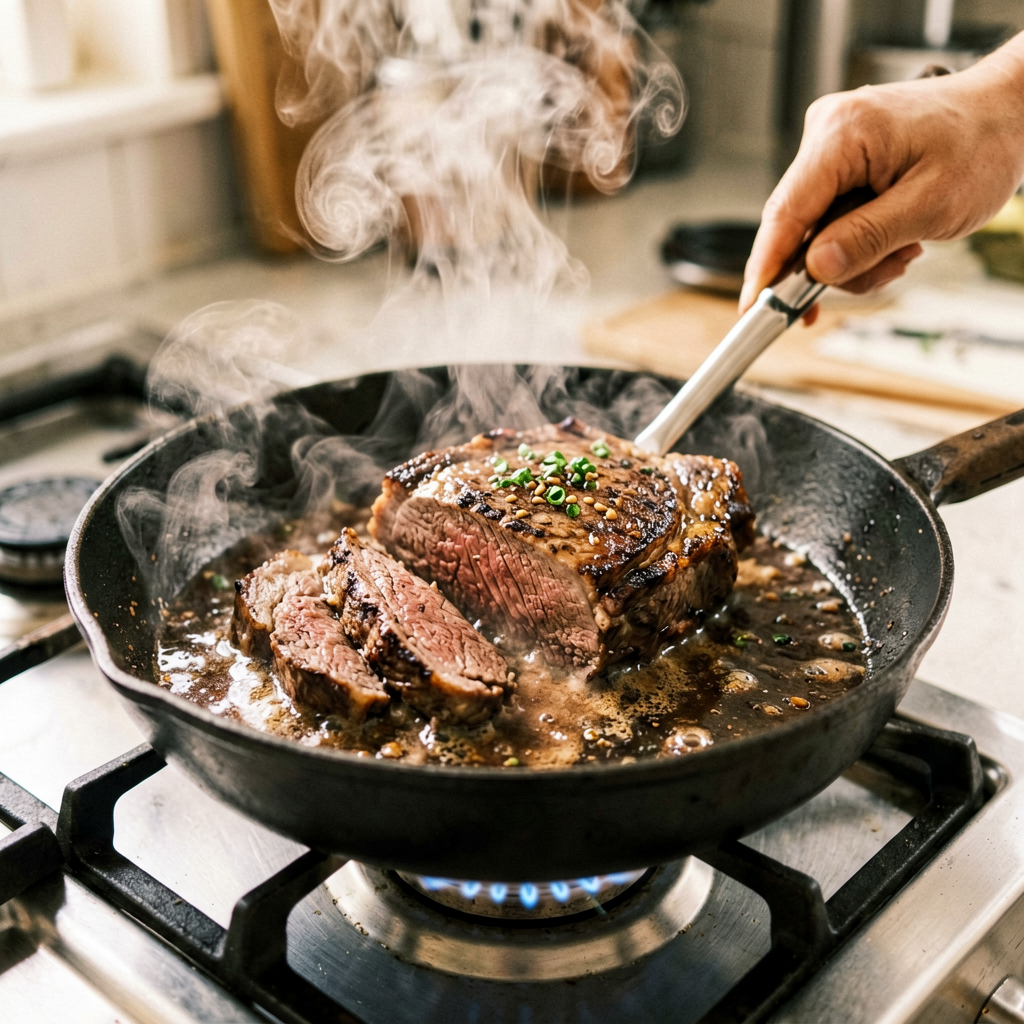
Step 1: The Sear (Builds Flavor)
Heat your 12-inch cast iron skillet over medium-high heat for 2 minutes. Add 2 tablespoons of olive oil. When the oil shimmers and just begins to smoke lightly, carefully place the beef roast in the center. Do not move it. Sear for 4 minutes per side, using tongs to turn it, until a deep, golden-brown crust forms on all three major sides. You should hear an active sizzle. This Maillard reaction creates hundreds of flavor compounds.
Step 2: Sauté Aromatics
Once the beef is seared, transfer it to a plate. Reduce the heat to medium. Add the remaining 1 tablespoon of oil, the smashed garlic, rosemary, and thyme sprigs to the pan. Sauté for 30-60 seconds until fragrant, but not browned.
Step 3: Deglaze and Assemble
Pour in the beef broth and Worcestershire sauce. Use a wooden spoon or spatula to scrape up all the browned bits (fond) from the bottom of the pan. Bring to a simmer. Return the seared beef to the pan, nestling it amongst the herbs. Arrange the prepped onions, carrots, and potatoes around the beef. The liquid should come about 1/3 of the way up the vegetables.
Step 4: Roast to Perfection
Transfer the entire skillet to the preheated 325°F (165°C) oven. Roast, uncovered, for 2.5 to 3 hours. The exact time depends on the thickness of your roast. The key is doneness, not time. Start checking the internal temperature with your instant-read thermometer after 2 hours. You are looking for an internal temperature of 205-210°F (96-99°C) for a chuck roast to be perfectly tender and shreddable. For a more sliceable texture, aim for 160°F (71°C) (medium-well).
Step 5: Rest is Mandatory
Carefully transfer the roast to a cutting board. Tent it loosely with aluminum foil and let it rest for 15-20 minutes. This allows the juices to redistribute throughout the meat, ensuring it stays moist when sliced. You can return the vegetables to the oven on “keep warm” setting if desired while the meat rests.
Pro Tips
- The Pan is Your Friend: Do not skip the initial sear. The fond (browned bits) in the pan is pure flavor. Deglazing with broth lifts it all into a delicious sauce that coats the vegetables.
- Don’t Crowd the Pan: Ensure vegetables are in a single layer around the roast. If overcrowded, they will steam instead of roast. Use a larger pan if necessary.
- Substitutions That Work: For a different root vegetable profile, try parsnips or sweet potatoes. Replace beef broth with a mix of broth and red wine (1/2 cup each) for a deeper sauce. Fresh herbs can be replaced with 1 tablespoon dried, added with the vegetables.
- Make-Ahead Option: You can chop all vegetables and store them in an airtight container in the fridge for up to 2 days ahead. The roast can be seared, cooled, and refrigerated, then everything assembled and roasted the next day.
Serving Suggestions
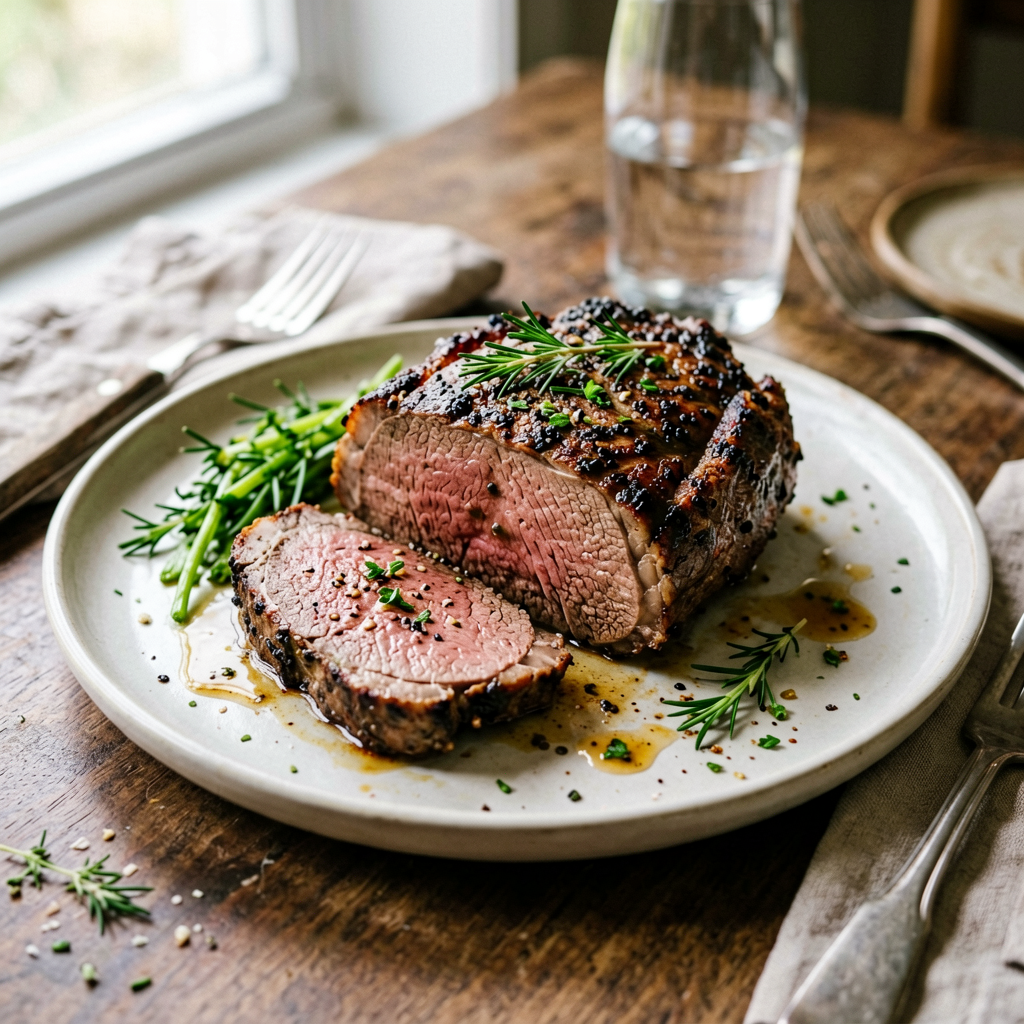
Carve the roast against the grain into thick slices or shred it with two forks. Serve a portion of meat with a generous scoop of the roasted vegetables. Spoon the flavorful pan juices from the bottom of the skillet over the top. This is a complete meal in itself. For added freshness, a simple green salad with a lemon vinaigrette cuts through the richness beautifully. This recipe serves 4 people generously.
FAQ
1. Can I use frozen vegetables?
For this recipe, I recommend fresh vegetables. Frozen vegetables contain more moisture and will release water as they cook, preventing them from developing a roasted, caramelized texture. They will steam instead of roast, changing the final result.
2. How do I know when the beef is done?
The most reliable method is an instant-read thermometer. For a tender, shreddable chuck roast (this cut is ideal for slow cooking), aim for an internal temperature of 205-210°F (96-99°C). The meat should offer little resistance when probed with the thermometer. The vegetables should be fork-tender.
3. Can I prep this ahead?
Yes. You can season the beef and chop all vegetables up to 24 hours in advance. Store them separately in the refrigerator. When ready to cook, simply bring the beef to room temperature for 30 minutes, then proceed with searing and roasting.
*As an Amazon Associate I earn from qualifying purchases.*